X
wikiHow is a “wiki,” similar to Wikipedia, which means that many of our articles are co-written by multiple authors. To create this article, volunteer authors worked to edit and improve it over time.
This article has been viewed 79,140 times.
Learn more...
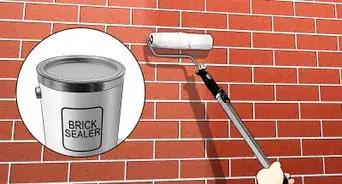
People stain mortar because they prefer a new or different look or because the mortar used for a repair or addition does not match the rest of the wall. Staining can make the repair blend in and disappear. Proven masonry stain is not a coating like a paint or sealant. It is absorbed into the mortar and cannot peel, fade or crack. It lasts as long as the mortar itself.
Steps
-
1Decide what color(s) to add to your mortar. Stain is translucent so you must consider what colors are already in the mortar and then decide what must be added to obtain the color you want.
- If you are disguising a repair or addition, what additional colors would make the new mortar match the old? If you just want a different look, what colors would give you the look you want? Be sure to consider how light or dark, strong or weak the colors should be. Don’t worry if you are not 100% certain about your decisions at this point.
-
2Choose a do-it-yourself masonry stain kit, and get help with an initial color mix recipe. One manufacturer will accept digital pictures of the color you have and the color you want and then advise you about what to purchase and what mixture of colors is likely to work well for you. You should be able to develop a mix recipe that brings you close to the color you want.Advertisement
-
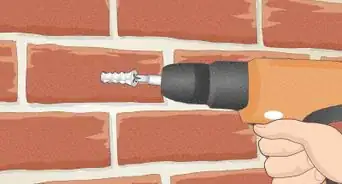
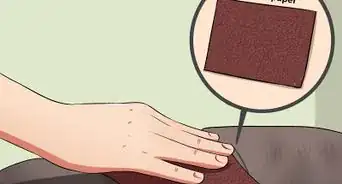
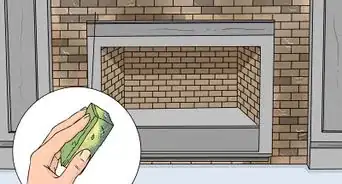
3Make sure your mortar is clean and dry. If dirty, scrub with water and a brush. If necessary, use a cleaner recommended by your mortar distributor. Use harsh chemicals such as acid only when necessary.[1]
-
4Wait until the temperature is above 40° Fahrenheit (4° Celsius). Follow manufacturer’s directions regarding appropriate weather for staining.[2]
-
5Protect yourself. Always wear gloves, safety glasses and old clothes when mixing and applying stain. Use tarps to protect nearby surfaces from spills. Keep rags and water handy to remove stain that might drip onto brick or stone where it doesn’t belong. Review the steps to take if stain mixture is spilled or splashed on your clothes, or on floors or walls.
-
6Test the recipe. Try the mixture you have chosen on a 2 to 3 inch length of mortar joint in an unnoticeable location. Let it dry. If it dries to a color you like, begin staining the entire project. If you don’t like the color, adjust the recipe. If you want help adjusting the recipe, send digital photos of the test and ask your kit manufacturer to advise you.
-
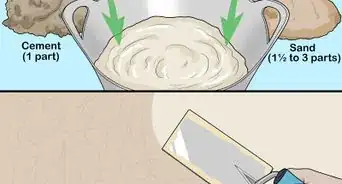
7Prepare your chosen mixture according to the manufacturer’s directions, and dip your brush. Use the 1 inch brush with Polyester bristles. Begin by stirring so you get in the habit of stirring with each dip. Then, drain the excess mixture from the brush by pushing it again the inside of the mixing cup on the side closest to your body.[3]
-
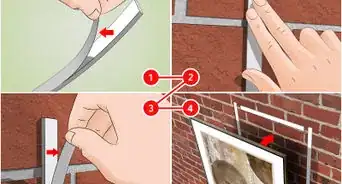
8Start staining the bed (or horizontal) mortar joints with a smooth, continuous, pulling motion. If you are right-handed, start your row on the left side and pull the brush to the right. If you are left-handed, reverse the procedure. Stain the mortar above 4 to 5 bricks. Complete three to four rows above or below the first row.
-
9Stain the head (or vertical) mortar joints that connect the rows you just stained with a single smooth stroke for each joint. When staining the vertical joints, keep the brush pointed slightly upwards. This will help prevent drips.
-
10Touch up any spots you missed. Try to overlap your strokes as little as possible.
-
11Dip the brush and repeat the process. Stain another group of horizontal and related vertical joints until the job is done.
-
12Check your work carefully to make sure you’ve colored all the mortar.
-
13Clean up.
- To clean out cups and brushes, wash the cups and brushes out repeatedly until water runs clear.
- Follow manufacturer’s instructions regarding storing and disposing of stain mixture.


Advertisement
Things You'll Need
-
To stain:
- Safety glasses
- Measuring spoons (1 teaspoon, ½ teaspoon, and ¼ teaspoon)
- Measuring cup (1/2 cup),
- Mixing container,
- 1” brush with Polyester bristles, and
- Stain ingredients (pigment & bonding chemical)
- (Save time by purchasing all the above items together in a do-it-yourself kit.)
-
For keeping clean:
- Rags
- Tarps
- A container for water
- Old clothes


References
About This Article
Advertisement