This article was co-authored by wikiHow Staff. Our trained team of editors and researchers validate articles for accuracy and comprehensiveness. wikiHow's Content Management Team carefully monitors the work from our editorial staff to ensure that each article is backed by trusted research and meets our high quality standards.
This article has been viewed 23,691 times.
Learn more...
Rough cedar is most commonly used for siding on houses, but you can also find it on fences. Because of the tannins in cedar, you can't treat it like other types of wood; you need to use specific types of primers and stains. You also need to skip the sanding process that you would normally do for other wood staining projects; otherwise, you will eliminate the rough texture of the cedar.
Steps
Priming the Wood
-
1Cover the floor with drop cloths. You should do this even if you are working outside. Wood stain can be difficult to clean, so this is definitely not something you want sinking into your driveway or sidewalk.[1]
- You can buy drop cloths at home improvement stores and paint-supply stores.
- If you can't find any drop cloths, use cardboard, newspaper, plastic tarp, or cheap tablecloths. As long as you cover the ground, you're set.
-
2Reapply the caulking, if needed. If this is for siding on a house, double-check the caulk around your windows and doors. Reapply the caulk if the old one is worn.[2]
- Don't wait until the end to apply the caulking, or it won't stick to the wood due to the stain.
Advertisement -
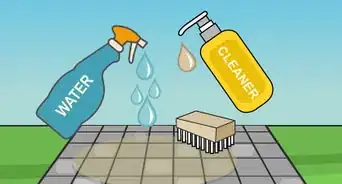
3Clean the wood with water and wood cleaner, then rinse it. Spray the wood with water from a hose. Apply some exterior wood cleaner, then let it sink in for 2 to 3 minutes. Scrub the wood along the grain with a stiff-bristled brush, then rinse it clean with more water.[3]
- You can use a pressure washer, but be careful, as it may damage the wood.[4]
-
4Let the wood dry completely. How long this takes depends on how warm the day is and how thick the wood piece is. The hotter and drier it is outside, the faster the wood will dry. It would be a good idea to wait 24 to 48 hours just to be safe, however.[5]
- Just because the wood is dry on the outside does not mean that it is dry on the inside. Be patient and wait; if you try to stain damp wood, it may rot.
- It can be hard to tell if the wood is completely dry all the way through. If the piece feels softer or heavier than it did at first, then it's still damp.
-
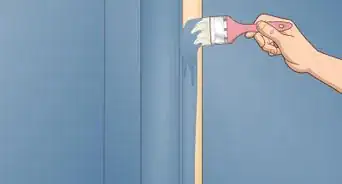
5Apply a coat of alkyd primer with a wide, natural paintbrush, if desired. Ultimately, this is up to you. A primer will change the color of the wood, so it is not recommended for semi-transparent and transparent stains; it is a great option for solid-colored stains, however.[6]
- An alkyd primer will only help the stain last longer. It is not absolutely necessary.
- Omit the primer if you're applying a semi-transparent or transparent stain. You will simply have to reapply the stain more often.
- Make sure that you use an alkyd primer, as other primers may not work on cedar due to the tannins.
-
6Wait 24 to 48 hours for the primer to dry, if you applied it. If you chose not to apply the primer, then you are all set for the next part of the stain application. If you did choose to apply the primer, however, double-check the drying instructions, as some brands may have different drying times.


Applying the Stain
-
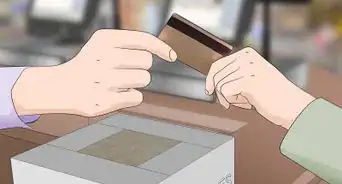
1Purchase an oil-based wood stain in your desired translucency. You can buy solid-colored, semi-transparent, or transparent wood stain. They all have the same application, but they have different finishes.[7]
- Solid-color stains are best for completely changing the color of the wood, sort of like paint. It may cover up the grain.
- Semi-transparent stains add a tint to the wood while allowing its natural grain to still show through.
- Transparent stains enhance the natural color of the wood, making it look brighter and deeper. It will also bring out the grain.
-
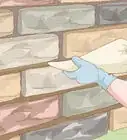
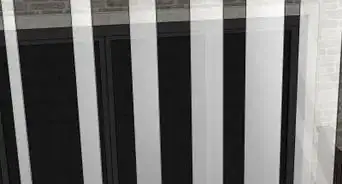
2Use a wide brush to apply vertical strokes of stain along the grain. Stir the stain first, then use a 4 to 6 in (10 to 15 cm) natural bristle brush to apply it to the wood. Work your way along the grain using long, vertical strokes, from one side of the piece to the other.[8]
- You will be working a little at a time here, so you only need to apply 2 to 3 rows of stain.
- You don't need to overlap the edges of the rows, but make sure that they are touching.
- Apply the stain along the wood grain/ridges, not across it. Make sure that you work the stain into the wood grain, however.
-
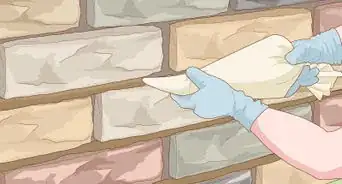
3Wait 20 minutes, then mop up the excess stain. An old rag will work the best, but you can use a sponge instead. Wipe the rag or sponge along the wood grain to pick up any excess stain.[9]
- If you don't do this, then the stain will oversaturate the wood and create splotches.
-
4
-
5Wait 24 to 48 hours for the stain to dry. Even if a brand suggests that only 12 to 24 hours are enough, it would be much better to wait 24 to 48 hours. This will ensure that the stained surface is completely dry.[12]
- You do not need to apply a sealer because the stain already acts as one.
- If the stain isn't dark enough or deep enough for you, then apply a second coat.
-
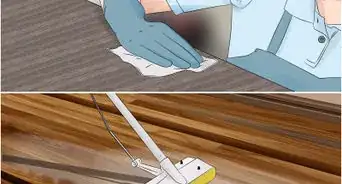
6Discard the used rags in a water-filled bucket. This is very important. Wood stain is flammable, so putting the rags or sponges into a water-filled bucket will prevent fires. Seal the bucket, then discard it at a hazardous-waste center.[13]
- Be sure to clean your brush well with a solvent-based cleaner.


Maintaining the Stain
-
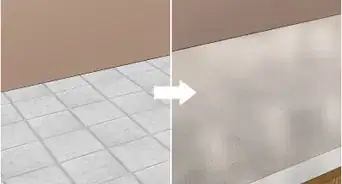
1Pressure wash the cedar every 2 to 4 years. This may remove some of the stain, but it is key to keeping the cedar in tiptop condition and helping it last longer. You should pressure wash it the same way that you did in the beginning, prior to staining.[14]
- Be careful when using the pressure washer as it may damage the wood. If possible, reduce the pressure so that it is not as strong.
-
2Reapply the stain every 3 to 5 years. Stain is pretty durable, but it will fade over time, especially if it is exposed to the elements. If you live in an area that receives a lot of sunlight, then it may fade even faster.[15]
- If you live in an area with lots of sun, painting the cedar might be the more convenient option because you won't have to do it as often.
-
3Reapply more stain if it is starting to fade. Stains not only add color to the wood, but they also help protect it, which is why you don't need a topcoat. If the stain fades, then you need wash the wood and reapply the stain, as described earlier.[16]
- Pour or spray some water onto the wood. If the water soaks into the wood in less than 5 minutes, you need to reapply the stain.
-
4Remove the stain completely if it is peeling, then reapply it. Transparent and semi-transparent stains don't peel, but solid-colored stains do. This is because they contain more pigment and don't soak into the wood as well. The only way to fix peeling stain is to remove it completely and start over.[17]
- You will need to use a pressure washer to remove most of the stain, and a solvent-based cleaner to remove the residue.
- You may have to sand the wood, but be aware that this may remove the rough finish.


Things You'll Need
- Alkyd primer (optional)
- Oil-based wood stain
- Stiff-bristled cleaning brush
- Exterior wood cleaner
- Hose
- 4 to 6 in (10 to 15 cm) natural-bristle brush
- Drop cloths


References
- ↑ https://www.improvenet.com/r/costs-and-prices/staining-cedar-siding
- ↑ https://www.improvenet.com/r/costs-and-prices/staining-cedar-siding
- ↑ https://www.thisoldhouse.com/ideas/all-about-exterior-stain
- ↑ http://www.housepaintingguide.org/how-to-clean-stained-siding-with-a-pressure-washer/
- ↑ https://www.thisoldhouse.com/ideas/all-about-exterior-stain
- ↑ http://buildingadvisor.com/materials/exteriors/exterior-paints-stains/#Paint
- ↑ https://outdoorlivingtoday.com/tips-for-applying-stain/
- ↑ https://www.thisoldhouse.com/ideas/all-about-exterior-stain
- ↑ https://www.thisoldhouse.com/ideas/all-about-exterior-stain
- ↑ https://outdoorlivingtoday.com/tips-for-applying-stain/
- ↑ https://www.improvenet.com/r/costs-and-prices/staining-cedar-siding
- ↑ https://outdoorlivingtoday.com/tips-for-applying-stain/
- ↑ https://www.thisoldhouse.com/ideas/all-about-exterior-stain
- ↑ https://contractorquotes.us/how-to-stain-cedar-siding/
- ↑ https://contractorquotes.us/how-to-stain-cedar-siding/
- ↑ https://www.thisoldhouse.com/ideas/all-about-exterior-stain
- ↑ https://www.thisoldhouse.com/ideas/all-about-exterior-stain
About This Article