This article was co-authored by Sam Hubbard and by wikiHow staff writer, Amy Bobinger. Sam Hubbard is a Professional Carpenter and the Owner of Hubbard Carpentry and Remodeling. He has over 19 years of experience in the industry. Sam specializes in kitchen remodels, home woodworking, cabinetry, and handyman services.
There are 9 references cited in this article, which can be found at the bottom of the page.
wikiHow marks an article as reader-approved once it receives enough positive feedback. In this case, 100% of readers who voted found the article helpful, earning it our reader-approved status.
This article has been viewed 169,141 times.
Staining wood can be a great way to give new life to a piece of furniture, your kitchen cabinets, a deck, or anything else you come across. If the wood is already stained, though, you might not be sure how to proceed. Luckily, there are a few simple guidelines that can help you know whether you need to strip the wood or if you can just stain over the existing stain!
Steps
Preparing the Wood
-
1Remove any drawers, doors, or hardware if you can. Taking apart the piece can make it easier to get an even color, because you'll be able to lay each component flat to stain it. In addition, you'll be able to make sure you don't miss any spots and you can thoroughly cover the facing behind the doors and drawers.[1]
- Taking off any hardware will ensure they don't accidentally get coated with stain.
-
2Protect your work area. Stain is designed to be permanent, so you should make sure to cover your work area with a drop cloth, newspaper, old towels, or a tarp.[2]
- If you're working outside in the grass, a drop cloth will help prevent grass from getting stuck in your stain while it's drying.
Advertisement -
3Wear rubber or latex gloves to protect your hands. Stain can be hard to get off of your skin. Wear a thin pair of gloves to make clean-up easy without affecting your coordination.[3]
- You may also want to wear old clothes that you don't mind getting messed up, in case some of the stain spills.
-
4Remove the existing stain if you are going from a dark color to a lighter one. Most stains are made to allow the natural grain of the wood to show through. Because of this, you can't get a lighter color by applying a light stain over a dark stain. If you want to lighten the wood you're working with, you'll have to strip it first.[4]
- In addition to creating a lighter finish, you will need to strip the wood first if your piece has a lacquered topcoat.
- You can remove the original stain with a chemical stripper or by sanding it away.
-
5Leave the original stain in place if you want to stain the piece a darker color. If you're going from a light stain to a dark stain, there's no need to strip away the existing stain first. However, keep in mind that the existing stain may alter the color of the finished product.[5]
-
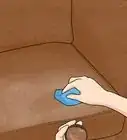
6Sand the surface of your project lightly with fine-grit sandpaper. You don't have to sand much, just enough to rough up the surface of the wood. A P200-grit sandpaper is perfect for prepping your project.[6]
- Use a sanding block or sponge so you apply even pressure.
- If you already sanded the wood to remove the previous stain, you don't need to sand it again.
- Don't sand through the existing finish or you'll end up with a splotchy appearance.


Staining the Wood
-
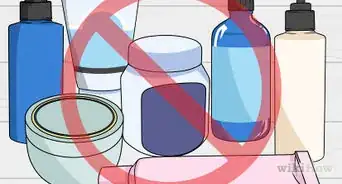
1Choose a gel stain, glaze, or water-based stain if you want a darker finish. These types of stains tend to result in a darker color. However, they can sometimes obscure the grain of the wood if you pick a very dark shade.[7]
- The main difference between the different types of stains is their texture. If you're not sure which one you prefer, ask an associate at your local home store for a small sample of each, then test them on your piece in an inconspicuous area.
-
2
-
3Apply a thick coat of stain with a foam brush or a cloth. Using a foam brush or an old cloth will help to minimize brush strokes that show up in the stain. You will also be able to achieve thinner coats, which will allow the stain to absorb better into the wood.[9]
- When stain absorbs into the wood, you are better able to see the wood grain in the finished product.
-
4Wipe away excess stain with pads. It may take a few passes with the pads to get a uniform coat of the stain. Look at the wood from different angles to make sure you don't leave any streaks or uneven color.[10]
- You can buy staining pads designed specifically for this purpose. They are made so that they won't leave streaks in the stain.
- If you leave a little of the excess stain, you'll get a darker finish, but it can be hard to get the color even this way.
-
5Let the stain cure for 18-24 hours. The manufacturer's instructions for how long to let the stain dry may vary, but 18-24 hours will ensure the stain is fully dry. If it's not dry, you won't get a smooth coat when you apply the sealer.[11]
-
6Apply another coat of stain if needed. Multiple coats can start to obscure the grain of your wood, but a second coat can help you get a darker color if that's what you're after. Let the first coat dry completely before you decide, though, because the color can change as the stain dries.[12]
- If you just need to adjust the color slightly, opt for a dye toner instead of a second coat.
-
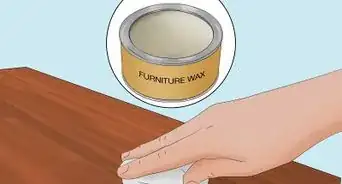
7Apply a water- or oil-based sealer for a glossy finish. A topcoat will lock in your stain and give you a nice, glossy finish. Apply it the same way as the stain once the final coat is dry.[13]
- A sealer can also help protect your wood piece by making it more resistant to spills and stains.
-
8Spray a toner made of dye over the stain if you need to adjust the color. If you aren't happy with the finished color of your stain, a spray-on toner can help you slightly change the color. These are usually applied after the sealer coat, but read the manufacturer's instructions to be sure. A dye toner will give you a thin wash of color that will stay.[14]
- If your color is too red, use a green dye.
- If you need to warm up the color, use a red or orange dye.
- Pigment toner can also be used, but it will cause the color to become muddy.
-
9Adjust the color with glaze if you don't want to use a spray. A pigmented glaze can be hard to brush out evenly and it tends to leave brush strokes, but it is another option if you prefer not to use a spray toner. [15]


Stripping a Previous Stain with Chemicals
-
1Use a chemical stripper if your wood has detail work that you want to preserve. Sanding a piece of wood with sharp or carved edges can destroy the details that make the piece unique. A chemical stripper will remove the stain without damaging the wood.[16]
- Chemical stripper is also a good option if you are working on a large surface.
-
2Work outside or in a well-ventilated area. Chemical strippers, or refinishers, are made up of harsh chemicals. Even if you buy a brand that is made to smell pleasant, it's still better if you try to avoid breathing them in. If you can't work outside, open the windows and doors to let fresh air in.[17]
- If you're working on a day without much wind, you may want to set up box fans around your work area to keep the air circulating.
-
3Cover your work area with a drop cloth. If you're working on a surface you don't want to ruin, you'll need a sturdy tarp or a drop cloth to protect it from being damaged by the chemicals you're using. Although the chemical stripper is clear, if it spills or drips, it could ruin the finish on your table or floors.[18]
- If you don't have a drop cloth or a tarp, use old, thick towels instead.
-
4Wear gloves and protective eyewear when working with these chemicals. The corrosive chemicals in refinisher can be very dangerous, so it's best to wear protective gear. At a minimum, gloves and eyewear can protect you in case of a spill or a splash. Try to avoid getting any of the stripper on your clothes, as the contact with your skin can cause burns.[19]
- You may also want to wear a dust mask, even if you're working in a well-ventilated area.
-
5Pour the chemical stripper onto a piece of very fine steel wool. Although there are a number of methods for working with chemical strippers, the steel wool option requires the least amount of supplies. Very fine steel wool is graded as #00, but you could use #000 or even #0000, depending on what you have on hand.[20]
- The finer the grade, the smoother the surface of your wood will be when you're finished, but the longer the process will take.
- Depending on the size of your project, you may need several packs of steel wool. They are often sold in packs of 6.
- You can purchase both refinisher and steel wool at home improvements stores.
-
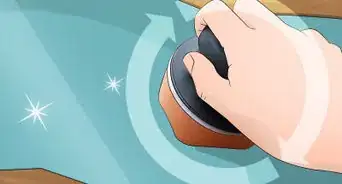
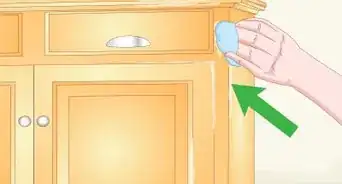
6Rub the steel wool across surface of the wood in a circular motion. Once the steel wool is saturated with the refinisher, start buffing the wood in small sections. Wipe the surface in a circular motion. You should see the stain start to come off on the steel wool immediately.[21]
- Switch to a new piece of steel wool when the stain starts to build up.
-
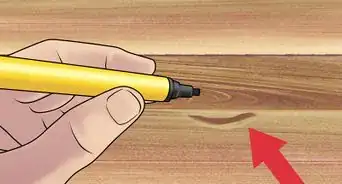
7Continue until all of the stain is gone. If you have any areas where you had trouble getting all of the stain off, a wire brush or a small piece of sandpaper may help you finish the job.
- Let the wood dry completely before staining it.


Sanding the Piece to Remove Stain
-
1Sand the wood if you are only working with a small piece. If you're staining a dark piece of wood a lighter color or you need to take off a lacquered top coat, sanding may be a good option. Sanding is the quickest way to take existing stain off of a piece of wood, especially if you're working with a small piece of wood or a large, flat surface with no detail.
- Sanding is also a good choice if you don't want to work with chemicals.
-
2Work from a rough grit to a fine grit. Start with a rough piece of sandpaper, like a P80 grade, for the first pass over the wood, then go over the area with a medium-grit, such as a P150. If you need to, you can finish with a fine grit, like P220.[22]
- Graduating to a finer sandpaper will help keep you from scuffing the surface of the wood too much.
-
3Keep the sandpaper or sander flat as you work. Whether you're using an electric sander, a sanding block, or just a piece of sandpaper, hold the sandpaper so it's flat against the surface of your wood as you're working. This will create an even finish.
- Otherwise, you could sand unevenly, wearing into the wood and creating a light spot that will show through the stain.[23]
-
4Wear a dust mask while you're sanding. Although you won't be working with dangerous fumes while you're sanding, you will be putting a lot of small particles into the air, and those can irritate your lungs if you breathe them in. A dust mask will help protect your airways while you're working.
- You can usually find dust masks wherever home improvement supplies are sold.
-
5Wipe down the surface of the wood with a wet cloth to remove any dust. After you're finished sanding, you'll want to make sure you don't leave any dust or residue on the surface of the wood. Otherwise, it will get caught in the stain and cause a gritty finish.


Expert Q&A
-
QuestionHow do I remove dust from my finish?
 Sam HubbardSam Hubbard is a Professional Carpenter and the Owner of Hubbard Carpentry and Remodeling. He has over 19 years of experience in the industry. Sam specializes in kitchen remodels, home woodworking, cabinetry, and handyman services.
Professional CarpenterAfter sanding the wood bare, you must go over it with a tack cloth before staining it again so you don't have dust over the surface. -
QuestionHow do you get the smoothest polyurethane finish?Sam HubbardSam Hubbard is a Professional Carpenter and the Owner of Hubbard Carpentry and Remodeling. He has over 19 years of experience in the industry. Sam specializes in kitchen remodels, home woodworking, cabinetry, and handyman services.
Professional CarpenterAfter sanding and prepping the wood, apply three coats of polyurethane finish using a brush. Lightly sand the wood between coats and remove dust with a tack cloth. In the last coat, use a piece of cardboard instead of sandpaper for buffing. Believe me, this will give you the best finish you could ask for.
Warnings
- Always work in a well-ventilated area when using chemical refinishers.⧼thumbs_response⧽
- When you're working with harsh chemicals, protect your hands, skin, eyes, and airways with proper safety gear.⧼thumbs_response⧽

References
- ↑ https://www.younghouselove.com/the-darkness/
- ↑ https://www.younghouselove.com/the-darkness/
- ↑ https://www.theweathereddoor.com/2014/10/how-to-stain-with-gel-stain-over.html
- ↑ https://www.theweathereddoor.com/2014/10/how-to-stain-with-gel-stain-over.html
- ↑ https://www.theweathereddoor.com/2014/10/how-to-stain-with-gel-stain-over.html
- ↑ https://www.allthingsthrifty.com/how-to-stain-ugly-oak-wood-darker-easily/
- ↑ https://www.woodshopnews.com/columns-blogs/seven-ways-to-a-richer-and-darker-finish
- ↑ https://www.woodshopnews.com/columns-blogs/seven-ways-to-a-richer-and-darker-finish
- ↑ https://www.theweathereddoor.com/2014/10/how-to-stain-with-gel-stain-over.html
- ↑ https://www.theweathereddoor.com/2014/10/how-to-stain-with-gel-stain-over.html
- ↑ https://www.theweathereddoor.com/2014/10/how-to-stain-with-gel-stain-over.html
- ↑ https://www.familyhandyman.com/woodworking/staining-wood/how-to-stain-wood-evenly-without-getting-blotches-and-dark-spots/view-all/
- ↑ http://www.woodworkersjournal.com/wood-sealers-pore-fillers/
- ↑ https://www.woodshopnews.com/columns-blogs/seven-ways-to-a-richer-and-darker-finish
- ↑ https://www.woodshopnews.com/columns-blogs/seven-ways-to-a-richer-and-darker-finish
- ↑ https://thriftdiving.com/how-to-strip-furniture/
- ↑ https://www.confessionsofaserialdiyer.com/how-to-remove-stain-without-sanding/
- ↑ https://www.confessionsofaserialdiyer.com/how-to-remove-stain-without-sanding/
- ↑ https://www.confessionsofaserialdiyer.com/how-to-remove-stain-without-sanding/
- ↑ https://www.confessionsofaserialdiyer.com/how-to-remove-stain-without-sanding/
- ↑ https://www.confessionsofaserialdiyer.com/how-to-remove-stain-without-sanding/
- ↑ https://thriftdiving.com/how-to-strip-furniture/
- ↑ https://thriftdiving.com/how-to-strip-furniture/
About This Article

If you want to stain over an existing stain on wood, choose a shade that is darker than the original stain. If you want to stain the wood lighter or if the wood has a lacquered finish, you will need to strip or sand away the original finish. Otherwise, lightly sand the surface of the wood, then apply a thick coat of stain with a cloth or foam brush. Wipe away the excess stain and allow it to dry completely. Finish with a clear sealer. To learn how to strip or sand your piece, read on!