This article was co-authored by wikiHow Staff. Our trained team of editors and researchers validate articles for accuracy and comprehensiveness. wikiHow's Content Management Team carefully monitors the work from our editorial staff to ensure that each article is backed by trusted research and meets our high quality standards.
There are 7 references cited in this article, which can be found at the bottom of the page.
wikiHow marks an article as reader-approved once it receives enough positive feedback. In this case, 92% of readers who voted found the article helpful, earning it our reader-approved status.
This article has been viewed 29,893 times.
Learn more...
Whether you want to expand your company’s selling reach or get rid of some extra items around the home, selling on Amazon is a fairly straightforward process. Start by creating an account and filling out all of the necessary information. Add product listings and select whether you want to ship the products yourself or use Amazon's fulfillment service. Once everything is set up, you’re ready to make your first sale!
Steps
Setting Up a Seller Account
-
1Go to the Amazon home page and click on the “Sell” link along the top bar. The link is small, featured on the top panel between “Gift Cards & Registry” and “Help.” This will take you to their seller page, where you can find information and options for the different types of selling accounts.
- If you're logged into your Amazon Prime account, you may not be able to see this link. Log out to access it.
- If you still can’t find the “Sell” button, you can also go to https://services.amazon.com/selling/getting-started.html, then click on the “Start selling” button.
-
2Select a Professional or Individual account. If you’ll be selling more than 40 items per month, select Professional. This plan is free for the first month, then costs $39.99 per month, and lets you list items in up to 35 categories. Select Individual if you'll be selling less than 40 items per month. Individual costs $0.99 per listing and limits you to 20 categories for all of your listings.Advertisement
-
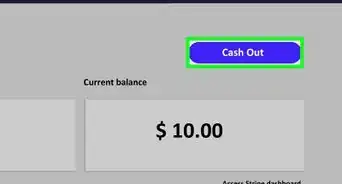
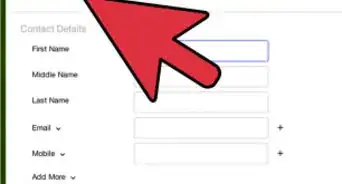
3Create a seller account. Once you’ve decided on Individual or Professional, click “Create seller account” and start filling out your account details. Enter information that will be visible to customers, such as your business name, contact information, where the products will ship from, and shipping options.[1]
- You’ll also need to provide information that will be kept private, such as bank account and routing numbers for Amazon to pay you, as well as your legal name and address.[2]
- Since the Seller Central site is separate from your Amazon account, you’ll need to create a seller account even if you already have an Amazon or Amazon Prime account.
-
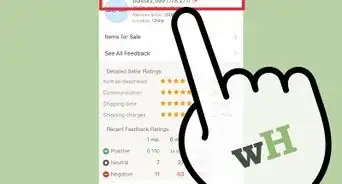
4Fill out your seller profile to make your company more legitimate. Go to your seller profile, where all your information and customer feedback will show up. Fill out this profile by adding your logo, return/refund policies, and an “About the company” section. Having additional information will help make your company look more personable and credible to potential customers.[3]
- A strong “About the company” section can create an emotional connection with the customer. To do this, tell the customer a little about you or the story of how your company started.[4]


Listing Your Items
-
1Decide what you want to sell. This can include original products, novelty items, or things around your home that you’d like to clear out. Your listings must fall under Amazon’s predetermined categories, and keep in mind that some categories—such as DVDs, footwear, handbags, and sports collectibles—will need approval from Amazon before you can sell them.[5]
- If your item meets Amazon’s requirements, you can apply for approval by filling out their “Contact Us” form.
-
2Use pre-existing item information for items already listed on Amazon. If you’re listing a product that other sellers offer, you can use the descriptions and stock images already provided. Once you find a listing for the exact item you're selling, click the "Sell yours here" button on the right-hand side of the page.
- The only additional information you need to provide is how many products you’re selling, the item’s condition, and the shipping methods you offer.[6]
-
3Add item information for new products not already listed on Amazon. If you’re selling items that aren’t already available on Amazon—such as a product specific to your company—you’ll need to complete a new item listing. This requires a UPC/EAN Number (a unique barcode) and the item’s SKU (stock keeping unit). Add a product title, price, description, images, and search terms to complete the listing.[7]
- Original items mean less competition, but they do take longer to set up.[8]
-
4Aim to sell items that don’t list Amazon.com as a seller. Third-party sellers automatically get bumped from the default first-choice seller position when Amazon.com offers the item. Look for and sell items that are only offered through other third-party sellers to improve your sales.[9]
- This default seller position is also known as being in the “buy box,” and it’s the easiest way to get the most sales.[10] To get the coveted “buy box” position, offer competitive pricing or build up your customer feedback rating.


Fulfilling Orders Yourself
-
1Check and update your orders daily. Maintaining good communication with Amazon will ensure that you don’t miss any orders or important information. Update your orders with shipping information daily and check in for any notifications.[11]
-
2Pay Amazon shipping rates. When you fulfill orders yourself, Amazon calculates the shipping rates based on the product’s category and the buyer’s selected shipping method, then charges you. These rates also vary based on the type of seller account you have.[12]
-
3Package up your orders efficiently. Use commercial packaging appropriate to the item you’re sending, such as a box or padded envelope, and make sure to ship your items on or before the estimated ship date.[15]
-
4Include a packing slip that identifies you as the seller. For every order, Amazon requires that you print out a packing slip with the customer’s complete order. Place the packing slip inside with the products so the customer can easily find it.
- You should also make sure you are listed as the seller on the packing slip, as well as any additional information included with your products. This way, if the customer needs to return the item, they know who to return it to.[16]
-
5Follow Amazon’s code of professionalism. Under Amazon’s guidelines for fulfilling orders, you can find the code of professionalism expected of all sellers. Read these thoroughly to make sure you are following all seller expectations. You can find the code under “Professionalism” at https://www.amazon.com/gp/help/customer/display.html?ie=UTF8&nodeId=200259260.
- Some aspects of the code include agreeing not to cancel transactions or send customers emails unless permitted. You also agree to source, sell, and ship your products according to Amazon’s terms.[17]


Using Fulfillment by Amazon (FBA)
-
1Add FBA to your account when you list your items. Sending your items to an Amazon Fulfillment Center takes away the stress of having to store your products and fulfill orders. To add FBA, create a new listing or go to one of your previous listings and select “I want Amazon to ship and provide customer service for my items if they sell” under “Shipping Method.”[18]
- Along with your seller account fees, you will pay additional fees for order fulfillment, storage, and optional services by Amazon.[19]
- To convert listed items in bulk, simply go to “Manage Inventory” and select these items, then click the “Change to Fulfilled by Amazon” action.
- Adding FBA also makes your items eligible for Prime and free shipping, which can draw customers and help boost your sales.[20]
-
2Create an FBA shipping plan. After adding listings to your FBA inventory, you’ll be prompted to set up a shipping plan. This will determine how you send your items to an Amazon Fulfillment Center. Fill in your address and either select “individual products” or “case-packed products.” Once you’re finished, select all of the items you want to sell and click “Add to an existing shipping plan.”
- Generally, you’ll choose “individual products.” Only select “case-packed products” if you’re sending a case full of the same items, such as a box of 40 identical DVDs.
-
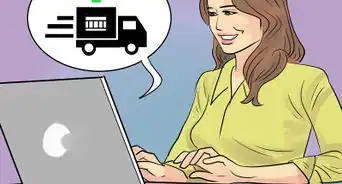
3Ship your products to an Amazon fulfillment center. Pack up and ship your items as directed by Amazon. Make sure to track your shipment until it reaches the fulfillment center safely. From there, Amazon is responsible for storing your items and fulfilling your orders.
- Amazon will also serve as your customer service contact for any FBA-shipped items.[21]


Community Q&A
-
QuestionTo decide if you want to register as a professional seller, does this mean 40 individual items OR does it mean 40 different types of products?
 Reina ItogaCommunity AnswerIt means 40 products, though remember that it is not a hard and fast rule.


References
- ↑ https://www.fundera.com/blog/selling-on-amazon
- ↑ https://www.fundera.com/blog/selling-on-amazon
- ↑ https://www.fundera.com/blog/selling-on-amazon
- ↑ https://www.fundera.com/blog/selling-on-amazon
- ↑ https://services.amazon.com/services/soa-approval-category.htm/ref=asus_soa_snav_cat
- ↑ https://www.fundera.com/blog/selling-on-amazon
- ↑ https://www.fundera.com/blog/selling-on-amazon
- ↑ https://www.fundera.com/blog/selling-on-amazon
- ↑ http://www.onlinesellingexperiment.com/how-to-sell-on-amazon-beginners-guide-to-getting-started-selling-on-amazon/
- ↑ https://hbr.org/2016/05/should-you-compete-with-amazon-or-sell-on-amazon
- ↑ https://www.amazon.com/gp/help/customer/display.html?ie=UTF8&nodeId=200259260
- ↑ https://services.amazon.com/selling/faq.html
- ↑ https://services.amazon.com/selling/faq.html
- ↑ https://services.amazon.com/selling/faq.html
- ↑ https://www.amazon.com/gp/help/customer/display.html?ie=UTF8&nodeId=200259260
- ↑ https://www.amazon.com/gp/help/customer/display.html?ie=UTF8&nodeId=200259260
- ↑ https://www.amazon.com/gp/help/customer/display.html?ie=UTF8&nodeId=200259260
- ↑ https://services.amazon.com/selling/faq.html
- ↑ https://services.amazon.com/selling/faq.html
- ↑ https://www.forbes.com/sites/gabrielshaoolian/2017/08/10/a-beginners-guide-for-deciding-to-sell-on-amazon/#7f90ee747295
- ↑ https://www.fundera.com/blog/selling-on-amazon
- ↑ https://www.fundera.com/blog/selling-on-amazon
- ↑ https://www.fundera.com/blog/selling-on-amazon
About This Article

To start selling on Amazon, first you'll need to set up a seller account. If you'll be selling more than 40 items a month, sign up for a professional seller account, which costs $39.99. Or, if you'll be selling less than 40 items a month, sign up for an individual seller account, which costs $0.99 per listing. After you set up an account, you can start listing and selling items on Amazon. Keep in mind that you'll need to pay Amazon's shipping rates if you have an individual seller account. To learn how to sell items through Amazon's Fulfillment Center, scroll down!