This article was co-authored by Patrick Coye. Patrick Coye is the owner and operator of Patrick’s Painting & Home Improvement in Alexandria, Virginia. With over 15 years of experience in residential construction, Patrick specializes in painting, wallpaper removal/installation, drywall, staining decks and fences, and kitchen cabinetry painting. To date, Patrick and his team have painted over 2,000 houses and stained over 800 decks. Patrick's Company won a "Top Job" award from the American Painting contractor magazine in 2020.
There are 8 references cited in this article, which can be found at the bottom of the page.
This article has been viewed 36,754 times.
It can be frustrating to apply a few coats of paint to a new project only to see stains coming through a few days later! Whether you are painting a new piece of wood or recovering a piece of furniture you can learn how to stop stains from bleeding through paint by taking a few precautionary measures and by appropriately treating existing stains.
Steps
Using Primer to Prevent Stains
-
1Set up your workspace in a well-ventilated area. Primer often has a very strong smell, so you want to make sure to work in a space that gets lots of circulated air, or even work outdoors if the weather is nice. If you are working indoors, set up a fan to blow the fumes outside while you work.[1]
- If you are sensitive to strong fumes, you can wear a face-mask, too.
-
2Lay down several tarps or drop cloths to protect your surroundings. Oil-based primer is hard to clean up if it spills, usually requiring paint thinner. Cover any furniture or tools you want to keep clean in case you have any accidents while working with the primer.[2]
- You can buy inexpensive tarps and drop cloths from your local DIY store. Or, if you’re in a rush, you can use old sheets. If you do use sheets, it’s best to layer them because they are thin and the primer can seep through them more easily.
Advertisement -
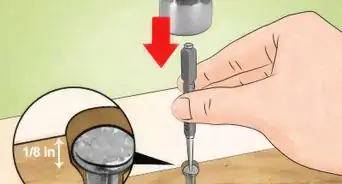
3Sand new pieces of wood to prepare it for primer. Sanding is going to make the wood grains even and more receptive to the stain-blocking primer.[3] Use 120-grit sandpaper and rub it back and forth over the surface of the wood until it is smooth to the touch.[4]
- Wipe dust off periodically to check your progress.
- Use a sanding block for a firmer hold on the sandpaper. This gives you a better grip as you sand back and forth and protects your hands from the rough sandpaper.
-
4Remove sanding dust from the wood with a water-dampened rag. Getting all the dust off the wood before you prime is essential to having a smooth painted surface. Use a damp rag to wipe off dust and allow the wood to dry completely before moving on.
-
5Apply oil-based stain-blocking primer to combat tannins and water stains.[5] An oil-based primer does have a strong smell and requires paint thinner for cleanup, but it is the most reliable in blocking stains from knotty wood, water, or wood that naturally stains (like redwood, cedar, and mahogany).[6]
- An oil-based primer is also helpful in eliminating strong odors from pieces of wood. For example, if you are restoring an antique piece of furniture that smells like smoke even after it has been sanded down, applying the oil-based primer will help to trap that scent in.
- If you are going to paint with a darker color, you can tint your primer (which is almost always white) so it’ll be easier to cover with your choice of paint.[7]
-
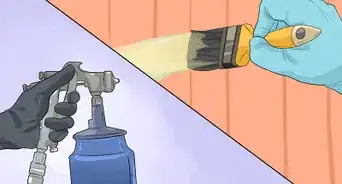
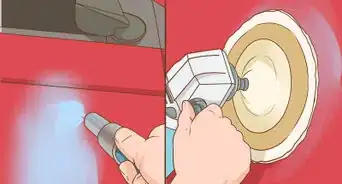
6Use a paintbrush to spread the primer over the wood in long, even strokes. Oil-based primer is thick, so you will need to use a little force while painting to get it to spread evenly. Work as quickly as you can, as the primer gets tacky as it starts to dry and will show brush strokes more easily.[8]
- Check the instructions on the primer for tips from the manufacturer.
- You should only need to apply 1 coat of primer.
-
7Let the primer dry completely before adding any layers of paint.[9] Depending on the humidity where you are working, it may take several days for this to happen. The wood should be dry to the touch once it is finished; if it feels sticky or if your fingers drag when you run your hand over it, it isn’t dry yet.[10]


Treating Existing Stains with Shellac
-
1Move the stained piece of furniture to a well-ventilated workspace. If you use shellac that comes in a spray bottle, it’s best to work outdoors so you don’t accidentally spray your walls or furniture. If you use liquid shellac, lay down some drop cloths or tarps to catch any drips.[11]
- Shellac usually doesn’t have overly strong fumes, but it’s still best to be cautious when working with sprays or paints of any kind.
-
2Apply a clear coat of shellac on top of the paint to treat existing stains. Treat the entire area rather than just the patch that is stained to avoid creating an uneven surface. You luckily don’t need to sand the entire piece of furniture and start again. Simply add a layer of shellac on top of the paint that is already there.[12]
- A nice thing about shellac is that it dries in minutes so you can quickly get on with the next step!
- You can get shellac in spray form or in a quart, depending on your preference.[13]
-
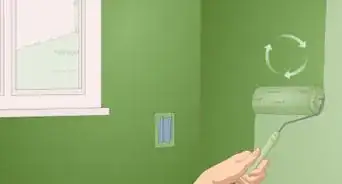
3Add a new coat of paint once the shellac has dried. Chances are, if you’re working with a piece of furniture that has already been painted, you can add just 1 more coat of your chosen paint to cover the shellac. You should no longer notice any staining or bleed-through from the tannins in the wood.[14]
- Stains are most noticeable when you’ve painted with a light color. Trying out a darker paint is another way to mask those stains.
-
4Let the new coat of paint dry completely before moving it back inside. Depending on the type of paint you are using, it should take 1 to 3 days for the paint to dry. Once it is no longer sticky to the touch, you can put it back in its original place.[15]
- A handy trick to test how dry paint is is to gently push your fingernail into a discreet section of the paint. If you can see the imprint from your fingernail, the paint isn’t dry yet.
-
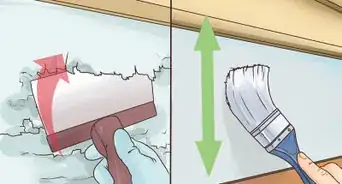
5Sand stains that keep reappearing after you have applied shellac. If you do have a stain that happens to make its way back through the shellac, try sanding just that section of the wood, applying a stain-blocking primer to it, and adding another coat of paint to the entire surface.[16]
- You don’t need to sand a lot—just enough to roughen the surface of the existing paint so it will be receptive to the primer.


Expert Q&A
Did you know you can get expert answers for this article?
Unlock expert answers by supporting wikiHow
-
QuestionWhat is stain-blocking primer?
 Patrick CoyePatrick Coye is the owner and operator of Patrick’s Painting & Home Improvement in Alexandria, Virginia. With over 15 years of experience in residential construction, Patrick specializes in painting, wallpaper removal/installation, drywall, staining decks and fences, and kitchen cabinetry painting. To date, Patrick and his team have painted over 2,000 houses and stained over 800 decks. Patrick's Company won a "Top Job" award from the American Painting contractor magazine in 2020.
Painting SpecialistStain-blocking primer includes primers that have a high level of titanium dioxide. They require spending a little more money but are very important in getting better coverage.
Support wikiHow by unlocking this expert answer.
-
QuestionIf I have already put 3 coats of fresh paint on the furniture without using shellac, what do I do to correct the bleeding?
 TechdocgeekCommunity AnswerIt sounds like the colors from the underlying layer are bleeding through your 3 coats of paints; perhaps you have chosen the wrong kind of paint to cover it with, or perhaps the original layer had chemicals or dyes in it that interact with the paint. You may need to sand it down and start over.
Things You’ll Need
Priming Wood to Prevent Stains
- Drop cloth or tarp
- Face mask (optional)
- 120-grit sandpaper
- Sanding block (optional)
- Damp rag
- Oil-based primer
- Paintbrush
Treating Existing Stains
- Drop cloth or tarp
- Shellac (either in a spray can or in a quart)
- Paintbrush
- Paint choice for top layer
- 120-grit sandpaper (optional)
- Sanding block (optional)
- Oil-based primer (optional)


References
- ↑ https://lifehacker.com/how-to-transform-your-garage-into-the-ultimate-diy-work-1719480723
- ↑ https://lifehacker.com/how-to-transform-your-garage-into-the-ultimate-diy-work-1719480723
- ↑ Patrick Coye. Painting Specialist. Expert Interview. 22 July 2020.
- ↑ https://www.craftsy.com/woodworking/article/how-to-properly-sand-wood/
- ↑ Patrick Coye. Painting Specialist. Expert Interview. 22 July 2020.
- ↑ https://www.familyhandyman.com/painting/painting-how-to-choose-and-use-primers/view-all/
- ↑ https://www.familyhandyman.com/painting/painting-how-to-choose-and-use-primers/view-all/
- ↑ https://centsationalstyle.com/2009/10/refinishing-with-oil-based-primer-paint/
- ↑ Patrick Coye. Painting Specialist. Expert Interview. 22 July 2020.
- ↑ https://centsationalstyle.com/2009/10/refinishing-with-oil-based-primer-paint/
- ↑ https://lifehacker.com/how-to-transform-your-garage-into-the-ultimate-diy-work-1719480723
- ↑ https://foxhollowcottage.com/how-to-fix-paint-bleed-through-and-cover-stains.html
- ↑ https://youtu.be/h9EGGkmdQ3Q?t=75
- ↑ https://foxhollowcottage.com/how-to-fix-paint-bleed-through-and-cover-stains.html
- ↑ https://centsationalstyle.com/2009/10/refinishing-with-oil-based-primer-paint/
- ↑ https://baileylineroad.com/brown-stains-coming-through-paint/
About This Article