This article was co-authored by Rebecca Schweiger. Rebecca Schweiger is a Professional Artist, Published Author, and the Founder of The Art Studio NY, New York City's #1-rated art school and global online art studio. Celebrated by TV networks, press, and celebrities including NBC, ABC, E!, Time Out New York, The Kardashians, and Big Bang Theory's Jim Parsons, Rebecca specializes in creating abstract artwork and teaching studio art classes. Her art studios provide 100+ weekly, beginner-friendly drawing and painting art classes to people around the globe. With more than 22 years of art experience, she is the author of Release Your Creativity: Discover Your Inner Artist with 15 Simple Painting Projects, and her artwork has been exhibited in more than 50 museums and galleries around the world. Rebecca holds a BFA in Painting from Boston University's School for the Arts and has participated in acclaimed artist residencies worldwide.
There are 10 references cited in this article, which can be found at the bottom of the page.
This article has been viewed 14,513 times.
If you’re the creative type, chances are you have an abundance of art and craft supplies so that you can make what you want to when the inspiration strikes. But with so many supplies, it can be hard to stay organized or even remember everything you have available to use! Finding creative storage solutions for your supplies can help you see what materials you have and can even be an inspiration for making new things.
Steps
Creating an Attractive Display
-
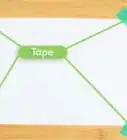
1Display ribbon, thread, and decorative tapes on a pegboard. Hang a pegboard wherever it is that you do your crafting—whether that’s in an office, a garage, the basement, or even in a closet. From each peg, hang a spool of thread, special tape, ribbon, wire, or other supplies. Being able to see all the different colors and patterns will make a unique and appealing visual display![1]
- You could even get small baskets, hooks, shelves, and containers that are made to be hung from pegboards to make your board more versatile.
Tip: Take all of your art supplies and lay them out somewhere you can easily see everything. Then, go category by category as you organize and figure out how to store your supplies. This will help you keep like with like, which will make it a lot easier to find what you’re looking for when it comes time to create![2]
-
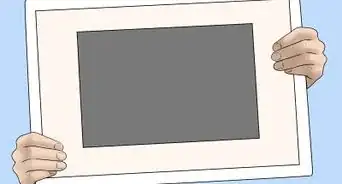
2Hang paintbrushes from a picture frame to make them easily accessible. Get an old picture frame and remove the glass from the inside. Take a handful of small hooks and install one every 2 inches (51 mm) along the underside of the top of the frame. Hang a paintbrush from each hook so that it hangs down in the interior of the frame.[3]
- This method only works with paintbrushes that have a hole in the handle, which is more common with larger brushes. Use a jar or tin to store your other brushes that can’t be hung up.
- You could also remove the glass and insert a piece of corkboard in the frame instead. Use nails or pushpins to hang your paintbrushes.
- Display your paintbrush holder like you would a piece of art. It’ll be easy to grab the tool you need while also helping yourself stay organized.
Advertisement -
3Keep supplies visible and easy-to-access by storing them in mason jars. This can be a really fun way to display things like pens, pencils, paintbrushes, markers, crayons, scissors, pushpins, stamps, glue sticks, and other supplies. You can keep the jars on your desk, on a shelf, or even along the floor against the wall.[4]
- You could also use recycled aluminum cans—cover them with decorative tape or colorful paper to make them look nice and use them to store writing instruments, paintbrushes, and other crafting supplies.[5]
- Smaller apothecary jars could be used to attractively store sequins, glitter, buttons, beads, and other small supplies.[6]
- If you aren’t using the lids to the jars, put them somewhere safe so that you can access them if you ever need to.
-
4Mount short pieces of PVC pipe on the wall to display your paints. Position each piece of pipe so that the opening is horizontal to the ground and your supplies will rest neatly inside. For each pipe, put a long nail into the wall to hang it from. You could arrange the pieces in a honeycomb pattern, in a straight line, or even in a large circle. Stack your paints inside so that you can see the bottom of each container and easily find the color you need when you’re working on a project.[7]
- You could also use these pipes to store markers, yarn, and other supplies.
- Cut each piece of pipe to the exact length you need depending on the type of supply you’re going to use it for. A 4 to 5 inches (100 to 130 mm) piece of pipe should neatly hold most paints.
-
5Use shallow shelving to display your supplies above a desk. Supplies can easily get lost in deep shelving or drawers and it can be hard to see what you have to work with. Line the shelves with jars, paints, small canvases, stamps, sponges, and other materials.[8]
- If you don’t have space above a desk or workstation, these shelves can be installed anywhere! They add a cool visual element to any room while also being functional.


Keeping Things Hidden Away
-
1Organize fabric in a filing cabinet so it’s easy to see what you have available. It can be hard to keep track of what fabric you have when it’s stacked in a pile. Make it easy to browse by wrapping pieces of fabric around wire hanging files. Then, place those files inside the filing cabinet. When you’re ready to create, you just have to pull open the drawer to view your options.[9]
- If you use a lot of fabric, consider investing in a tall filing cabinet so that you can have several drawers dedicated to storage.
- Consider organizing your fabric by color so you can easily grab the right shade without having to search for too long.
-
2Use colorful boxes to store your supplies on shelves. For a tidy look, buy the same size and style of boxes either in the same color or in multiple colors. This makes it easy to stack the boxes and helps them look more uniform. If you prefer a more eclectic vibe, use boxes of various sizes and shapes to keep your craft area cleaned up.[10]
- You could use plastic boxes, or for a more upscale look, use decorative boxes made of wood or coated cardboard. Another option is to use toolboxes.[11]
- Label each box with its contents so it’s easy for you to find what you’re looking for.
Tip: If you’re low on storage space, this can be a creative way to keep your supplies in various rooms. No one will know that the pretty pink box in your living room holds paper scraps and scissors!
-
3Store small supplies in an apothecary cabinet for an elegant storage solution. This is a stylish way to keep your materials neat and organized. You can buy a new apothecary cabinet or search for one at antique and vintage stores. Fill each drawer with supplies, keeping them separated by type so they stay organized.[12]
- Many apothecary cabinets have places for a small label on each drawer. If yours doesn’t have that option, consider using a small piece of decorative tape or masking tape to label each one since you can’t see what’s inside.
- This works best for smaller items, as larger ones probably won’t fit inside the drawers.
-
4Repurpose a mirrored medicine cabinet to hide supplies. These types of cabinets don’t have to be just for bathrooms! Hang one in your office or crafting room to add a cool decorative element, and use it to store paints, jars filled with supplies, or other materials.[13]
- Most mirrored medicine cabinets are slim enough to fit behind doors. It could be a nice way to check out your outfit before leaving the room while also serving as extra storage space.
-
5Transform a closet to be your art storage station.[14] Take a look at your closet space at home and see if there is a way to consolidate their contents so you can have one closet dedicated entirely to your art supplies. You could install shelving on the inside, hang a pegboard from the back of the door, add totes to hold loose items, and implement lots of other storage solutions.[15]
- When you open the closet door, it will be wonderful to see all your supplies in one place! Make sure to label the containers if they aren’t opaque so that you can easily find what you need.
- You can also store your art supplies in a wheel station that you can put in your closet when not in use.[16]


Maximizing Storage in a Small Space
-
1Use a door shoe organizer to utilize storage space on the back of a door. Whether it’s the back of a bedroom or office door or the inside of a closet door, that area is prime organization space. Simply hang the organizer from the top of the door, then fill each compartment with your various supplies.[17]
- Try to keep your supplies separated by type. For example, keep all your markers in one compartment and all your paintbrushes in another instead of mixing them.
- A door shoe organizer can also be a great option for storing yarn. You’ll be able to easily see what colors you have available and it’ll save tons of space that would normally be taken up by these bulky supplies.
-
2Install a magnetic strip to hold magnetic containers filled with supplies. Place the magnetic strip along a wall, on the underside of a shelf, along the side of a desk or workstation, or on the back of a door. Buy small magnetic jars, bins, or containers to store your supplies and attach them to the strip to keep your surface areas clear of clutter.[18]
- Magnetic spice jars can be repurposed for art supplies.
- You could also use a magnetic sheet hung from the wall to hold your supplies rather than a strip, just depending on what kind of space you have available.
-
3Add shallow shelves behind a door to store paints, thread, or other supplies. That space behind a door is often neglected, but it can be a great storage solution when you’re dealing with a lack of space. Just make sure that the shelves are shallow enough that you can open the door fully without it knocking against them.[19]
- Floating shelves may work particularly well and appear less crowded than traditional shelving might look.
- You can buy shelves to install, or you could try your hand at making them yourself.
Tip: Depending on your personality, you may have to play around with your storage solutions until you find something that works for you! If you like things to be neat and tidy, having colorful displays might be more distracting than helpful. Or if you have a hard time feeling inspired unless you see what you have to create with, keeping things hidden away may not be the best option for your creativity.
-
4Use a ladder shelf to hold containers filled with your art supplies. You can either build a ladder shelf or buy one. Fill the shelves with boxes, jars, and other containers so you can easily access your supplies while freeing up floor space.[20]
- Going vertical with your storage will use up less space and make your room look less cluttered than a horizontal storage solution would.
-
5Invest in stackable containers to keep supplies neat while saving space. Plastic containers that have drawers rather than lids may work especially well because you won’t have to take out multiple boxes to access whatever you need. Stack your containers beneath a desk, in a closet, on shelves, or anywhere else they’ll fit.[21]
- Label the outside of each container so you can easily see what each one holds. Use decorative tape and a marker so that it’s easy to remove and change labels if you need to.
- You can buy differently sized containers to tailor your storage space. There are lots of systems that have multiple-size options that still allowing each container to stack on the others. For example, you may want a higher container for bulkier supplies and a shorter container for things like paper or fabric.


Community Q&A
-
QuestionWhere can I keep my art supplies if I don't have space for any shelves or drawers?
 EnitzkoCommunity AnswerYou can try to find space in a closet, garage, or your room. If you don't have any room there, consider making something out of your art supplies so that you won't have as many as before. Alternatively, you can ask a family member to store them.


References
- ↑ https://www.apartmenttherapy.com/organizing-ideas-how-to-keep-diy-supplies-organized-247798
- ↑ https://www.parents.com/parenting/home/organization/real-mom-ways-to-tidy-up-like-marie-kondo/
- ↑ https://www.apartmenttherapy.com/organizing-ideas-how-to-keep-diy-supplies-organized-247798
- ↑ https://diyprojects.com/10-stunning-and-useful-storage-ideas/
- ↑ https://www.diyncrafts.com/17424/repurpose/50-jaw-dropping-ideas-for-upcycling-tin-cans-into-beautiful-household-items
- ↑ https://www.theidearoom.net/craft-room-organization-ideas/
- ↑ https://www.diyncrafts.com/13887/organization/25-life-changing-pvc-pipe-organizing-and-storage-projects
- ↑ https://www.theidearoom.net/craft-room-organization-ideas/
- ↑ https://www.apartmenttherapy.com/organizing-ideas-how-to-keep-diy-supplies-organized-247798
- ↑ https://www.apartmenttherapy.com/organizing-ideas-how-to-keep-diy-supplies-organized-247798
- ↑ Rebecca Schweiger. Professional Artist & Art School Founder. Expert Interview. 19 November 2021.
- ↑ https://foxhollowcottage.com/cottage-kitchen-apothecary-cabinet-a-sensible-storage-solution.html
- ↑ https://www.theidearoom.net/craft-room-organization-ideas/
- ↑ Rebecca Schweiger. Professional Artist & Art School Founder. Expert Interview. 19 November 2021.
- ↑ https://www.theidearoom.net/craft-room-organization-ideas/
- ↑ Rebecca Schweiger. Professional Artist & Art School Founder. Expert Interview. 19 November 2021.
- ↑ https://www.apartmenttherapy.com/organizing-ideas-how-to-keep-diy-supplies-organized-247798
- ↑ https://www.apartmenttherapy.com/organizing-ideas-how-to-keep-diy-supplies-organized-247798
- ↑ https://www.familyhandyman.com/storage-organization/12-simple-storage-solutions/
- ↑ https://www.familyhandyman.com/storage-organization/12-simple-storage-solutions/
- ↑ https://www.bobvila.com/slideshow/10-storage-containers-you-need-after-tidying-up-53351#bv-us
About This Article