This article was co-authored by Ashley Adams. Ashley Adams is a Licensed Cosmetologist and Hair Stylist in Illinois. She completed her Cosmetology education at John Amico School of Hair Design in 2016.
There are 20 references cited in this article, which can be found at the bottom of the page.
This article has been viewed 21,057 times.
Stretching is a technique used by those with African-textured hair to maximize their natural hair length. While relaxing, blow-outs, and straightening all help make naturally curly hair appear longer, it can be very damaging. Stretching is a much safer way to help hair appear longer without disrupting the curl pattern. Keep in mind, however, that stretching your hair too often can damage your hair.[1]
Steps
Doing Banding with Hair Ties
-
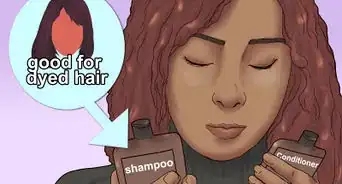
1Apply a moisturizing leave-in conditioner to your hair. Make sure that your hair is clean and freshly-washed first. Detangle it with a wide-toothed comb first, then apply a generous amount of leave-in conditioner to it. Run the comb through your hair again to help evenly distribute the leave-in conditioner.[2]
- This method works best on damp hair, but you can work with dry hair as well. It is very similar to the LOC (leave-in conditioner, oil, and cream) method used before styling hair.
- This method is safe for your hair, but be aware that it can weaken and break your hair over time.
-
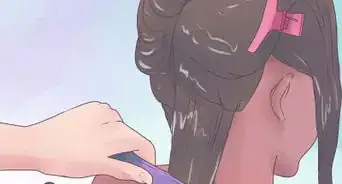
2Divide your hair into 4 sections. Part your hair down the center, from your forehead down to your nape. Part it again, this time going horizontally across the back of your head from ear-to-ear. Twist and clip 3 of those sections out of the way.Advertisement
-
3Apply moisturizer and oil to the remaining hair section. Go to the remaining section of hair that you left loose. Apply some shea butter to it first, then follow up with olive oil. Run a wide-toothed comb through your hair to help make it smooth and to distribute the products.[3]
- You can use other moisturizing products and oils instead, if you prefer.
-
4Tie the section into a tight ponytail. Use a smaller hair tie for this rather than the standard sized one. It will help reduce bulk and make the style more comfortable for you. When tying the ponytail, make sure that the hair along your scalp is pulled taut.[4]
- Use tangle-free hair ties to prevent snagging.
-
5Pull the ponytail taut and wrap a hair tie down its length. Don't wrap the hair tie repeatedly around the same spot as you would when tying off a ponytail or braid. Instead, wrap and twist the hair tie down the length of the ponytail in a crisscross fashion. You should be able to cover 1 to 2 inches (2.5 to 5.1 cm) of hair this way.
- Pull your hair taut while doing this.
-
6Continue wrapping hair ties around your ponytail until you get to the end. Start wrapping the next hair tie where you finished wrapping the last one. Remember to pull your hair taut as you go. Depending on the length of your hair, plan on using 6 to 7 hair ties for the entire section.[5]
- When you have one last wrap left on your hair tie, fold the ends of your hair down, and wrap the hair tie one last time. This will make it more secure.
-
7Repeat the process on the remaining sections. When you are done, you'll have a bunch of Medusa-like tentacles all over your head. Don't worry, however, they won't be left in your hair for very long.
-
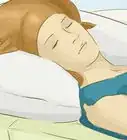
8Cover your hair with a scarf. If you need to, wrap the banded hair around your head first, then secure them with bobby pins. Wrap a satin scarf around your head to hide the banded hair and secure it.
-
9Remove the bands the following day. Take the scarf off first, then remove any bobby pins. Make sure that your hair is completely dry, then carefully pull the hair ties off one by one. Do not tug or yank on the hair ties, or you will risk damaging your hair.[6]
- If your hair isn't dry, re-pin the banded hair, cover it with the scarf, and wait until it is dry.


Doing African Threading
-
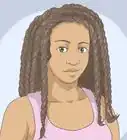
1Divide your hair into 4 sections. Part your hair down the middle from forehead to nape. Next, create a horizontal part going along the back of your head from ear-to-ear. Twist and clip 3 of the sections out of the way, and leave 1 of them loose.[7]
- Make sure that your hair is dry and freshly-washed.
- Be aware that this method can cause matts, especially if your natural hair texture is coarse or prone to matting in the first place.
- If you have very thick hair, you may want to divide your hair into 8 sections instead.
-
2Gather the remaining section into a tight ponytail. Have a long piece of your cotton yarn ready. It should be at least 2 to 3 times the length of your hair when pulled taut.
- Do not secure the hair with an elastic, just hold it in your hand.
-
3Wrap 100% cotton yarn around your ponytail to secure it. Cut a piece of yarn that's 2 to 3 times longer than your hair when its stretched out. Place the end of the yarn alongside your ponytail, facing away from your scalp. Wrap the yarn tightly around your hair 2 to 3 times to secure the ponytail.
- Do not use wool, acrylic, or wool-blend yarn. You need to use cotton yarn. You can find it in fabric stores and crafting stores.
- You will be wearing your threaded hair under wigs and scarves, but it would still be a good idea to match the yarn as closely as possible to your own hair.
-
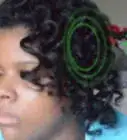
4Continue wrapping the yarn around your ponytail in a spiral. Pull your hair taut and continue wrapping the yarn around it tightly in a spiral (like in a candy cane). When you have about 1 inch (2.5 cm) of hair left, wrap the yarn around your hair a few more times.[8]
- Do not cut the yarn yet. You will still need it to finish wrapping your hair.
-
5Apply a moisturizing product to the ends of your hair. Start with some olive oil, then follow up with shea butter. You can also use other moisturizing products as well. Be sure to saturate the ends of your hair.[9]
-
6Fold the ends down and wrap them with yarn. Fold the moisturized ends of your hair down over the wrapped yarn. Wrap the yarn tightly around the ends from bottom-up until they are completely covered.[10]
- You will need to extend your wrapping just past the folded-over ends.
-
7Tie the yarn off, then trim off the excess. Wrap the yarn one more time around your hair, leaving a finger-thick loop. Thread the tail end of the yarn through that loop, then pull on it to tighten the knot. Use a pair of scissors to trim off any excess yarn.
-
8Repeat the process for the remaining sections. When you are done, you'll have 4 or more rope-like strands of hair sticking out of your head. You may feel a little like Medusa now, but don't worry, your hair will look fantastic at the end.
- Remember to reapply the moisturizing products to each section.
-
9Wear the threaded hair under wigs or scarves. Wrap the threaded hair around your head. Secure them with bobby pins, then slip a wig cap over your head to hold them in place. Put on your favorite wig, or tie a chic scarf around your head instead.
-
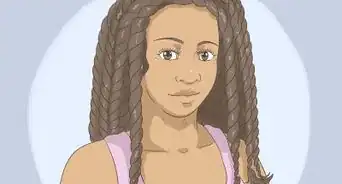
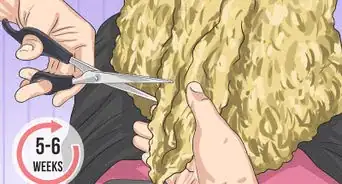
10Maintain the style for at least 6 months. Take the threads out and redo them every 3 or 4 weeks. If you need to wash or condition your hair at any point during that 3 to 4-week period, you should take the threads out. After 6 months or so, your hair will be stretched out, and you can stop wearing the threads.[11]
- Your hair may become longer after just a few weeks, and the hair growth may continue up to 6 months.


Doing Rope Twists
-
1Divide your hair into 6 sections. Begin by parting your hair down the middle. Next, create 3 sections on each side of your head. You'll want to have a section in front, above, and behind each ear. Twist and clip 5 of the sections out of the way. [12]
- Your hair should be dry at this point.
-
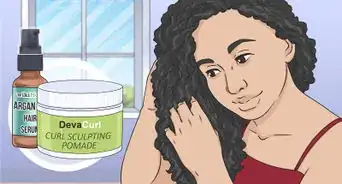
2Apply moisturizing products to the remaining section. Detangle the remaining section with a wide-toothed comb, then apply shea butter or a leave-in cream. Follow up with a nourishing hair oil or olive oil. Comb your hair once more to distribute the products evenly.[13]
-
3Tie the section off into a ponytail. Make sure that you make the ponytail nice and tight so that the hair is pulled taut against your scalp. Use a mini hair tie to reduce bulk and discomfort.[14]
-
4Twist the ponytail into a rope braid. Split the ponytail into 2 sections. Twist each section clockwise into a thin rope. Next, twist the ropes together counterclockwise. Your hair should hold the rope naturally on its own; if it doesn't, secure it with a mini hair elastic.[15]
-
5Repeat the process on the remaining sections. Moisturize and detangle each section before tying it into a tight ponytail. Twist each ponytail into a rope braid, then secure it with a mini hair elastic, if needed. Work one section at a time.
-
6Pull the rope braids across your head and secure them with bobby pins. Pull the first rope braid on the left side of your head over to the right. Secure it with a bobby pin. Next, pull the first rope braid on the right side over to the left side of your head, and secure it with a bobby pin as well. Work your way back and forth across your head, from forehead to nape.[16]
- Pull the rope braids tightly across your head to help further stretch out the hair.
- If you didn't secure the rope braids with mini hair elastics, they may have come untwisted. If that happened, simply re-twist them before pinning them.
-
7Tie a satin scarf around your head and leave it on for 2 days. During this time, your hair will dry and begin to stretch. Feel free to switch out the scarf to match your outfit or wear a cute hat over it.[17]
-
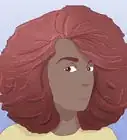
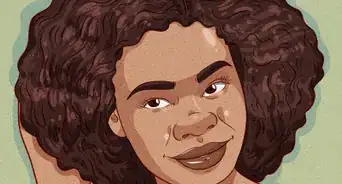
8Remove the twists. Take the scarf off first, then pull out the bobby pins. Carefully undo the twists and pull out the hair ties. If you want to, you can fluff up your hair. Be very gentle; do not tug, pull, or yank on the hair ties.[18]
- Your hair may be wavy or curly when you undo the twists. If you like, you can wear this as a style.
-
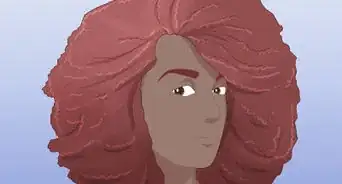
9Redo the process with more twists, if desired. If your hair looks very poufy and frizzy, you'll need to redo the whole procedure. Dampen your hair and reapply the shea butter or cream. Skip the ponytails, and simply twist each mini section into a rope braid, then stretch and pin them across your head. Cover them with a scarf and leave it on for 1 day.[19]
- Instead of doing 6 sections, try 8 or 10 this time.
- If you want your curls to have more definition, don't fluff them out this round.[20]


Warnings
- Stretching damages your hair the more often you do it. This all depends on how fine and healthy your hair is.[21]⧼thumbs_response⧽
Things You'll Need
Doing Banding with Hair Ties
- Leave-in conditioner
- Shea butter
- Olive oil
- Comb
- Hair ties
- Satin Scarf
Doing African Threading
- Shea butter
- Olive oil
- Comb
- 100% cotton yarn
- Satin Scarf
Doing Rope Twists
- Shea butter
- Olive oil
- Comb
- Bobby pins
- Satin Scarf
References
- ↑ http://curlsunderstood.com/benefits-of-stretching-natural-hair/
- ↑ https://www.youtube.com/watch?v=kgkcLpc7VH0&feature=youtu.be&t=20s
- ↑ https://www.youtube.com/watch?v=kgkcLpc7VH0&feature=youtu.be&t=1m
- ↑ https://www.youtube.com/watch?v=kgkcLpc7VH0&feature=youtu.be&t=2m2s
- ↑ https://www.youtube.com/watch?v=kgkcLpc7VH0&feature=youtu.be&t=2m30s
- ↑ https://www.youtube.com/watch?v=kgkcLpc7VH0&feature=youtu.be&t=4m10s
- ↑ https://www.youtube.com/watch?v=Kfg5H4iWyjM&feature=youtu.be&t=1m
- ↑ https://www.youtube.com/watch?v=Kfg5H4iWyjM&feature=youtu.be&t=1m15s
- ↑ https://www.youtube.com/watch?v=Kfg5H4iWyjM&feature=youtu.be&t=2m10s
- ↑ https://www.youtube.com/watch?v=Kfg5H4iWyjM&feature=youtu.be&t=2m40s
- ↑ https://www.youtube.com/watch?v=Kfg5H4iWyjM&feature=youtu.be&t=4m35s
- ↑ https://www.youtube.com/watch?v=69HuYSkOXA8&feature=youtu.be&t=40s
- ↑ https://www.youtube.com/watch?v=69HuYSkOXA8&feature=youtu.be&t=50s
- ↑ https://www.youtube.com/watch?v=69HuYSkOXA8&feature=youtu.be&t=1m32s
- ↑ https://www.youtube.com/watch?v=69HuYSkOXA8&feature=youtu.be&t=2m5s
- ↑ https://www.youtube.com/watch?v=69HuYSkOXA8&feature=youtu.be&t=2m25s
- ↑ https://www.youtube.com/watch?v=69HuYSkOXA8&feature=youtu.be&t=3m16s
- ↑ https://www.youtube.com/watch?v=69HuYSkOXA8&feature=youtu.be&t=3m34s
- ↑ https://www.youtube.com/watch?v=69HuYSkOXA8&feature=youtu.be&t=4m30s
- ↑ https://www.youtube.com/watch?v=69HuYSkOXA8&feature=youtu.be&t=7m55s
- ↑ http://curlsunderstood.com/benefits-of-stretching-natural-hair/
About This Article

To stretch natural hair, start by washing your hair and applying a leave-in conditioner while it's still damp. Then, divide your hair into 4 sections, and clip back 3 of them. Next, apply a moisturizer and oil to the section of hair you left down, and tie the section into a tight ponytail. Once you've done that, wrap hair ties down the length of the ponytail until you reach the end, repeating the process on your other sections of hair. Finally, leave the bands in overnight before taking them out. For more advice from our Cosmetology co-author, like how to stretch natural hair using rope twists or threading, scroll down!