This article was co-authored by wikiHow Staff. Our trained team of editors and researchers validate articles for accuracy and comprehensiveness. wikiHow's Content Management Team carefully monitors the work from our editorial staff to ensure that each article is backed by trusted research and meets our high quality standards.
This article has been viewed 43,239 times.
Learn more...
Hollywood Christmas movies are filled with comical scenes of families tripping over themselves while trying to string lights on the Christmas tree. Maybe this mishap has even happened to you during the holidays. The good news is that Christmas tree decorating doesn't have to start off in such a chaotic manner. Instead of creating a frustrating memory while trying to light the tree, use these appropriate safety and decorating techniques to create your perfect outdoor or indoor display.
Steps
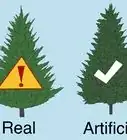
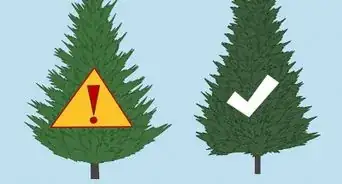
Lighting a Real Tree
-
1Determine how many lights you’ll need. A good rule of thumb is that for every foot of tree, you should use 100 lights. So if you have a 5 foot tree, you will probably be using 500 lights. Of course you could use more or less depending on your budget and preference. The size of the bulb can also determine how many lights you use.[1]
- The number of lights is really a personal preference. If you want a more subtle look, you may use a less lights or smaller bulbs. You may also use a combination of sizes for some variety.
-
2Check if all the bulbs are working. Before you start hanging your lights, plug them in to make sure that all of them are working. Keep your lights plugged in as you hang them to get a sense of how your finished tree will look.[2]
- Do not use lights that you cannot get to active within five minutes. Avoid any frustration of tinkering with lights for extended periods of time.
Advertisement -
3Remove all tags. Tags can be found on each string of lights and can be unsightly. Simply use scissors to remove all tags before hanging up your lights on your tree.[3]
-
4Install a power strip to the closest receptacle. This will be a built-in circuit breaker as well as make it more convenient to turn your lights on and off. Simply turn the power strip on and off to activate your lights.[4]
-
5Plug an extension cord into the power strip. Find brown or green cords at your local hardware store to blend with your tree. Make sure that you can plug more than one plug into your extension cord. Add a splitter to an extension cord that only allows one plug.[5]
- Place two power cords in your tree. First place the extension cord halfway up your tree trunk. A second cord should be placed at the top of taller trees. Use small cable ties or wind excess cord around the trunk to keep it in place and hide it from view.
- Plug in a second extension cord into your main power strip if you are lighting a larger tree.
-
6Plug in your first set of lights. Hide the wires by plugging in your lights to the extension cord that you have placed halfway up your tree. You want to maximize your light strand by not having to plug it into the wall outlet. Extend your lights and pull them to the top of your tree along the trunk.[6]
-
7Move from the trunk out to the branch tips. Hide wires and keep the emphasis on the lights by wrapping the lights around the branch, working outward to the tips. Avoid draping your lights on the front of your tree because this keeps the wires in plain view.[7]
- Keep the lights loosely wrapped on each branch with about 12 lights to each branch, spreading them out in areas that they will be seen. You may reduce the number of lights at the back of your tree if it is obstructed by a wall.
- Avoid connecting together more than three strings of light because this may cause them to burn out. Use the extension cord that you placed at the middle of your tree to plug your fourth string lights into. Tie the plugs together to keep them secure. [8]
-
8Start at the bottom of your tree. If you are going for a natural look, string your lights through and around your tree randomly. Avoid patterns or spirals. You may also place some lights into the deeper branches of your tree with others at the front to create some depth.[9]
- Move from the top to the bottom of your tree if you have a limited number of lights or a taller tree. This makes it easier to spread the lights out at the bottom of your tree. Install your lights from the top down so that you are always working towards the plug. Avoid hanging half a strand of lights at the top of your tree.
- Green plugs that attach a string of lights to another create a dead zone. Push the green plugs deep into the tree branches to hide the green plugs.
-
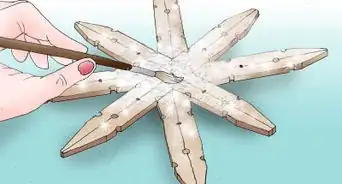
9Use floral wire to keep your lights in place. If your lights fall off branches or if you’re going for a specific design, use floral wire to keep them in place. Wrap the floral wire around the cord of your lights and bend the loose ends of the wire into the tree to prevent injury.[10]
- Floral wire can be purchased at your local flower shop or arts and crafts store.


Lighting an Artificial Tree Strategically
-
1Budget your lights. Artificial trees usually come in sections. You may use miniature tree lights to wrap around the branches if your light each section separately Use 50-light strands because they are less likely to burn out and are easy to handle.[11]
- Use about 12 boxes of 50-light strings if your tree is around six feet and about 20 boxes for trees that are around eight feet high. For showcase lighting, use about 40 boxes of 50-light strings for a tree that is around six feet high and 80 boxes for a tree that’s eight feet high.
-
2Check if all the bulbs are working. Before you start hanging your lights, plug them in to make sure that all of them are working. Keep your lights plugged in as you hang them to get a sense of how your finished tree will look.[12]
- Do not use lights that you cannot get to active within five minutes. Avoid any frustration of tinkering with lights for extended periods of time.
-
3Remove all tags. Tags can be found on each string of lights and can be unsightly. Simply use scissors to remove all tags before hanging up your lights on your tree.[13]
-
4Install a power strip to the closest receptacle. This will be a built-in circuit breaker as well as make it more convenient to turn your lights on and off. Simply turn the power strip on and off to activate your lights.[14]
-
5Start at the bottom of the trunk. Keep some slack in the first string of lights and create a loop by separating the cord from the first bulb. Place the loop over one of the greens or small branchlets close to the trunk and secure the cord by wrapping it a few times around the green.[15]
-
6Work from the tips to toward the trunk. Keep the string of lights taught as you place the lights from the tips of your branches moving towards the trunk. Make sure to wrap the cord over the branch and itself as you make your way towards the trunk.[16]
-
7Secure the cord at the trunk. When you reach the trunk, separate the cord from the last light and secure it by slipping it over a branch. Place the cord over to the closest branch, find a green part close to the trunk and wrap the cord around it. Make sure to pull the cord over the tip of the branch and wrap it over itself and the branch.[17]
-
8Repeat the process. Wrap branches in the same way until you reach the end of the light string. Plug in another set of lights and continue wrapping branches until you get to the end of the tree section, the section at which the tree comes apart. Position any excess lights along the branches instead of having them cross into another section of the tree.[18]
- Evenly spread out your lights so that your tree will be evenly lit from the top of your tree to the bottom.


Lighting Trees Outdoors
-
1Budget your lights. Plan on using at least three 100 light strings for every foot of height on your tree. So if your tree is six feet tall, you will be using about 18 light strings of 100 lights each.[19]
-
2Divide your tree or trees into sections. Avoid wrapping the lights around your tree as if it were a maypole. Start from the top and mentally divide your tree into three triangular sections until you get to the bottom of your tree’s cone.[20]
-
3Clip or remove any unsightly branches. Use florist shears to clip any drooping branches or any branches that seem out of place.[21]
-
4Plug in the first string of lights. Place the last bulb of the first string of lights at the top of your tree. Carefully weave your lights back and forth through the top triangle section. Do not cross your cord over itself. Plug in another set of lights once you’ve reached the end of the first and continue weaving until you reach the bottom of the top triangle section.
- Use a GFCI circuit for lights outside. These circuits are designed to prevent electrocution and shock.
-
5Repeat the weaving. Weave lights through each triangular section until you reach the bottom of the cone of your tree. Avoid connecting more than 300 lights to one another as they may burn out.[22]
-
6Look for dead spots. Any dark holes need to be filled. Rearrange your lights to fill in any gaps or until you’re satisfied.[23]
-
7Use a painter’s pole to string lights without a ladder. Remove the roller from a painters pole and use the metal bracket to string lights on trees that are 10 feet or taller without having to use a ladder.[24]
- Work your way to the bottom and use another extension cord if needed. Plug any additional extension cords to your main power strip.[25]
- Wrap your plugs with electrical tape to help keep them together as well as protect them from water.
-
8Use floodlights to show off evergreens. Use blue, white, or green lamps. Using yellow, red, amber, or pink can make your tree look a muddy brown.[26]
-
9Avoid hooks. A strong wind can easily dislodge your lights if you use hooks to hang them up. Use plastic gutter clips that you can purchase from your hardware store. You may also find them in your arts and craft store.[27]
-
10Be sure there is a working outlet outdoors. Test any outdoors sockets to be sure that they are functioning properly before plugging in any lights. Keep cords organized and neat away from any walkways where they can be tripping hazards.[28]


Keeping Safe
-
1Make sure all your lights are compatible. Christmas tree lights can be end to end or stacked. End to end is also known as string to string. Stacked plugs can join more light strands together relative to string to string plugs. Read the boxes to ensure that your lights are compatible before purchasing.[29]
-
2Check the wattage of the bulbs. Don’t plug more than two extension cords to one another and make sure that they can handle the wattage of the bulbs. Only buy the lengths of light string and extension cord that you will be using. Make sure that all the lights you are using have the same wattage to prevent power surges. This will also prolong the life of your lights.[30]
-
3Plug in your lights before removing them from the box. Make sure all the lights work before placing them on your tree. You don’t want any live wires or broken bulbs in your tree as they can be fire hazards.[31]
-
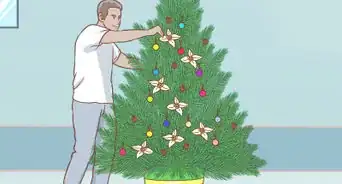
4Use miniature clear lights as base lighting. Miniature white lights make great base lighting when coupled with strands of larger cool-burning bulbs that come in a variety of colour. You may also add novelty lights like flashing lights, flickering flames, bubble lights, or lights of various shapes along with miniature lights.[32]


Warnings
- Christmas tree lights are manufactured with lead, which serves as a fire-retardant. To avoid lead poisoning, always wash your hands thoroughly after handling lights.⧼thumbs_response⧽
Things You'll Need
Indoor Tree
- A Christmas tree
- 4 strands of Christmas lights
- A power strip
- An electrical cord with a power splitter (brown or green)
- Scissors
- Cable ties (optional)
- Step stool (optional)
Outdoor Tree
- A GFCI receptacle
- Electrical tape
- A painter's pole (optional)


References
- ↑ http://www.realsimple.com/holidays-entertaining/holidays/christmas/christmas-tree-lights
- ↑ http://www.realsimple.com/holidays-entertaining/holidays/christmas/christmas-tree-lights
- ↑ http://www.houzz.com/ideabooks/5499851/list/how-to-light-your-christmas-tree-like-a-pro
- ↑ http://www.houzz.com/ideabooks/5499851/list/how-to-light-your-christmas-tree-like-a-pro
- ↑ http://www.houzz.com/ideabooks/5499851/list/how-to-light-your-christmas-tree-like-a-pro
- ↑ http://www.houzz.com/ideabooks/5499851/list/how-to-light-your-christmas-tree-like-a-pro
- ↑ http://www.houzz.com/ideabooks/5499851/list/how-to-light-your-christmas-tree-like-a-pro
- ↑ http://www.houzz.com/ideabooks/5499851/list/how-to-light-your-christmas-tree-like-a-pro
- ↑ http://www.realsimple.com/holidays-entertaining/holidays/christmas/christmas-tree-lights
- ↑ http://www.realsimple.com/holidays-entertaining/holidays/christmas/christmas-tree-lights
- ↑ http://www.bhg.com/christmas/trees/christmas-tree-lighting-tips/
- ↑ http://www.realsimple.com/holidays-entertaining/holidays/christmas/christmas-tree-lights
- ↑ http://www.houzz.com/ideabooks/5499851/list/how-to-light-your-christmas-tree-like-a-pro
- ↑ http://www.houzz.com/ideabooks/5499851/list/how-to-light-your-christmas-tree-like-a-pro
- ↑ http://www.bhg.com/christmas/trees/christmas-tree-lighting-tips/
- ↑ http://www.bhg.com/christmas/trees/christmas-tree-lighting-tips/
- ↑ http://www.bhg.com/christmas/trees/christmas-tree-lighting-tips/
- ↑ http://www.bhg.com/christmas/trees/christmas-tree-lighting-tips/
- ↑ http://www.bhg.com/christmas/trees/christmas-tree-lighting-tips/
- ↑ http://www.bhg.com/christmas/trees/christmas-tree-lighting-tips/
- ↑ http://www.realsimple.com/holidays-entertaining/holidays/christmas/christmas-tree-lights
- ↑ http://www.bhg.com/christmas/trees/christmas-tree-lighting-tips/
- ↑ http://www.bhg.com/christmas/trees/christmas-tree-lighting-tips/
- ↑ http://www.houzz.com/ideabooks/5499851/list/how-to-light-your-christmas-tree-like-a-pro
- ↑ http://www.houzz.com/ideabooks/5499851/list/how-to-light-your-christmas-tree-like-a-pro
- ↑ http://www.bhg.com/christmas/trees/christmas-tree-lighting-tips/
- ↑ http://www.bhg.com/christmas/trees/christmas-tree-lighting-tips/
- ↑ http://www.bhg.com/christmas/trees/christmas-tree-lighting-tips/
- ↑ http://www.bhg.com/christmas/trees/christmas-tree-lighting-tips/
- ↑ http://www.bhg.com/christmas/trees/christmas-tree-lighting-tips/
- ↑ http://www.bhg.com/christmas/trees/christmas-tree-lighting-tips/
- ↑ http://www.bhg.com/christmas/trees/christmas-tree-lighting-tips/
About This Article

Before you string Christmas tree lights on a real tree, plug all the strands in to make sure they're working. Then, plug the first strand of lights into the nearest outlet or extension cord, and wrap the lights around your tree's branches. Start the at bottom of the tree, and work from the trunk out to the branch tips. Next, once you're finished wrapping the first strand, plug another strand into it and continue wrapping it around branches. Finally, repeat the process with the other strands until you reach the top of the tree. To learn how to string Christmas tree lights on an artificial tree, scroll down!