X
wikiHow is a “wiki,” similar to Wikipedia, which means that many of our articles are co-written by multiple authors. To create this article, volunteer authors worked to edit and improve it over time.
This article has been viewed 27,818 times.
Learn more...
In Team Fortress 2, every class can taunt by pressing the G key. Depending on the weapon held, the type of taunt done can be changed. Certain weapons have an interesting feature about them: they can kill using their taunts. While most taunt kills are slow, they all deal extreme damage and can be used as a surprise attack. There are many reasons why people taunt kill: for achievements, to embarrass your enemy, or just to take advantage of an unwary target.

Method 1
Method 1 of 2:
Finding a Target
-
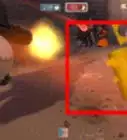
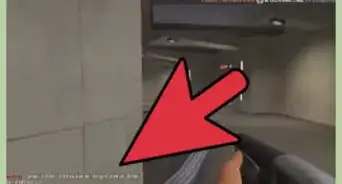
1Find a suitable target. Good targets are usually ones that do not move a lot, or don't move very quickly, such as a Sniper, a Heavy pushing the payload cart, or an Engineer that stands near his buildings. Snipers are particularly good targets as most of the time they stand perfectly still, looking through their scopes. Be careful when trying to taunt kill Heavies and Engineers though, as if the Heavy spots you he can deal some serious damage to you with his Minigun, and the Engineer will likely have a Sentry Gun nearby.
-
2Make your way to your target. Try to flank your target or take a route that isn't used as often, as this will reduce your chances of getting spotted or having to confront an enemy. Use all of the mobility options your class has available to get to your target quickly.
- Scout: Use the Scout's double jump and his natural quickness to get to your target quickly. The Scout also has many weapons that help with mobility, such as the Atomizer (allows you to triple jump), the Baby Face's Blaster (speed boost from dealing damage), the Bonk! Atomic Punch (grants invincibility), the Crit-a-Cola (increases speed when ingested), the Force-A-Nature (triple jumps from the knockback of firing it), the Soda Popper (three extra jumps when boost meter is full), and the Winger (higher jumps when active).
- Soldier: Make use of rocket jumping. To rocket jump, shoot a rocket at your feet as you press jump and crouch. The rocket's explosion will propel you forwards.
- Pyro: The Pyro can hold the Powerjack to gain a small speed boost, or the Pyro can flare jump with the Detonator. To flare jump, the Pyro must shoot a flare at his feet while pressing jump and crouch
- Demoman: The Demoman can use any of his shields (Chargin' Targe, Splendid Screen, or Tide Turner) to get a burst of speed, or can sticky jump with any stickybomb launchers. To sticky jump, place a stickybomb on the ground and detonate it with right click while pressing jump and crouch.
- Heavy: The Heavy can use the Buffalo Steak Sandvich to gain a speed boost, however be aware that this makes it so he can only use his melee weapon until the effect wears off. While the Heavy's Gloves of Running Urgently also boost speed, they don't have a taunt kill, meaning they can't be used if you want to taunt kill.
- Engineer: The Engineer can place teleporters to help him get closer to his target, or the Engineer can use his Wrangler and a mini-sentry to get to high places by standing on his mini-sentry, aiming the Wrangler up, and then shooting himself to propel himself upwards.
- Medic: The Medic can use the Overdose to get a small speed boost, as long as he has at least 10% of his UberCharge built, or he can use the Quick-Fix to gain any mobility boosts the person he is healing has, such as the Scout's speed.
- Sniper: The Sniper does not have a weapon that grants him increased mobility, however the Sniper is relatively quick naturally, so use this speed to your advantage.
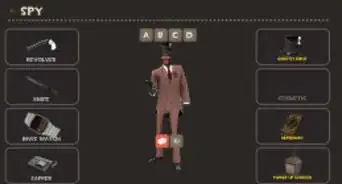
- Spy: The Spy can use his cloak and disguised to make it to his target without confrontation. With these, you can take the main route and not have to resort to detours (if the main route is faster), as you will not be confronted if you are disguised or cloaked.
-
3Once you are at your target, prepare for the taunt. Some taunt kills have different ranges from one another, so make sure to line up your taunt correctly. If you are using Scout, you might want to drink your Bonk! Atomic Punch (if you are using it) to grant you invincibility in case someone spots you. If you are using Spy and have used your cloak to reach your target, do not uncloak too close to them, as they might hear the uncloaking sound. This is especially true for the Dead Ringer, as it has a loud and distinct. Make sure to also undisguise if you are disguised as you cannot taunt while disguised.
-
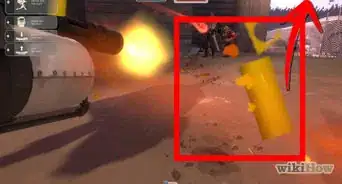
4Use your taunt. Press G to use your taunt, or if you have any equippable taunts equipped (such as the Conga), press G twice.
-
5Watch as your class preforms the taunt. If the taunt connect, congratulations, you have just preformed a successful taunt kill! If the taunt doesn't connect, the taunt is interrupted, or you get killed, better luck next time! Try again, and hopefully if will connect next time.


Advertisement
Method 2
Method 2 of 2:
Waiting for a Target
-
1Make your way to a spot where lots of easy targets travel to. For example, many maps have an area where lots of Snipers congregate and stand still while aiming, so find one of those spots.
-
2Find a hiding place near the spot. Make sure that your hiding spot has a line of sight to the spot where the targets go to. Be creative when hiding; use the environment to your advantage. Hide behind objects that people won't expect you to hide behind, such as a bush or tall grass. Try to find hiding places that are high off the ground; many people do not look upwards when searching for people.
-
3Wait for an enemy to come. This may require some time, but it can potentially be easier than finding a target and approaching them.
-
4Once a suitable target has reached the spot, prepare for the taunt kill. Since some taunts have different ranges, you must get in the correct position in order for them to hit. If you are using Spy, make sure to undisguise and unclock, and if you are using Scout, you may want to drink a Bonk! Atomic Punch (if equipped) to gain invincibility. If the enemy that has reached the spot isn't exactly a suitable target (such as a Scout that won't stand still), you may want to continue to wait until an easier target has come, such as a Sniper.
-
5Use your taunt. Press G to use your taunt, or if you have any equippable taunts equipped (such as the Conga), press G twice.
-
6Watch as your class preforms the taunt. If the taunt hits the enemy, congratulations, you have successfully preformed a taunt kill! If the taunt doesn't hit, better luck next time! Try again, and hopefully if will connect next time.


Advertisement
Community Q&A
-
QuestionDoes this work 100% of the time?
 Community AnswerIf you do it right, then yes, but they can go wrong. Sometimes someone can go from behind you and surprise you and then kill you. So it depends.
Advertisement
About This Article
Advertisement