X
This article was co-authored by wikiHow staff writer, Nicole Levine, MFA. Nicole Levine is a Technology Writer and Editor for wikiHow. She has more than 20 years of experience creating technical documentation and leading support teams at major web hosting and software companies. Nicole also holds an MFA in Creative Writing from Portland State University and teaches composition, fiction-writing, and zine-making at various institutions.
The wikiHow Tech Team also followed the article's instructions and verified that they work.
This article has been viewed 46,567 times.
Learn more...
This wikiHow teaches you how to find the read and write speeds of a USB drive in Windows or macOS.
Steps
Method 1
Method 1 of 2:
Using USBDeview for Windows
-
1Connect the USB drive you want to test. USB ports are usually on the side or front of laptops, and on the front or back of desktop computers.
-
2Download the USBDeview zip file. Here's how:
- Go to http://www.nirsoft.net/utils/usb_devices_view.html in a web browser.
- Scroll down to the “Download USBDeview” links (Download USBDeview and Download USBDeview for x64 systems).
- Click the link that pertains to your version of Windows.
- If the download does not begin automatically, click Save File.
Advertisement -
3Press ⊞ Win+E. This opens the File Explorer.
-
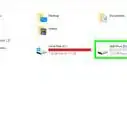
4Click the Downloads folder. It’s in the left panel. This displays the contents of your Downloads folder in the right panel.
-
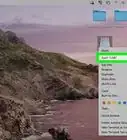
5Right-click the USBDeview zip file. It’s called USBDeview.zip or USBDeviewx64.zip, depending on the version. A menu will expand.
-
6Click Extract All…. The "Extract Compressed Folders" window will appear.
-
7Click Extract. The contents of the zip file will extract. When finished, you’ll be brought to the folder containing the installation files.
-
8Double-click USBDeview. A security warning will appear.
-
9Click Yes. The application will launch.
-
10Click the USB drive you want to test. You may have to scroll down the list to find it.
-
11Click the File menu. It’s at the top-left corner of the window.
-
12Click Speed Test. It’s near the bottom of the menu.
-
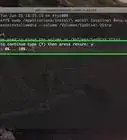
13Click Start Test. USBDeview will now check the read and write speeds for this drive. The results will appear next to “Write Speed” and “Read Speed.”
-
14Click Close. This closes the speed test.


Advertisement
Method 2
Method 2 of 2:
Using Blackmagic Disk Speed Test for macOS
-
1Connect the USB drive you want to test. USB ports are usually on the side or front of laptops, and on the front or back of desktop computers.
-
2
-
3Type blackmagic speed test into the search bar. It’s at the top-right corner of the App Store. A list of matching results will appear.
-
4Click Blackmagic Disk Speed Test. It’s the black, gray, and blue speedometer icon.
-
5Click GET.
-
6Click Install App. This will install the app on your Mac. Once the installation is complete, the “Install App” button will change to “OPEN.”
- You may have to enter your administrator password to begin the download.
-
7Click OPEN. This launches the Blackmagic Disk Speed Test app.
-
8Click the gear icon. It’s between the two meters at the center of the app.
-
9Click Select Target Drive.
-
10Select your USB drive. It’ll be in the left column.
-
11Click Open.
-
12Click Speed Test Start. The test will begin. Once the test is finished, the read and write speeds will appear at the bottom of each meter.


Advertisement


About This Article

Nicole Levine, MFA
wikiHow Technology Writer
This article was co-authored by wikiHow staff writer, Nicole Levine, MFA. Nicole Levine is a Technology Writer and Editor for wikiHow. She has more than 20 years of experience creating technical documentation and leading support teams at major web hosting and software companies. Nicole also holds an MFA in Creative Writing from Portland State University and teaches composition, fiction-writing, and zine-making at various institutions. This article has been viewed 46,567 times.
How helpful is this?
Co-authors: 3
Updated: October 18, 2018
Views: 46,567
Categories: External Storage Devices
Advertisement