This article was co-authored by wikiHow staff writer, Hunter Rising. Hunter Rising is a wikiHow Staff Writer based in Los Angeles. He has more than three years of experience writing for and working with wikiHow. Hunter holds a BFA in Entertainment Design from the University of Wisconsin - Stout and a Minor in English Writing.
There are 15 references cited in this article, which can be found at the bottom of the page.
This article has been viewed 47,250 times.
Learn more...
An exhaust pressure sensor, also known as an EBP or DPF sensor, measures differences between your vehicle’s exhaust before and after it passes through a filter. This helps determine if you need to clean or replace the filter to avoid clogs. If the sensor doesn’t work properly, it could make your check engine light come on and cause the engine to hesitate or stumble. If you want to check the sensor while it’s still attached to your vehicle, use a multimeter and vacuum pump to test the pressure and voltage readings. Otherwise, you can remove the sensor and test the electrical resistance between the ports.
Steps
Assessing Voltage and Pressure Changes
-
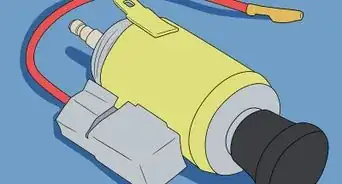
1Locate the exhaust pressure sensor attached to the engine or the firewall. Pop open the hood of your vehicle so you can access the engine. Look around for a small, black rectangular box that has 2 rubber hoses coming out from the bottom and an electrical connector plugged into one side. Usually, you can find it bolted to the side of your engine or on the vehicle’s firewall at the front or back of the compartment. If you have trouble locating it on your own, consult your vehicle’s manual to find it.[1]
- If you still can’t find the pressure sensor in your vehicle, take your vehicle to a mechanic since the sensor may be built into the pipes.
-
2Place T-pins in the ground and signal leads on the electrical connector. Locate the cube-shaped connector that has wires coming out from it that lead toward the battery. Slide the long, straight end of the T-pin, which is a piece of conductive metal shaped like the letter T, into the port that contains the ground wire labeled with a negative sign (-). Put another pin into the port with the signal wire, which is usually blue. Leave about 1–2 in (2.5–5.1 cm) of the pins sticking out so you can test them. [2]
- You can buy metal T-pins from hardware stores or online.
- The ground and signal ports are usually located on opposite sides from one another, so you’ll leave the middle port empty.
- Keep your vehicle turned off while you’re plugging in the pins so you don’t risk getting shocked.
Advertisement -
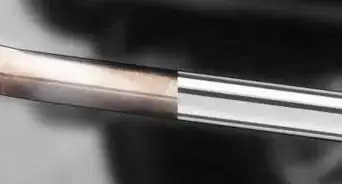
3Remove the rubber intake hose from the sensor. Locate the rubber hose on the bottom of the sensor that’s furthest to the left, which is for the exhaust intake. If there’s a pipe clamp, unscrew it before pulling the hose off of the sensor. Otherwise, carefully pull the hose straight down to remove it. Set the rubber hose aside while you’re working so it’s out of the way.[3]
- If you notice the rubber hose has cracks or damage, replace it as soon as you can since it may leak later on.
-
4Connect a handheld vacuum pump to the sensor’s intake port. Push the end of the pump’s hose onto the exposed sensor port. Make sure the hose forms a tight seal on the port, or else you won’t be able to test the sensor accurately. Position the pump so you can easily see the pressure gauge and access the hand pump.[4]
- Vacuum pumps measure how much pressure builds up inside the sensor when you add more air. You can buy vacuum pumps online or from auto part stores.
- Avoid removing both hoses from the pressure sensor since you won’t produce accurate results.
-
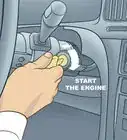
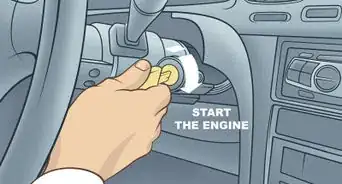
5Start your vehicle’s engine. Make sure you’re outside or in a well-ventilated area so exhaust fumes don’t build up. Turn the key in the ignition and keep your vehicle running throughout the test. Allow the engine to run for about a minute so it can warm up before running your tests.[5]
- The engine may get hot while you’re working so avoid touching it so you don’t get burnt.
-
6Turn a digital multimeter on to measure voltage. Turn the dial on the multimeter so it points to the DCV setting, which measures direct current voltage. Plug the meter’s red probe into the positive port labeled with a plus sign and the black probe plugged into the negative port.[6]
- You can buy multimeters online or from your local hardware store.
- Opt for a digital multimeter since they can perform multiple functions and will be easier to read while testing the sensor.
- Your multimeter may also be labeled with the letter V with 3 horizontal lines on top of it instead of DCV.
-
7Hold the red and black probes on the pins in the signal and ground ports respectively. Position the exposed end of the red probe so it touches the pin. Then place the black probe on the other pin, making sure the probes don’t touch one another. Keep pressing the probes against the metal so they make firm contact, or else you may get inaccurate readings later on.[7]
Variation: If you have trouble keeping the probes against the pins, opt to use ones that have alligator clips and attach them to the pins so you don’t have to hold them in place.
-
8Check the multimeter reading for the baseline voltage. Keep the probes firmly pressed against the pins in the sensor’s connector. Look at the display on the multimeter to find the voltage traveling through the sensor. Typically, the reading will be 5 V or less, but it may vary slightly depending on your vehicle.[8]
- If you don’t get any reading on your multimeter, make sure you’re holding the probes against the correct pins. If you still don’t get a reading, then there may be a problem with your vehicle’s electrical system.
-
9Squeeze the handle on the pump to raise the pressure to 0.5 PSI. Firmly pull down the pump’s handle so it’s completely depressed before letting it go to add pressure to the sensor. Continue squeezing and releasing the handle until the dial points to 0.5 PSI, which should be enough pressure to change the voltage.[9]
-
10See if the voltage increases to determine that the sensor works properly. Look at the multimeter’s display again to see if the voltage increased. If you notice a higher listing than the baseline reading, then the sensor is working properly and you may have an issue somewhere else in the exhaust system. However, if the reading doesn’t change or it gets lower, you may have a faulty sensor.[10]
- You can buy replacement sensors from auto parts stores and they usually cost around $100–150 USD.


Checking the Sensor’s Resistance
-
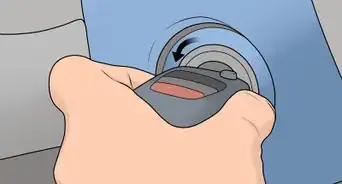
1Disconnect the pressure sensor from your vehicle. Pop your vehicle’s hood and look for the sensor, which is a small, rectangular black box that has 2 rubber hoses and an electrical connector attached to the sides. Usually, you’ll find the sensor bolted onto the side or bottom of the engine, or along the firewall in the back of the engine well. Pull the electrical connector straight out from the port to disconnect it from the battery. Loosen any pipe clamps around the rubber hoses on the bottom of the sensor before pulling them off. Locate the bolts on the sides of the sensor holding it in place and unscrew them with a wrench before pulling the sensor out.[11]
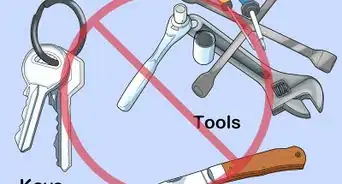
- Avoid using your vehicle if you don’t have the sensor attached since it will cause unfiltered exhaust fumes to escape.
- Keep your vehicle turned off while you remove the pressure sensor.
-
2Set a digital multimeter to measure ohms. Turn the dial on the multimeter to the ohm setting, which is usually labeled with the omega symbol (Ω). Connect the red probe lead to the positive terminal on the multimeter. Place the black lead in the negative port on the bottom of the multimeter so you’re able to test the sensor properly.[12]
- You can also use an ohmmeter, which is similar to a multimeter but only measures electrical resistance.
-
3Hold the multimeter’s negative lead against the ground post on the sensor. Look at the port on the sensor where you plug in the electrical connector to find 3 prongs. Look for the prong labeled with a negative sign (-) or listed as a ground port. Put the exposed end of the black lead against the prong and hold it in place.[13]
- Typically, the ground port is the leftmost or rightmost prong but it may vary depending on the sensor you have.
-
4Press the positive lead from the meter on the sensor’s signal post. Locate the signal prong post in the port next to the other prongs. Check the prong labels to find the one labeled “Signal” or using a positive sign (+). Keep the red probe against the prong in order to take a resistance reading.[14]
-
5Get a new pressure sensor if you get an open line reading on the meter. Look at the display on the multimeter to see if it says “OL,” which means open line. If it does, that means the sensor doesn’t have any electrical resistance and won’t work properly. Buy a new sensor that’s the same shape and design as the one you have so it fits in your vehicle properly.[15]
- If you notice the numbers changing on the multimeter display, then the sensor has electrical resistance, meaning a current can pass through it and it will still work in your vehicle.


Warnings
- Always work outdoors or in a well-ventilated space when running your vehicle to prevent harmful fumes from building up.⧼thumbs_response⧽
Things You’ll Need
Assessing Voltage and Pressure Changes
- Metal T-pins
- Digital multimeter
- Handheld vacuum pump
Checking the Sensor’s Resistance
- Digital multimeter


References
- ↑ https://youtu.be/G1HHfvudBD8?t=69
- ↑ https://youtu.be/IZqLZI6USeY?t=177
- ↑ https://youtu.be/IZqLZI6USeY?t=215
- ↑ https://youtu.be/IZqLZI6USeY?t=228
- ↑ https://youtu.be/kegN1c6fkag?t=179
- ↑ https://www.bobvila.com/articles/how-to-use-a-multimeter/
- ↑ https://youtu.be/IZqLZI6USeY?t=211
- ↑ https://youtu.be/IZqLZI6USeY?t=251
- ↑ https://youtu.be/cnctglYsqfA?t=132
About This Article