This article was co-authored by Jeanine Hattas Wilson. Jeanine Hattas Wilson is a Professional Painter and the President of Hattas Public Murals, Inc. With nearly 20 years of experience, Jeanine specializes in creating, overseeing, designing, and painting murals. Jeanine holds a BA in Advertising from Marquette University and a Studio Painting Minor from The Milwaukee Institute of Art & Design. She has studied at The Atelier Artien in Paris, France, Los Angeles Academy of Figurative Art, and under renowned artists such as Robert Liberace, Michael Siegel, and William Cochran. To date, Hattas Public Murals has painted nearly 5,000 commissioned works of art in homes and commercial and public spaces.
This article has been viewed 23,302 times.
If you are starting a home project and have plans to do some painting, it’s important to understand the different types of paint available and how to prepare them for use. The most common paint is latex-based and can be mixed with water for thinning. Oil-based paint can be trickier to work with since it requires specific mixing agents like turpentine. You never want to mix water with oil-based paints. Paint thinning is a process where attention is paid to paint consistency in order to achieve the proper texture for application.[1]
Steps
Thinning Latex Paint
-
1Pour the paint into a large container. Remove and discard any dried paint chunks. If you have a large painting project, a 5-gallon bucket (19 l) is a good choice since you will eliminate the need for multiple mixing sessions.
-
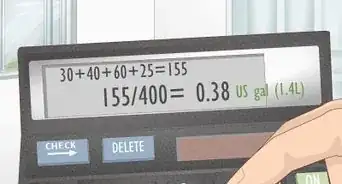
2Add water to the paint.[2] The general rule is to add 1/2 cup (118 ml) of water for each gallon (3.7 l) of paint you use. Never add all the water at one time. Gradually mix it in at a slow pace while you stir.
- You can also revive old, dried out paint by adding the same ratio of water and gradually mixing.
Advertisement -
3Mix the paint and water by stirring. Stir thoroughly and continuously while keeping an eye on how the paint texture changes. Periodically remove the stick from the can to observe the consistency of the paint. Keep stirring until the paint reaches a creamy texture.
-
4Conduct a funnel test. To check the paint’s viscosity, hold a funnel over the paint bucket and run some paint through it using a ladle or spoon. This is an important step if you are going to use a paint sprayer for your project. The paint should flow through the funnel freely and without clogging or backing up. If the funnel becomes clogged, the paint is not ready to be used and needs additional thinning.[3]
- Continue gradually stirring and adding small amounts of water to the paint until it passes the funnel test.


Thinning Oil Paint
-
1Put on gloves. Gloves are necessary to protect your hands from staining. Choose a pair of gloves that can be dedicated exclusively to paint purposes because the paint will not wash out.
- Thinning oil paint requires a few additional steps that differ from the thinning process for latex paint. Oil paint will permanently stain nearly any surface it comes in contact with so take care to not spill any while you are working.
-
2Pour oil paint into a large container. It’s important to use a container dedicated to this purpose since stains are irreversible. Discard of any dried pieces you see. For big projects, using a large container will help reduce the number of times you will need to repeat the thinning process.
-
3Add one part turpentine for every three parts of paint you use. A “part” refers to the specific unit of measurement you are using during this process. It can be in gallons, milliliters, liters, or ounces.
- Don’t worry if you are unsure how to correctly measure in parts. You can always check the measurements of your mixing container and adjust your other measurements accordingly.
-
4Stir the paint. Use a stick that will never be used for anything else and mix for several minutes. Monitor the consistency as you stir and stop when the paint appears to have a creamy texture.
- There may be some trial and error during the mixing phase. Slowly add additional thinner to the paint if you feel it is not the texture how you would prefer.


Testing if Your Paint is Ready for Use
-
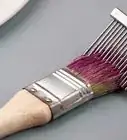
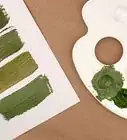
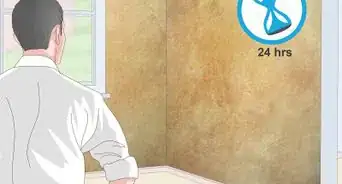
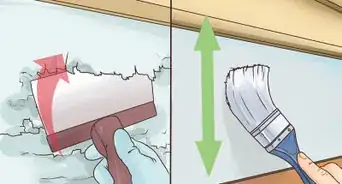
1Brush a thin layer paint onto a test surface. A wooden panel or piece of drywall are good testing materials to determine if your paint is ready for your project. Allow the paint to dry completely and then add a second coat. Once the second coat has dried, notice how the paint looks. The goal is for the paint to have a dry, smooth texture on the test surface.
-
2Add more water or a thinning agent if desired. If your paint still hasn’t reached the right consistency, try stirring in small amounts of water or turpentine depending on the type of paint you are using. Carefully monitor the texture while you are mixing so your paint doesn’t become oversaturated.
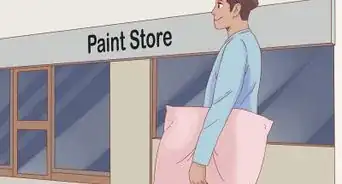
- A paint thinning product for latex paint can also be purchased at a hardware store if you are unable to achieve your desired results using water.
-
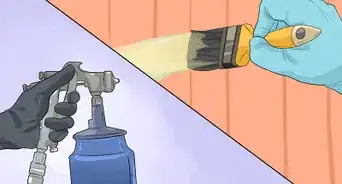
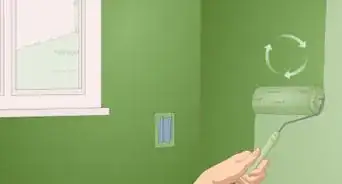
3Begin work on your painting project. Depending on your project’s needs, chose either a paint sprayer, brush, or roller to apply the paint to your intended surface. Check the quality of the paint between coats and re-mix materials as often as needed.


Judging if Your Paint is too Thick
-
1Choose the right workspace. Working in a well-ventilated room will make a noticeable difference during the paint thinning process. Latex paint produces potent fumes that can be dangerous if over inhaled. Your work area should include windows or vents if working indoors. Outdoor workspaces are usually your best option to avoid fume irritation.[4]
-
2Determine the type of paint you are using. Household paint generally comes in latex or oil-based options. Depending on which type you use, the steps for thinning will be different. Latex paint is water based and is typically easier to mix. Oil-based paint requires specific mixing agents that are not usually found around the house. Check the label on the can to confirm what kind of paint you have.
-
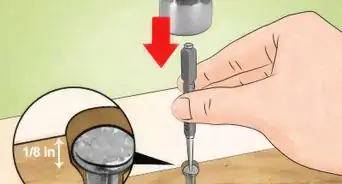
3Open your can of paint. If you don’t have a paint can opener tool, a standard flat head screwdriver is a good substitute. Insert the head of the screwdriver between the lid and rim at the top of the can, and gently lever the handle in a downward direction. Turn the can in a clockwise direction to loosen the seal and drive the can open. Avoid prying the entire lid off at one time so it can be preserved to seal the can again after use.
-
4Stir the paint thoroughly. Using a paint stirrer or stick, stir for 5 to 10-minutes. Use full and deep rotations so the paint molecules are properly combined.[5]
- Your goal with stirring is to combine the heavier molecules that settle at the bottom of the can with the lighter molecules at the top.
-
5Observe the thickness of the paint. Lift the stirrer from the can and allow the paint to drip over a paint tray. Notice the paint as it drips off the stirrer. It should have an even flow as it falls and a consistency that resembles heavy cream. If you notice it falls off the stick in globs then it will need thinning before use.


References
- ↑ https://www.bobvila.com/articles/how-to-thin-latex-paint/
- ↑ Jeanine Hattas Wilson. Professional Painter. Expert Interview. 5 May 2021.
- ↑ https://www.bobvila.com/articles/how-to-thin-latex-paint/
- ↑ https://www.bobvila.com/articles/how-to-thin-latex-paint/
- ↑ https://www.bobvila.com/articles/how-to-thin-latex-paint/
About This Article