This article was co-authored by wikiHow Staff. Our trained team of editors and researchers validate articles for accuracy and comprehensiveness. wikiHow's Content Management Team carefully monitors the work from our editorial staff to ensure that each article is backed by trusted research and meets our high quality standards.
There are 19 references cited in this article, which can be found at the bottom of the page.
This article has been viewed 43,114 times.
Learn more...
A basic knot may be enough to join two pieces of string for a project, but when it comes to boating, you will need to use different kinds of knots. The type of knot you use depends on what you are tying it to and the purpose. For example, you would use one knot for tying an anchor and a different knot for mooring a boat. You should also keep the situation in mind: some knots need to be sturdy, while other knots need to come loose quickly and easily.
Steps
Making an Anchor Bend
-
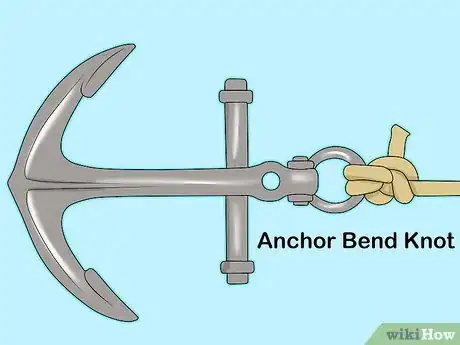
1Use the anchor bend to secure a rope to an anchor. You can then use the rest of the rope to secure the anchor to your boat. It would be a good idea to add a second knot at the end of the rope to use as backup in case the rope slips.[1]
-
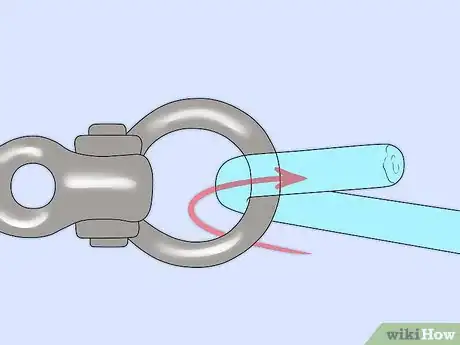
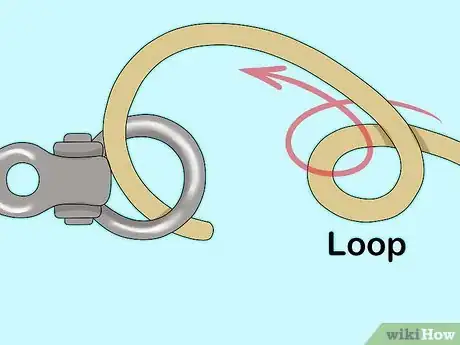
2Wrap the end of the rope once around the anchor's ring. Feed the end of the rope through the ring on top of the anchor. Wrap the rope around the ring once to make a loop. The end of the rope should now be alongside the rest of the rope.[2]
- Keep the rope loosely wrapped around the ring so that you have a small loop.
Advertisement -
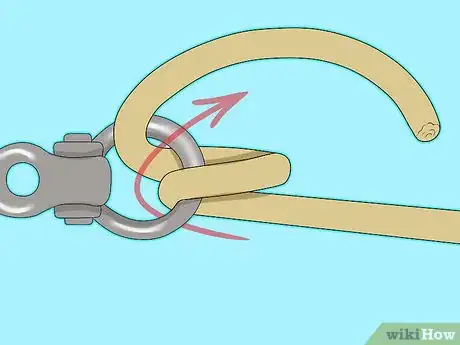
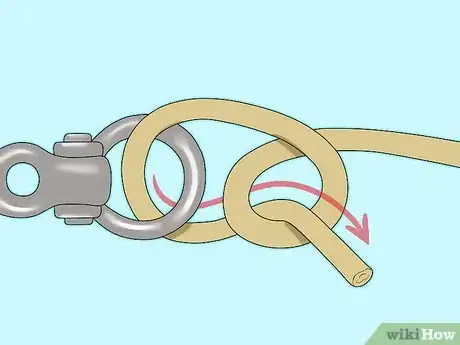
3Pull the end of the rope across the rest of the rope. Do not lose the shape of the loop around the ring. Point the end of the rope towards the loop.[3]
-
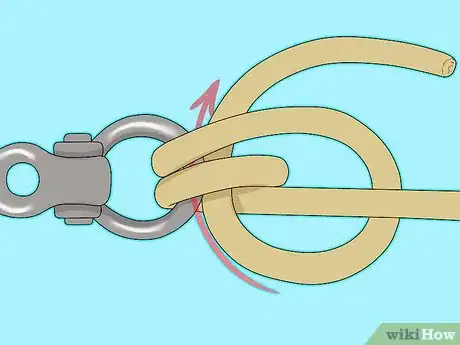
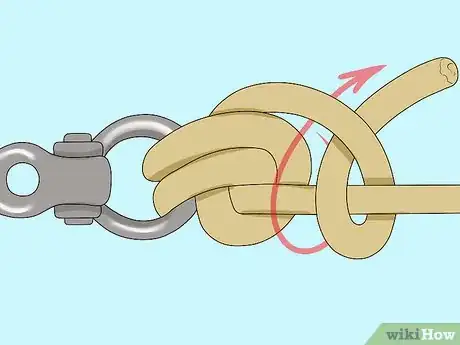
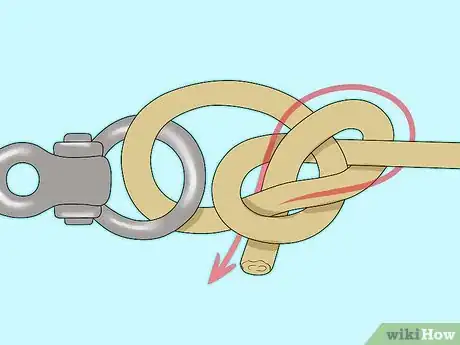
4Feed the end of the rope through the loop. Pull it just tight enough so that the rope crossing in front of the rest of the rope tightens.[4]
-
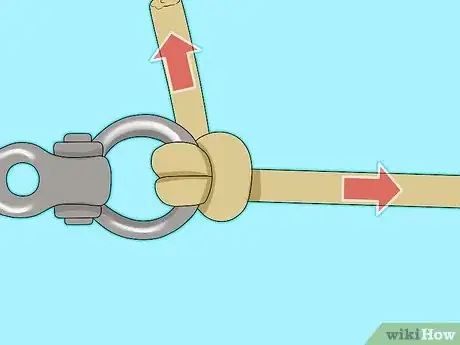
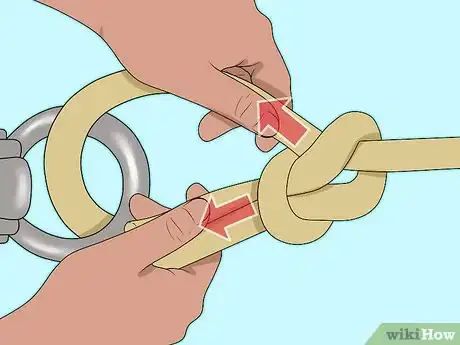
5Tug on both ends of the rope and adjust the knot as needed. Alternate between tugging on the ropes and shifting the knot around until everything is nice and tight. Make sure that the end of the rope is resting between the anchor's ring and the knot itself.[5]
-
6Tie a backup knot around both ends of the rope, if desired. Wrap the tail end of the rope into a small loop. Feed the end of the rope through the loop, then tug on it to tighten the knot. Repeat this step for the other end of the rope, if desired. You don't have to do this, but it will help prevent the rope from accidentally slipping.[6]
Tying a Bowline Knot
-
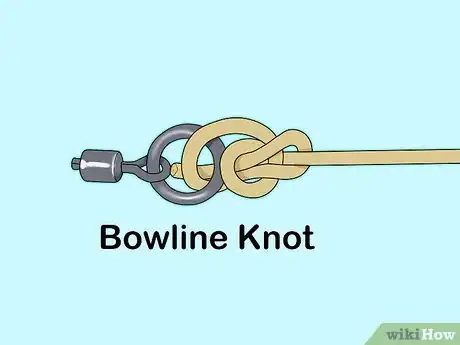
1Use the bowline if you need a strong hold that is easy to untie. The bowline knot also has a loop at the end that you can put around a cleat or post if you need to moor your boat temporarily.[7] The knot tightens under pressure, so it won't untie as long as it is bearing a load.[8]
- Although this knot is secure, do not use it in emergency situations.
-
2Form the end of the rope into a loop. Drape the rope across your palm. Wrap the end of the rope to make an O-shaped loop. Make sure that the end of the rope is crossing in front of the rest of the rope.[9]
-
3Feed the tail end of the rope through the loop. Take the end of the rope and bring it behind the loop. Pass the end through the loop so that you have a second loop right next to it. The second loop should be big enough for your hand to pass through.[10]
-
4Bring the tail around the rope, then pull it back through the hole. Bring the tail behind the rope, then pull it back down through the first loop that you made. Keep the tail end under the second loop.[11]
-
5Pull on the rope to tighten the knot. Hold onto the rest of the rope and tug on the tail end. You can slide the knot up and down the rope to make the second loop larger or smaller.[12]
Knotting a Cleat Hitch
-
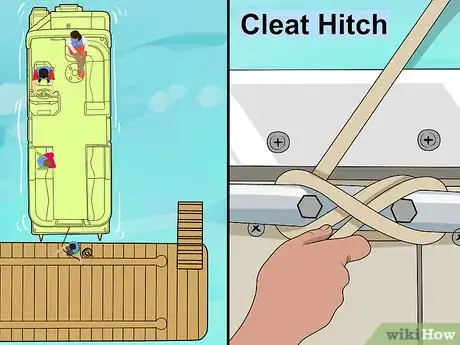
1Use a cleat hitch if you need to tie your boat to a floating dock. The cleat hitch is both easy to tie and untie. It is also very strong, so it you can use it to firmly secure most watercraft.[13]
- You use the cleat hitch to tie ropes to cleats. Cleats are shaped sort of like T's.
-
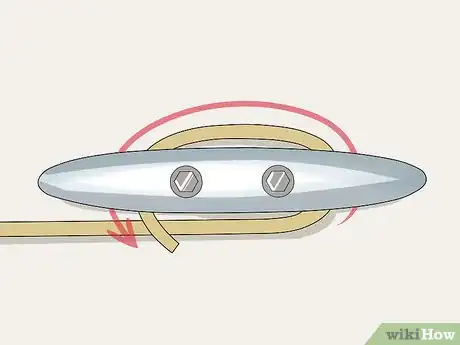
2Wrap the end of the rope around the base of the cleat. Make a single full wrap around the base of the cleat. The stationary end of the rope should be perpendicular to the cleat. The end you are holding should be parallel to the cleat.[14]
-
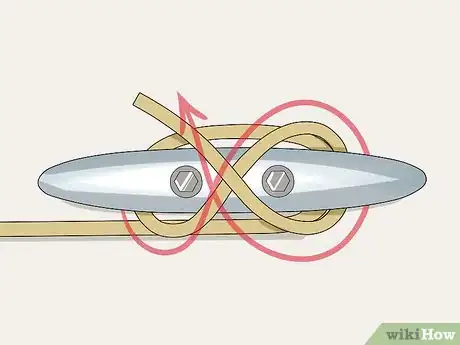
3Wind the end of the rope around the horns to form a figure eight. Pull the tail end of the rope across the top of the cleat. Wrap it under the first horn, then drag it over the top of the cleat. Wrap it under the second horn.[15]
- Keep the rope between the screws on top of the cleat.
- If the cleat is large, or if the rope will be under a lot of tension, make 2 to 3 more figure eights.
-
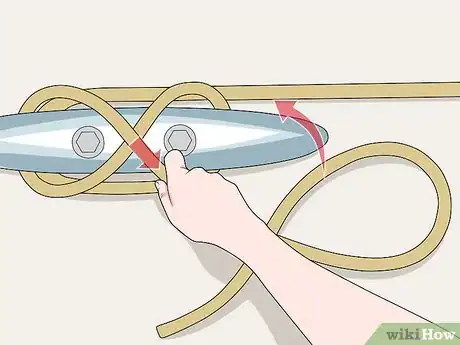
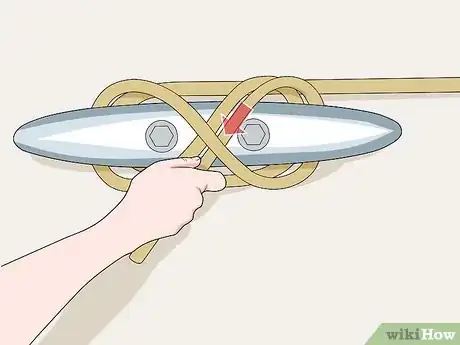
4Pull the end of the rope under the top wrap. You'll notice that you have rope crisscrossing over the top of the cleat. Find the topmost rope, and pass the end of the rope under it.[16]
-
5Tug on the tail end of the rope to tighten the knot. Make sure that the tail end is pointing away from the stationary rope.
Knotting a Clove Hitch
-
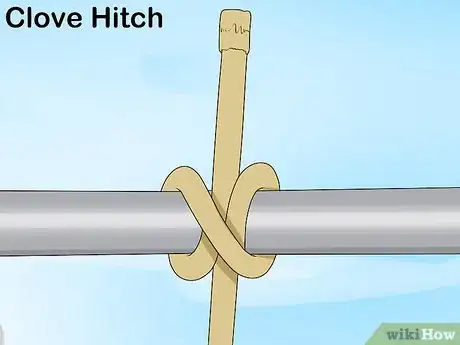
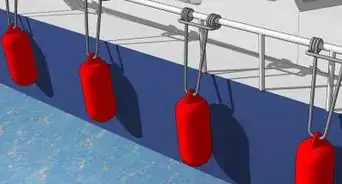
1Use the clove hitch if you need something quick. Although the clove hitch doesn't hold as well as other knots, it is quick to tie and untie. It is great for hanging fenders over the side of your sailboat when docking.[17]
- Be aware that the knot can slip if there is no constant pressure on it. The knot can also come loose if the object that it's attached to rotates.[18]
-
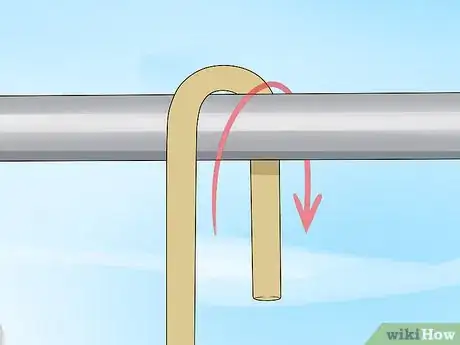
2Wrap the end of the rope once around whatever you are attaching it to. Place the rope vertically in front of the bar, handle, ring, etc. with the end pointing up. Bring the end down behind the bar. Pull it under the bar, then back up again.[19]
-
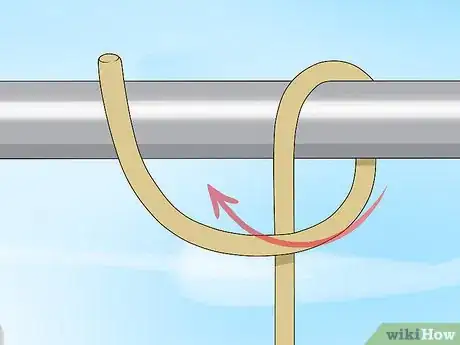
3Cross the rope over itself. Bring the rope back down behind the bar again. This time, make sure that it crosses over the rope that is already around the bar. If you were to look down on the bar, you'd see an X-shape formed by the rope.[20]
-
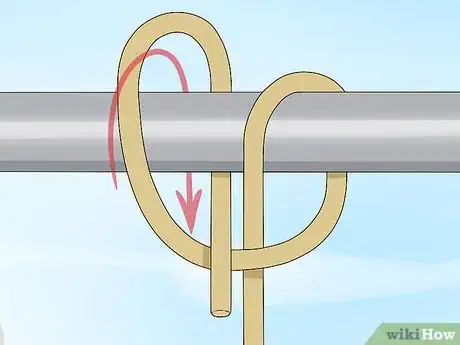
4Bring the rope in front of the bar and under the last wrap. Pull the rope back under the bar and up the front. Tuck it under the top rope that is forming the X.[21]
-
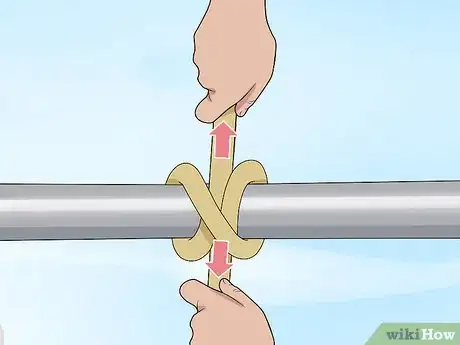
5Tug on both ends of rope to tighten the knot. Pull one end upward and the other end downward simultaneously. This will cause the knot to shift towards the front of the bar and tighten. The knot will remain tight as long as there is constant tension on the rope.ref>https://www.youtube.com/watch?v=TLVBdF7dPyI&feature=youtu.be&t=25s</ref>
Doing a Figure Eight Knot
-
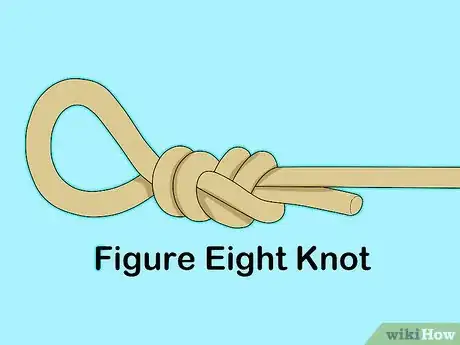
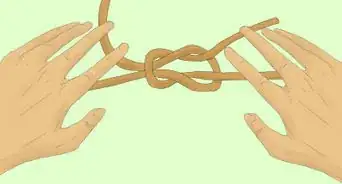
1Use a figure eight knot if you need something strong. The figure eight knot has a firm, non-slip loop at the end. It is one of the strongest knots there is and ideal for mooring boats.[22]
-
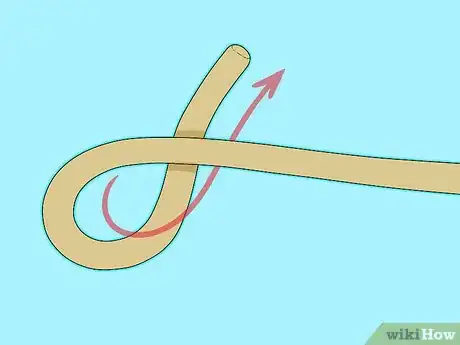
2Make a loop near the end of the rope. Measure 24 inches (61 cm) from the end of the rope, then wrap the rope into a loop. The tail needs to cross in front of the rest of the rope.[23]
-
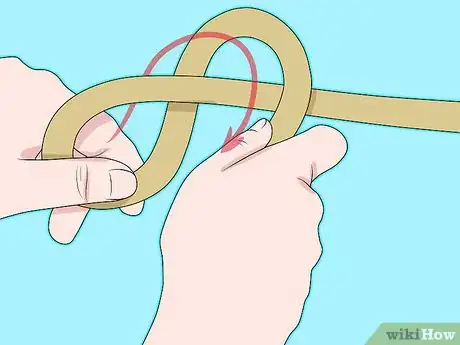
3Wrap the tail end behind the rest of the rope. Hold the loop in your non-dominant hand. Use your other hand to wrap the tail end of the rope behind the rest of the rope, just under the loop.[24]
-
4Feed the tail end through the loop, then tighten. Pull the tail end upwards and push it through the loop. Pull upwards on the tail end and downwards on the rest of the rope to tighten the knot.[25]
-
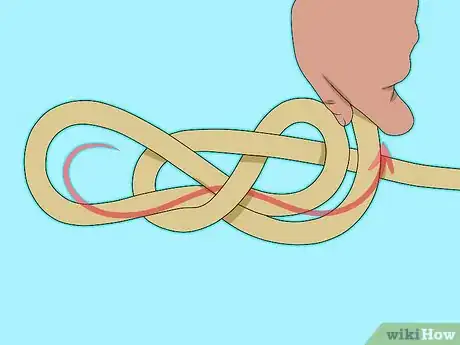
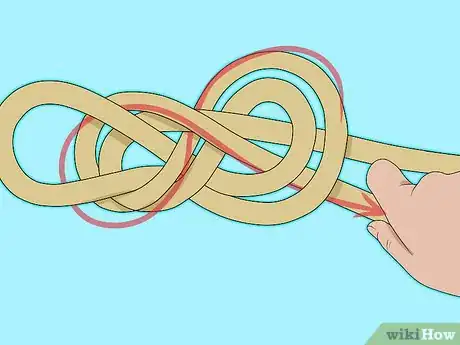
5Use the end of the rope to retrace the knot, if desired. If you have enough rope leftover, you can use it to retrace your knot. Simply weave the tail around the knot, following the rope that's already there. This will make the knot larger. If you want to, you can leave a loop at the bottom to hook onto things.[26]
References
- ↑ http://www.jetdock.com/knowledge-center/how-to-tie-5-common-boating-knots.asp
- ↑ https://www.youtube.com/watch?v=35pk9P49AFw&feature=youtu.be&t=5s
- ↑ https://www.youtube.com/watch?v=35pk9P49AFw&feature=youtu.be&t=20s
- ↑ https://www.youtube.com/watch?v=35pk9P49AFw&feature=youtu.be&t=25s
- ↑ https://www.youtube.com/watch?v=35pk9P49AFw&feature=youtu.be&t=35s
- ↑ http://www.jetdock.com/knowledge-center/how-to-tie-5-common-boating-knots.asp
- ↑ http://www.jetdock.com/knowledge-center/how-to-tie-5-common-boating-knots.asp
- ↑ https://asa.com/news/2013/04/03/sailing-knots/
- ↑ https://www.youtube.com/watch?v=9eg79w52wvI&feature=youtu.be&t=30s
- ↑ https://www.youtube.com/watch?v=9eg79w52wvI&feature=youtu.be&t=36s
- ↑ https://www.youtube.com/watch?v=9eg79w52wvI&feature=youtu.be&t=40s
- ↑ https://www.youtube.com/watch?v=9eg79w52wvI&feature=youtu.be&t=45s
- ↑ http://www.jetdock.com/knowledge-center/how-to-tie-5-common-boating-knots.asp
- ↑ https://www.youtube.com/watch?v=QlwWXpTQd1Q&feature=youtu.be&t=18s
- ↑ https://www.youtube.com/watch?v=QlwWXpTQd1Q&feature=youtu.be&t=30s
- ↑ https://www.youtube.com/watch?v=QlwWXpTQd1Q&feature=youtu.be&t=47s
- ↑ https://asa.com/news/2013/04/03/sailing-knots/
- ↑ http://www.jetdock.com/knowledge-center/how-to-tie-5-common-boating-knots.asp
- ↑ https://www.youtube.com/watch?v=TLVBdF7dPyI&feature=youtu.be&t=10s
- ↑ https://www.youtube.com/watch?v=TLVBdF7dPyI&feature=youtu.be&t=15s
- ↑ https://www.youtube.com/watch?v=TLVBdF7dPyI&feature=youtu.be&t=20s
- ↑ http://www.jetdock.com/knowledge-center/how-to-tie-5-common-boating-knots.asp
- ↑ https://www.youtube.com/watch?v=ZEViTAkUbMU&feature=youtu.be&t=20s
- ↑ https://www.youtube.com/watch?v=ZEViTAkUbMU&feature=youtu.be&t=25s
- ↑ https://www.youtube.com/watch?v=ZEViTAkUbMU&feature=youtu.be&t=26s
- ↑ http://www.jetdock.com/knowledge-center/how-to-tie-5-common-boating-knots.asp
