This article was co-authored by Claire Donovan-Blackwood. Claire Donovan-Blackwood is an Arts & Crafts Specialist and CEO of Heart Handmade UK, a site dedicated to helping people live a happy, creative life. With over 13 years of experience, Claire uses art as a form of therapy and focuses on mindfulness in the making of art. She makes crafting easy and accessible for those she works with. Claire received her B.A. in Photography & Visual Imagery from The University of Huddersfield.
This article has been viewed 167,641 times.
Tie-dying paper is a fun and simple craft you can create with your child or by yourself. It's a great way to keep kids busy and entertained, using supplies you probably already have around the house. Many people also love to make wrapping paper, stationery paper or greeting cards featuring tie-dyed patterns. There are a variety of ways to tie-dye paper, whether it's basic printer paper, drawing paper, tissue paper or even coffee-filter paper.
Steps
Dying Paper with Water Colors or Food Coloring
-
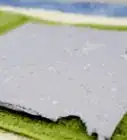
1Wet your paper. Get a rag wet and splotch water all over the paper you plan to dye. Allow excess water to drop off into a sink.
-
2Mix watercolors or food coloring in various squirt or spray bottles. Use squirt bottles[1] to create blotches of color and spray bottles[2] to create larger spatters of color. Make sure you mix the appropriate amount of water with your dyes according to their directions.Advertisement
-
3Place your paper onto a surface you don't mind getting colored. You might cover a table or countertop with several layers of newspaper or place your paper in a large, shallow tin. You can even complete the activity on the ground outside, weather permitting.
- It's also a good idea to protect your clothes by wearing a smock, apron or old t-shirt.
-
4Squirt or spray the dye on the paper. There's no right or wrong way to apply the color, just use your imagination. Use various colors for a true tie-dyed look.
- If you want to create symmetrical patterns, fold the paper in half before applying the color.
-
5Hold the paper over a pan, sink or outdoors to allow the colors to run. The liquid dye will run and bleed across the wet paper. You can twist the paper as it drips to create further designs.
-
6Allow the paper to dry. If you chose to fold the paper, unfold it, then lay the paper down flat on a towel. Let the paper air dry for at least 30 minutes.[3]


Staining Paper with Coffee
-
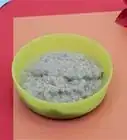
1Add coffee grounds into a pan. Choose a pan large enough to also hold the paper you plan to dye. Don't worry if you aren't sure how many grounds to add, you can always add more to strengthen the coffee as it steeps.[4]
- The more coffee you add, the darker your paper will be.
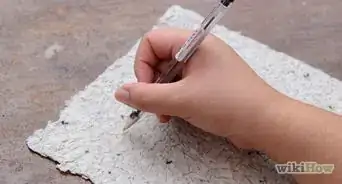
- If you add much coffee, some tiny particles of it can stay on the paper, and if you draw or write on it, the pen can pick them up and get blocked. But it will still work for wrapping gifts or even for printing.
-
2Pour boiling water into the pan. Allow the water and coffee grounds to steep at least five minutes. If the resulting liquid isn't dark enough, add more grounds and allow it to steep a few minutes more.
-
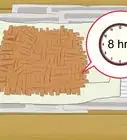
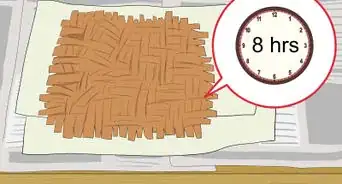
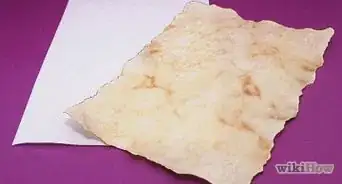
3Add a piece of paper to the pan, and let it steep. How long you allow the paper to steep is completely up to you, depending on how dark you want the paper to be stained. Various projects could require paper to steep anywhere from five minutes to overnight.
- If you would like to create symmetrical stained designs, fold the paper into squares, triangles or strips before placing it in the liquid.
-
4Remove the paper from the coffee. Wait until the paper is just a shade or two lighter than what you desire, then remove it from the coffee. The paper will darken a shade or two more as it dries.
-
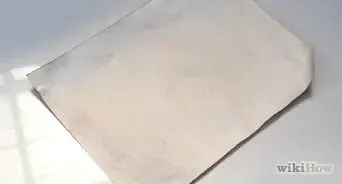
5Hang the paper to dry. You can clip it to a clothesline or a curtain rod. Be careful as you handle the paper, since it will be more fragile while it's wet. Drying time can vary based on the type of paper and where it's hanging. You can test it with your hand to know when its fully dried.
- If you're not satisfied with the shade once the paper dries, simply repeat steps 3-5.

Dying Paper with Markers
-
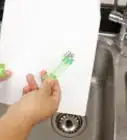
1Color the paper with markers.[5] Get multiple colors of markers and scribble all over the paper in whatever designs you like. The more solid blocks of color, the better the end result.
- To create a symmetrical design, fold soft absorbent papers into halves, fourths or eighths. Hold a marker down on the top layer until the ink has soaked through all of the layers.[6]
-
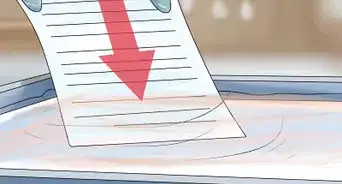
2Wet the paper. You can get the paper wet by spraying it with or dipping it into water. When the marker gets wet, it will bleed and blur, resembling tie dye. You want the paper to be wet but not dripping.
-
3Let the paper dry. If you've folded the paper, unfold it and lay it flat on a dry surface. Once it's dry, you can use it for wrapping paper, as the background of a special note or even the basis of paper flowers.

Community Q&A
-
QuestionWill the marker ink spread out by itself?
 Community AnswerIt will start spreading once you have wet the paper. The water will diffuse the ink and make it spread over the paper.
 -
QuestionHow do I get the water to spread out the marker ink if I don't have a spray bottle?
 ZabaJabaRabbitCommunity AnswerYou can also use a paintbrush to flick on the water, clean out an empty ketchup bottle, or use your fingers and drip the water on that way.
 -
QuestionWhich of these methods (or others) will color the paper so that it won't leak color if wet?ZabaJabaRabbitCommunity AnswerAll of them will leak, but if you don't want flimsy paper, glue it to something like a piece of cardboard, cardstock or another piece of paper when it's dry. It will have to dry fully before you handle it.
Warnings
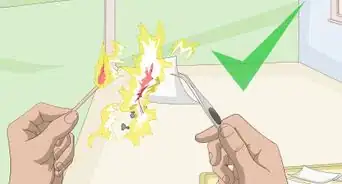
- Dye can stain your clothes. Be sure and protect them with some sort of covering, such as smock, an apron or an old t-shirt.⧼thumbs_response⧽
- Be careful when handling boiling water, it can easily burn your skin. Be sure you have a parent's permission.⧼thumbs_response⧽
Things You'll Need
- Smock, apron or old t-shirt
- Newspaper, plastic table cloth or a pan large enough to lay the paper
- Any type of paper
- A rag
- Water
- Spray or squirt bottle
- Food coloring, watercolor paint, markers or coffee grounds
- Clothes line or curtain rod with clips or clothespins(optional)
- Perfume (optional)
- White crayon (optional)

References
- ↑ http://www.babble.com/babble-voices/60-second-craft-how-to-make-tie-dye-paper/
- ↑ http://www.education.com/activity/article/make-watercolor-tie-dye/
- ↑ http://www.babble.com/babble-voices/60-second-craft-how-to-make-tie-dye-paper/
- ↑ http://craftingagreenworld.com/2012/07/16/how-to-antique-paper-using-coffee-staining/
- ↑ http://evolvingmotherhood.com/2011/08/easy-craft-idea-tie-dye-paper.html
- ↑ http://www.crayola.com/things-to-do/how-to-landing/classic-markers.aspx
- ↑ http://www.education.com/activity/article/make-watercolor-tie-dye/
About This Article

To tie dye paper with water colors or food coloring, start by wetting the paper all over with a damp rag. Next, mix water colors or food coloring in spray bottles according to the package directions, and spray the mixture all over the paper. After that, pick up the paper and hold it so the colors run, or fold or twist the paper to make different designs. When you’re happy with how it looks, lay the paper flat on a towel, and let it air dry for at least 30 minutes. To learn how to use markers or coffee to tie dye your paper, keep reading!