wikiHow is a “wiki,” similar to Wikipedia, which means that many of our articles are co-written by multiple authors. To create this article, 23 people, some anonymous, worked to edit and improve it over time.
The wikiHow Video Team also followed the article's instructions and verified that they work.
This article has been viewed 47,793 times.
Learn more...
Bookbinders the world over have been marbling paper for centuries. This project can entertain children for an afternoon, or sustain an artist's interest for a lifetime. Slight changes in ingredients or temperature can cause major differences, so this may take a few tries before you get comfortable.
Steps
Setting Up
-
1Set up your workspace. Lay down newspaper over a large work table, and the floor around it. Set up:
- One tray larger than your paper, with raised edges.
- A second tray or bucket larger than your paper, filled with water.
- A clothesline or drying rack
-
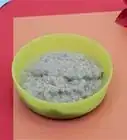
2Mix alum and warm water (optional). Alum is a "mordant," meaning it causes color to set on the paper. Without it, the marbling will be faint and blurry. To make enough alum for several dozen sheets of paper, stir 1 tbsp (15 mL) alum into 1½ cups (360 mL) warm water until completely dissolved, at least two minutes.
- Buy pure aluminum sulfate from an art supply store or online. Do not use alum sold as a spice. This is usually a related chemical compound that may damage the paper.
- Keep alum out of reach of children. It is not dangerous to handle, but can dry the skin and irritate the nose when inhaled. Wear gloves or wash hands after handling, and avoid inhaling the powder.
Advertisement -
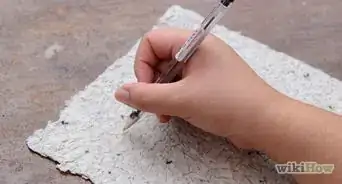
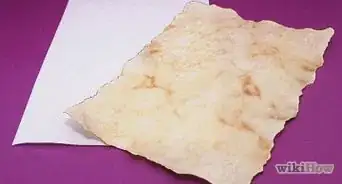
3Treat the paper with alum. Wipe the alum mixture over the sheet of paper with a sponge in a couple long strokes, covering the entire sheet without soaking it. Mark the untreated side with a pencil to avoid confusion. Lay the paper flat with the treated side up, until dry (roughly 15–30 minutes).
-
4Pour liquid starch into the empty tray. Liquid starch is available in the detergent section of your grocery store. Pour it to about 1 inch (2.5 cm) depth. Let the liquid settle before you continue, and avoid bumping the tray.
- This is by far the easiest option to set up, but most experienced marbling artists use other materials. See below for alternatives if you get poor results from starch, or if starch is not available in your area.

Creating the Pattern
-
1Skim the liquid surface with a strip of newspaper. This will break the surface tension, and remove dust and air bubbles. Pop remaining bubbles with a pin.
-
2Mix your paint with gall or oil. Arrange a small cup or dish for each color of acrylic paint. Use an eyedropper or paintbrush to transfer a drop of paint to the liquid starch (or a small, separate test dish of starch left until still). Most brands and colors will sink, in which case you should add marbling gall to that container of paint. Vegetable oil is a cheap substitute, but may leave your paper a little greasy.[1] Stir in one drop at a time, testing in between, until a drop of paint float on the surface and spreads out slowly. Stir in more if the drop rapidly spreads to more than 3 inches (7.5 cm).
- Old-fashioned ox gall will not work with acrylic paints. Use a detergent-based marbling gall that does not contain animal products. This is also sold as surfactant or dispersant.
- Test each color separately, and test before each marbling session. Changes in temperature and humidity can change the amount of gall required.
-
3Add paint to the starch. Once all your paints are prepared, add drops directly to the large tray of starch. For individual drops, use an eyedropper or paintbrush tip. To scatter many drops at once, use a tight bundle of plastic straws, flicked over the surface. Repeat with several colors, until they've spread across the whole surface of the liquid.
- For your first few projects, start with a dark base layer and use no more than four colors.
- You can get a different shades of the same color by mixing slightly more gall into the paint.
-
4Decorate the surface (optional). You can use any thin object you don't mind getting messy, such as a small paintbrush or toothpick. Drag this through the liquid, just under the surface, to create swirls and points. To create parallel patterns, use a cheap, wide-toothed comb or a plastic fork.
- Too much stirring will cause the colors to blend and become murky. Stop if you notice the borders between the colors becoming less distinct.

Decorating the Paper
-
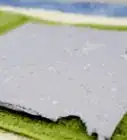
1Lower the paper onto the starch. Hold the paper by opposite corners, with the alum-treated side down. Lower the center of the paper to the center of the starch tray. Once it touches the surface, quickly lower the rest of the paper, until the corners you are holding reach the surface. Tap the corners gently to make sure they touch the surface.
- If you drop the paper all at once, air bubbles may get trapped underneath and leave uncolored areas on your paper.
-
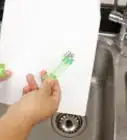
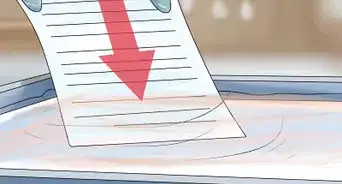
2Rinse the paper gently. The paper is now decorated with color, but also covered with a thin layer of starch. Immediately peel it off using the corner, and move it to the bucket of water for rinsing. Depending on how well your paint adhered, you may be able to gently shake the paper under the water level until the starch is removed. To reduce risk of washing off the color, rinse the paper with a gentle trickle of water from a faucet or sponge.
-
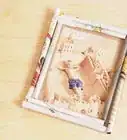
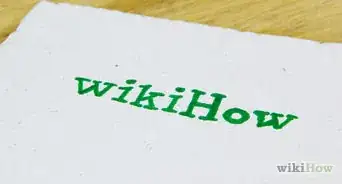
3Hang the paper up to dry. Hang the paper over a clothesline or drying rack, colored side up. Once dry, the paper will be permanently marbled. Repeat with several additional sheets of paper. Create a new decoration. once the starch surface is looking mostly clear.

Variations and Techniques
-
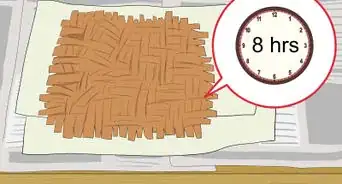
1Use water thickened with carrageenan. You can use any thick liquid, called a "size," instead of the starch. For this traditional and popular choice, combine 1 tbsp (15 mL) carrageenan powder and 4 cups (950 mL) water, then blend for about 30 seconds until combined. Cover in plastic and refrigerate for 8 hours, to form a bubble-free liquid with the thickness of syrup or buttermilk.
- You can use it after 3 or 4 hours, but the bubbles may cause defects in your pattern[2] It can last in the fridge for about a week.
- If the tap water in your area is very hard (mineral-heavy), you may need to use filtered water.
-
2Try methyl cellulose. Many book binder use methyl cellulose, which is cheaper than carrageenan but trickier to use. Buy methyl cellulose labeled "cold water dispersible" online, in a book-binding supply store, or in a large crafts store. Stir it into boiling water, then combine with ice water to make a mixture that sets within 10 minutes and lasts indefinitely.
-
3Use marbling ink instead of paint. Specialized marbling inks may be designed to use with a specific liquid, so check the label before buying. If you're getting vivid colors and sharp lines with the paint, there's no need to switch. You can also use other types of paint, but you may need to change the liquid they float on and/or the gall you mix them with. Here are some examples:
- Oil paints mixed with turpentine, floating on water.[3]
- Watercolor paints mixed with oxgall, floating on carrageenan
-
4Create Japanese style effects. Japanese suminagashi ink will float on plain water, making the whole setup much easier.[4] This typically creates thinner ring patterns, rather than the saturated colors seen in Turkish or European marbling.
-
5Create combs and rakes. Experienced marbling artists often use "combs" or "rakes," which are lengths of lumber with nails hammered through them. This allows for more symmetrical effects, dragging the nails through the pattern in a straight line.


Community Q&A
-
QuestionCan I use food coloring?
 Community AnswerYes! Just use that instead of the paint mixture. You can also use shaving cream instead of the alum and liquid starch mix.
Things You'll Need
- Baking tray with raised edges
- Liquid starch or alternatives
- Acrylic paint or alternatives
- Alum (from an art supply store)
- Vegetable oil or gall / surfactant / dispersant
- Eyedroppers and/or small paintbrushes
- Paintbrushes, plastic straws, or other drawing tools
- Clothesline or drying rack
References
About This Article
To marble paper, start by mixing alum and warm water and wiping the solution over your sheet of paper with a sponge. Next, pour liquid starch into a tray and add drops of paint to the starch to create your design. Then, lower your paper into the starch with the alum-treated side down. Finally, gently rinse the paper with water to remove the layer of starch and hang it up to dry. To learn how to create a Japanese style of marbling, keep reading!