This article was co-authored by wikiHow staff writer, Janice Tieperman. Janice is a professional and creative writer who has worked at wikiHow since 2019. With both a B.A. and M.A. in English from East Stroudsburg University, she has a passion for writing a wide variety of content for anyone and everyone. In her free time, you can find her working on a new crochet pattern, listening to true crime podcasts, or tackling a new creative writing project.
The wikiHow Video Team also followed the article's instructions and verified that they work.
This article has been viewed 11,208 times.
Learn more...
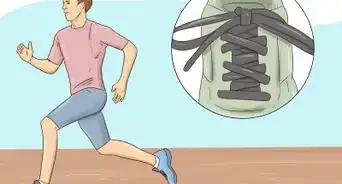
Blood knots are commonly used by fly fishing enthusiasts, who use this method to combine two fishing lines of similar lengths. While it isn’t a difficult knot, it can take some time to master. First, practice securing two pieces of string together to get the hang of a basic blood knot. Once you feel comfortable with this tying technique, try applying your skills on your next fly fishing trip!
Steps
Interconnecting the Lines
-
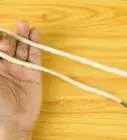
1Lay both pieces of line on a flat surface and label them as lines A and B. Take both lengths of string or fishing line and place them next to one another. Make sure that both pieces are close together so you can easily loop them. For easier knotting, label the leftmost piece as line A, and the rightmost piece of string as line B.[1]
- While you’ll practically be forming a blood knot with fishing line, it might be easier to practice with 2 shoelaces, or 2 pieces of yarn.
-
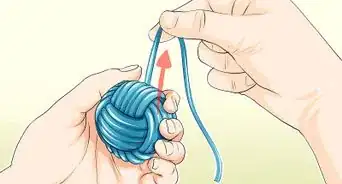
2Loop both lengths together loosely. Weave both pieces of string around other once, letting the loose ends dangle beneath the longer stretch of string or fishing line. Check that these looped pieces form a basic twist instead of a knot.[2]
- These twisted lengths should look like a pretzel.
Advertisement -
3Wrap line A around the left end of line B 5 times. Continue twisting line A around B, creating a coil shape around the second length of string. Move the string in a counter-clockwise direction, so line A circles line B at least 5 times. Be sure to hold onto the end of line A, so the string doesn’t unravel.[3]
Did you know? While blood knots are naturally durable, you can make them stronger by twisting line A around line B more than 7 times. Some fly fishing hobbyists will twist their lines a total of 14 times when creating a blood knot!
-
4Tuck the end of line A into the gap between lines A and B. Take the end of line A that you’re currently grasping and pull it to the right. Curve the string over the coils, centering it between both lines A and B. Continue tugging the string downward, leaving at least 1 inch (2.5 cm) of slack emerging from the end of line A.[4]
- It’s okay if the string isn’t completely tight—just leave the string in place so the first half of your knot doesn’t unravel.
- This tucked end section of string will rest on top of the coiled portion of string.
-
5Curl line B around the right end of line A 5 times. Take the loose end of line B and begin circling it in a clockwise direction around the straight length of line A. Loop around line A in a circular motion, forming the same tight coil shape that you’ve already formed on the other side of the knot.[5] Circle the string around at least 5 times, unless you’d prefer your blood knot to be more durable; in this case, circle the string around 10 to 14 times.[6]
- Keep your coils consistent on both sides of the knot. If you looped line A around line B 7 times, then you should do the same amount for the opposite end of the blood knot.
-
6Pull the end of line B in between lines A and B. Keep this half of the blood knot in place by securing the loose end of line B. Take this end and pull it beneath the coil, tugging it upwards between lines A and B. As you did with the opposite side, check that at least 1 inch (2.5 cm) of slack is hanging through the gap.[7]
- The 2 loose ends of this knot should be facing in opposite directions.

Forming the Knot
-
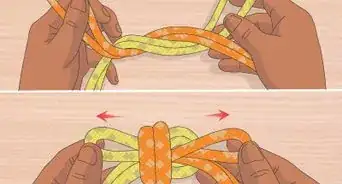
1Pull on the loose ends from lines A and B. Use both hands to grip the loose, dangling ends of the blood knot. With an even amount of force, tug on both ends to tighten the knot in place. Watch closely as the knot becomes compact. If your knot doesn’t work out on the first few tries, don’t worry—just try again, and focus on winding and tucking in the string.[8]
- Your knot should feel taut, with no loose coils of string present.
-
2Trim off any loose slack from the lines. Take a pair of scissors and trim off ¾ of the excess string. Don’t cut all of it off, as you don’t want to undo the knot altogether. Instead, leave a small portion of slack visible.[9]
- If you’d prefer to leave more slack visible, only cut off ½ of the excess instead.
-
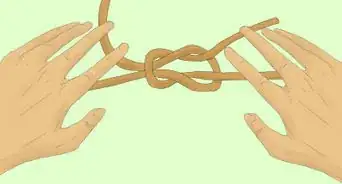
3Tug on the lines to check that they’re secure. Take both hands and grab the longer lengths of string that you just tied together. Give both ends a good yank—if both sections of string hold, then you’ve successfully created a blood knot![10]
Things You’ll Need
- String
- Fishing line
- Scissors

References
- ↑ https://www.animatedknots.com/blood-knot
- ↑ https://www.animatedknots.com/blood-knot/#2
- ↑ https://www.animatedknots.com/blood-knot/#7
- ↑ https://www.101knots.com/wp-content/uploads/2017/08/How-to-Tie-a-Blood-Knot.jpg
- ↑ https://www.101knots.com/wp-content/uploads/2017/08/How-to-Tie-a-Blood-Knot.jpg
- ↑ https://www.animatedknots.com/blood-knot/#7
- ↑ https://www.animatedknots.com/blood-knot/#14
- ↑ https://www.animatedknots.com/blood-knot/#15
- ↑ https://www.101knots.com/wp-content/uploads/2017/08/How-to-Tie-a-Blood-Knot.jpg