This article was co-authored by wikiHow Staff. Our trained team of editors and researchers validate articles for accuracy and comprehensiveness. wikiHow's Content Management Team carefully monitors the work from our editorial staff to ensure that each article is backed by trusted research and meets our high quality standards.
The wikiHow Video Team also followed the article's instructions and verified that they work.
This article has been viewed 101,629 times.
Learn more...
Tying an apron may seem like a puzzle when you’re doing it for the first time. If your apron has a bib, start by tying the neck loop. Then determine whether you want to tie your apron in the front or the back based on your needs or dress code. It's usually easier to tie it in front unless the strings are too short or they will get in your way. Pretty soon, you’ll be tying your apron without even thinking about it.
Steps
Tying the Neck Loop
-
1Put the bib 4 inches (10 cm) - 5 inches (13 cm) below your collar bone. The bib is the top part of the apron that covers your chest. You don’t want it too high, because it will strangle you. If you put it too low, it will not effectively keep your shirt clean.
-
2Tie a knot in the back of the loop if the apron has a single bib loop. Place the loop over your head. Find the right height for your bib. Tie a knot at the back of the loop to shorten it so your apron hangs where you want it to hang.[1]Advertisement
-
3Thread the tie through the loop if the apron has a tie/loop closure. Start by placing the tie around your neck, then threading it through the loop. Position the bib where you want it. Then tie the loose end around the loop and onto itself.
-
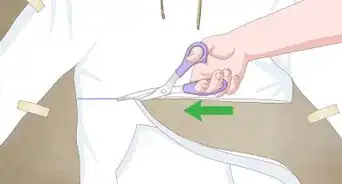
4Cut the neck loop and tie a knot if you have a long single neck loop. Start by cutting the neck look in half at the midpoint. Position your bib, then tie the two strings in a knot behind your neck.
- Make sure you can get the apron on and off over your head before you cut the strings.
- Cut the extra, dangling parts of the strings so they don’t look sloppy or interfere with your work.


Tying an Apron Behind Your Back
-
1Bring your apron’s strings together in the back. Take one tie in each hand and bring them together behind you. Make sure your ties are not overly twisted, though a few twists won’t matter.[2]
-
2Tie them together using a knot or a bow. Pull the ties together before you start your knot so that your apron is tight. Don’t make it so tight that you can’t breathe or you feel like you’re cutting off circulation.[3] Tie the strings in a shoelace knot or a half-shoelace knot.
-
3Tug on your knot to test its strength. Pull on your apron lightly from the top and the bottom. You don’t want a knot that’s going to fall out while you’re working! If it does fall out, redo it until it doesn’t.
-
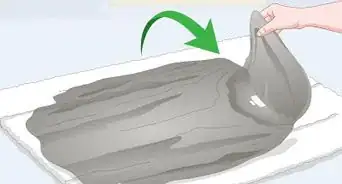
4Practice tying with your eyes closed to get faster. Many people struggle with tying behind their own backs. To practice, take your apron off and lay it on a table in front of you. Take one tie in each hand, close your eyes, and practice tying them until it becomes easier.


Tying an Apron In Front
-
1Test to see if the apron falls above or below your knees. Put on your neck loop and tie it as you plan to wear it. If you have a half apron, hold it at your waist where you plan to wear it. Look in a mirror and see if your apron hangs below your knees.
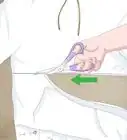
- If your apron hangs below your knees, you can hem it with some scissors and a sewing machine or hemming tape.[4]
- If you don’t want to sew or you don’t have time, just grab the apron at the hips and fold a section up. Hold this in place while you tie and you have shortened your apron.
-
2Cross your apron’s ties behind you and bring them around to the front. Take one tie in each hand. Pass them behind your back, switching hands as you do so, and bring them to the front again.[5]
-
3
-
4Test your knot for strength by pulling on it gently. Tug on your apron gently from both the top and the bottom. If your knot falls out, redo the process with tighter ties or a different kind of knot.


References
- ↑ https://www.youtube.com/watch?v=i3pIizxiB94
- ↑ https://www.youtube.com/watch?v=7oVHzAiUW7A
- ↑ https://www.youtube.com/watch?v=l9xu-wx4Bvo
- ↑ https://www.youtube.com/watch?v=kdX-0xRkf_w
- ↑ https://www.youtube.com/watch?v=Q1_ukrov_A4
- ↑ https://www.youtube.com/watch?v=l9xu-wx4Bvo
- ↑ https://www.youtube.com/watch?v=n3Xa7wh81Wo
About This Article

To tie an apron, first thread the loose tie through the loops at the top of the apron. Tie each end in a knot around the loop so the top of the apron falls 4-5 inches (10-13 cm) below your collar bone. If your apron falls above your knees, cross the attached ties behind your back, wrap them around your waist, and tie a knot at the front. If your apron falls below your knees, grab the fabric near your hips and fold it up to your waist so the bottom of the apron is above your knees. Holding the fold in place, bring the attached ties around your waist and tie a knot at the front over the fold to keep it in place.