X
wikiHow is a “wiki,” similar to Wikipedia, which means that many of our articles are co-written by multiple authors. To create this article, volunteer authors worked to edit and improve it over time.
This article has been viewed 36,659 times.
Learn more...
This tutorial will give a detailed walkthrough on how to tune your nitro vehicle. Before you begin, build your vehicle and make sure the engine is broken in, meaning that it has been started before and at least two tanks of fuel have been used up by the engine. If so then you can get started at step 1 below!
Steps
-
1Inspect the vehicle. Before doing anything make sure to inspect vehicle and make sure that the fuel lines and air filter housing are properly and securely in place. There are two fuel lines one going from the bottom of the fuel tank to the carburetor and the second going from the exhaust muffler to the top of the fuel tank. The air filter housing is attached at the top of the carburetor.
-
2Check the air filter. Ensure that the air filter itself is clean and ready to go, if you find the filter to be dirty rinse it with fuel to remove all contaminates and then lightly apply the proper oil to the filter. Consult your engine manual to get the right oil weight.Advertisement
-
3Check servos. Servos are the little mechanical devices in charge of controlling the throttle and moving the tires when steering. The majority of on road vehicle have two sets of servos, one two control the throttle and brakes and another set to control the steering. To check that both sets are working properly turn on your both your remote and the vehicle transmitter, make sure to turn on the remote first to ensure that the signal is picked up correctly, then move the throttle and steering mechanisms of the remote control. If both sets of servos function in correlation with your commands on the remote then the servos are working fine.
-
4Reset servos. Make sure to both trim settings on your remote control. The trim settings control the servos settings when you are not touching the remote. If the trims are out of whack the the tires will not be straight and the throttle could be open too much.
-
5Fill the fuel tank. Fill the fuel tank to the top, keep in mind that it is not necessary to fill the tank to the extreme top just make sure that about 90% of the tank has been filled. Make sure to consult your engine manual to ensure you are using the appropriate nitro blend. Mixtures with higher nitro content cause the engine to run faster thus performing better but at the cost of running at a higher temperature. Normally on road vehicles take fuel in the range of 25-33% nitro, whereas off-road vehicles tend to perform best at 20% nitro.
-
6Prime the engine. The first step in actually starting the engine is to prime it. Priming the engine means that the piston sleeve housing is full of fuel and will allow your engine to start immediately. To prime the engine first block the exhaust tip of the muffler either with your finger or dry cloth. By blocking the muffler all of the exhaust pressure will travel through the fuel line into the fuel tank forcing the fuel to exit through the bottom fuel line into the carburetor. Next turn over your engine by pulling the pull start cord, you should be able to visibly see the fuel enter your carburetor through the fuel lines. Once fuel enters the carburetor stop turning over the engine.
-
7Start the engine. Once the engine has been primed it is now ready to be started. Make sure to not block the exhaust tip and leave it freely open. Insert the glow plug driver on the glow plug and then pull the chord a 3-5 times until the engine starts. Once the engine starts remove the glow plug driver and drive the vehicle around to build up the engine temperature.
-
8Make sure to identify where the high speed needle and low speed needles are located. The high speed needle governs the fuel/air mixture at ¾ to maximum throttle whereas the low speed needle dictates the fuel/air mixture at idle to ¾ throttle. It is worth noting that engines smaller than .15 cubic inches typically have only a high speed needle.
-
9Reset the needle settings. Make sure that your needle settings are set to factory, in which the needles are flush with the chamber.
-
10Perform an initial inspection. Make sure the fuel tank is filled and that all servos are working fine. If needed, now is the time to replace any dead batteries. Once ready take your vehicle to an open lot and start the engine.
-
11Prepare for tuning. Once engine has been started drive the vehicle for a minute or two to build up the engine’s temperature.
-
12Tune the high speed needle. Once the engine has been warmed up you are ready to begin the tuning process. Using your screwdriver,turn the high-speed needle 1/8 of a turn clockwise. By turning the needle clockwise you are leaning out the mixture which will lower the amount of fuel the engine takes in and increases engine RPMs. With each adjustment the vehicle’s top speed and performance should improve.
-
13Finalize the high speed needle. Continue to lean out the high speed needle in 1/8th increments and be sure to drive the vehicle after each adjustment. Some of the signs to stop leaning is when the engine begins to bog out, no blue smoke is visible or the engine suddenly shuts off. When this happens richen the needle by turning it 1/8 of a turn counterclockwise and drive the vehicle to make sure it is running smoothly without bogging out or shutting off.
-
14Tune the low speed needle. This is done in the same manner as the high speed needle. Using the screwdriver, lean out the low speed needle in 1/8th increments by turning the needle clockwise and driving around after each adjustment. As you drive the vehicle after each adjustment you should notice that the vehicle's acceleration and bottom end speed improving.
-
15Finalize the low speed needle. Some of the signals that indicate we have tuned the low speed needle too lean is when the engine revs to fast at idle and very little blue smoke is visible when accelerating. If you experience any of the signals make sure to richen or lean out the low speed needle.
-
16Fine tune the low speed needle. Also another way of making sure we have properly tuned the low speed needle is to pinch the fuel line and observe the engines behavior. If the engine slowly begins to rev up and quit in around 3 seconds then the low speed needle is tuned correctly. If the engine immediately shuts off then the needle is too lean or if the engine take very long to shut off then it is tuned too rich.
-
17Do a final inspection. Make sure that there is a trail of blue smoke coming out of the exhaust when running and that the engine is not bogging out or shutting off.
-
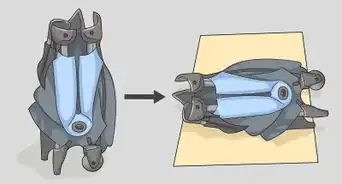
18Install the Body Cover. Once the engine is running smoothly with no problems, the body cover can now be installed.
- Your vehicle is now properly tuned and is operating at optimum performance.


Advertisement


About This Article
Advertisement