This article was co-authored by wikiHow Staff. Our trained team of editors and researchers validate articles for accuracy and comprehensiveness. wikiHow's Content Management Team carefully monitors the work from our editorial staff to ensure that each article is backed by trusted research and meets our high quality standards.
There are 7 references cited in this article, which can be found at the bottom of the page.
The wikiHow Video Team also followed the article's instructions and verified that they work.
This article has been viewed 222,841 times.
Learn more...
Cupcake liners are an important part of any baker's toolkit. Without liners, cupcakes can stick to the pan and form in an uneven shape. Using cupcake liners is easy and will improve your cupcakes for any occasion. First, choose the right liners for your needs. You can choose between wax, foil, and re-usable silicone varieties. Find decorated liners for festive occasions. Then place a liner in each slot of a cupcake pan and fill it with batter. Now you're ready to bake your cupcakes.
Steps
Finding the Right Cupcake Sheets
-
1Get liners that fit in your cupcake baking sheet. Cupcake liners come in different sizes, so match the liner size with the pockets in your cupcake sheet. If the liner is too big, it won’t fit in your sheet. If it’s too small, the sides will expand and your cupcakes will be too flat. Find a liner that fits perfectly into your baking sheet.[1]
- Standard cupcake liners are 2.25 inches (5.7 cm) in diameter. These will fit a typical baking sheet.
- If you’re making mini muffins or cupcakes, opt for a 1 inch (2.5 cm) or 3⁄4 inch (1.9 cm) liner instead.
- If you aren’t sure what liners will fit your sheet, measure the diameter of a slot in your baking sheet. Then find liners that match this diameter. The diameter of liners is usually on the packaging.
-
2Get foil cupcake liners to keep grease off your fingers. Wax and paper cupcake liners work fine for most baking jobs, but they aren’t grease-proof. That means grease bleeds through the paper while the cupcakes bake, and your hands could get slippery when you pick up the cupcakes. For a grease-proof option, use foil liners instead.[2]
- Foil liners and paper liners are both available at supermarkets or online.
- Specialty bake shops will have a greater variety of choices for cupcake liners.
Advertisement -
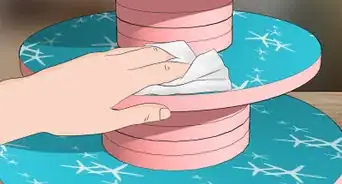
3Use silicone liners for a reusable option. If you want to cut down on your carbon footprint and avoid throwing out cupcake liners after every use, try silicone liners instead. These are reusable, so just wash them and use them again the next time you bake.[3]
- Always check silicone liners for their intended baking temperature. Most silicone liners can handle high heat, but double check to make sure you don’t melt them in the oven.
- Don’t use silicone liners over an open flame. They will melt.
- As an added bonus, you'll also save money because you won't have to buy more liners every time you bake.
-
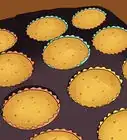
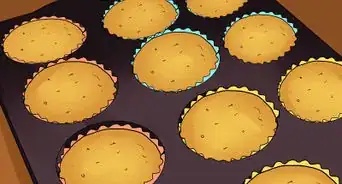
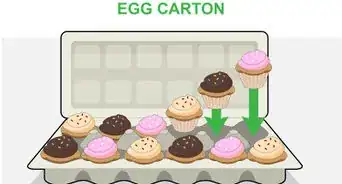
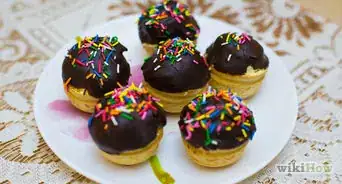
4Find decorative liners for a festive occasion. If you want to add some more fun to your cupcakes, choose one of the many decorated cupcake liners available. These range from different colors to elaborate designs. Shop around and see if there is a design that appeals to you.[4]
- Try to match the liner to the occasion. If you’re throwing a Halloween party, look for orange liners or ones with pumpkins on them.
- There are also paper liners folded into different shapes like tulips. Use these for further decoration.
- If you or any of your guests has an allergy to food dyes, don’t use colored liners. The dye could leak onto the cupcake and cause an allergic reaction.
-
5Check reviews online to find a quality liner brand. Not all cupcake liners are the highest quality. Some could stick to the batter and pull the cupcake apart as you try to get it out. Search online for the brand you’re considering buying and see if anyone has had problems with sticking. Use a product that has good reviews and few people saying that the liners stuck to the cupcake.[5]


Baking with the Liners
-
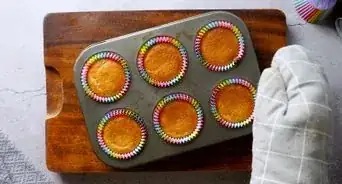
1Place a cupcake liner into each slot on a cupcake pan. Make sure each one rests on the bottom of the cupcake pan. Push each liner down gently so it sits snuggly in the pan.[6]
- Most pans have 12 slots for cupcakes. If you’re making more than this, use more pans.
- A pan for making mini cupcakes will probably have more than 12 slots. Make sure you buy enough liners before you start baking.
-
2Spray non-stick cooking oil into silicone liners if you use them. Silicone cupcake liners sometimes stick to batter. Grease them with a small amount of cooking spray before putting any batter in.[7]
- Just give each liner a quick spray with the oil. Don't let any oil pool at the bottom.
-
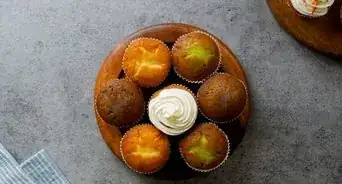
3Fill each cupcake liner 2/3 to the top with batter. Take a spoon or measuring cup and scoop up the batter. Then pour the batter into the liner until it reaches about 2/3 of the way to the top. This gives the batter space to expand.[8]
- Use equal amounts in each liner so all the cupcakes bake through evenly.
- You could also use a frosting bag filled with batter to fill the liners.
- Some recipes call for a specific measurement of batter. If you’re using that kind of recipe, then use the measurement it suggests.
-
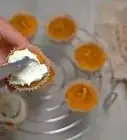
4Bake your cupcakes. With all the batter in the pan, the only thing left to do is bake your cupcakes! Put the pan in a pre-heated oven and wait for them to cook all the way through. Then take the cupcakes out, add frosting, and serve them.[9]
- The most common temperature for baking cupcakes is 350 °F (177 °C), but follow the recipe you’re using for the baking temperature.
- Cupcakes usually take 15-20 minutes to bake.

Community Q&A
-
QuestionHow can I get my bran muffins to stop sticking to the cupcake liners?
 Community AnswerI would recommend lightly greasing the liners with some spray oil.
 -
QuestionCan I use cupcake papers in a square pan to cook?
 Community AnswerYes, as long as they're durable enough to stand on their own.
 -
QuestionDo I need to grease the cupcake paper liner?
 Community AnswerNope! The grease is for the cupcake batter to not stick to the pan, and the liners do the exact same thing, so you don't have to grease the paper liners as well.
Warnings
- Don't fill the cupcake liners all the way to the top with batter. They will overflow in the oven.⧼thumbs_response⧽
References
- ↑ https://www.webstaurantstore.com/guide/629/types-and-styles-of-baking-cups.html
- ↑ https://www.webstaurantstore.com/guide/629/types-and-styles-of-baking-cups.html
- ↑ https://healthy-cookware.com/eight-reasons-to-use-paper-cupcake-liners/
- ↑ https://healthy-cookware.com/eight-reasons-to-use-paper-cupcake-liners/
- ↑ https://youtu.be/miW5AexCLWE?t=43
- ↑ https://youtu.be/ef3UEhLFyHs?t=175
- ↑ https://www.thefoodieskitchen.com/en/2011/04/16/using-cupcake-silicone-liners/
- ↑ https://youtu.be/GcMwyb0gfIY?t=175
- ↑ https://youtu.be/GcMwyb0gfIY?t=189
About This Article