This article was co-authored by wikiHow Staff. Our trained team of editors and researchers validate articles for accuracy and comprehensiveness. wikiHow's Content Management Team carefully monitors the work from our editorial staff to ensure that each article is backed by trusted research and meets our high quality standards.
This article has been viewed 46,208 times.
Learn more...
When you bring cupcakes to an event or give them as gifts, taking the time to wrap them in a festive way can show others your creative side. Packing the cupcakes correctly before taking them to your destination can also mean all the difference between cute, delicate desserts and squished bundles of cake. By choosing the right outer packaging and containers for transport, you can ensure your cupcakes survive the trip and arrive in style.
Steps
Decorating Your Cupcakes' Packaging
-
1Purchase decorative cupcake boxes from your grocery or home goods store. Choose boxes that will be large enough to fit the cupcakes but not too big that they will slide around inside. You can choose to use single cupcake boxes or boxes with multiple cupcake spaces.
- If you're giving the cupcakes as gifts, you can place a small name tag on each cupcake box to personalize them.
- If the cupcakes are for a party with many people, you may choose a cupcake box with multiple cupcake spaces.
-
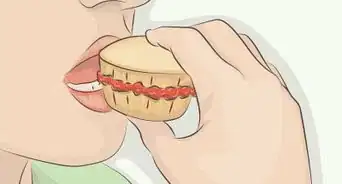
2Place cupcakes in plastic cups wrapped in cellophane to give out individually. Place one cupcake in a clear, disposable plastic cup. Cut a 6 in (15 cm) of sturdy cellophane wrap and lay it on a flat surface, then place the plastic cup holding the cupcake in the center of the cellophane. Fold the corners of the plastic so they touch just above the top of the cupcake.
- Without denting the frosting, use string or ribbon to secure the plastic.
- To add even more flair, put small polka dot or animal stickers on the plastic wrap. It's best to do this before wrapping the cupcake to avoid damaging the frosting.
Advertisement -
3Place each cupcake in a small restaurant takeout box as a cheap option. Purchase restaurant boxes from a local craft supplies store or ask for extras when you are at restaurant. Fasten the top of the box and tie a colorful ribbon around it for a creative touch.
- To determine the size box you'll need, measure the diameter of the compartments in your cupcake tin, then add 1 in (2.5 cm) so the cupcakes don't touch. For instance, if your tin makes a 3 inches (7.6 cm) cupcake, you would need 4 in × 4 in (10 cm × 10 cm) of space for each cupcake.
- If you're going to be carrying more than 1 cupcake in each box, you can create a makeshift insert for added stability. Cut squares of card stock that are slightly larger than the cupcakes. Cut a notch into each corner, then fold down each side so the card stock sits slightly raised. Then, cut an X into the center of the card stock for the cupcake to sit in.
- If the cupcakes are a gift, place gift tags on each box and write the person’s name or a short message.
-
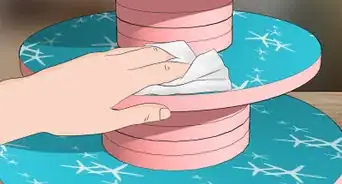
4Make a cupcake box from a paper cup for a do-it-yourself touch. Purchase paper cups with bases that are about the same size as the bottom of the cupcake and are at least a few inches taller than the total height of the cupcake and frosting. Cut off the very top rim of the cup. Make 4 equal-length cuts in the top of the cup to make 4 equal strips. Place the cupcake in the cup. Fold each strip over the cupcake in the cup and put tape on top.
- Instead of tape, you can also use a cute sticker to make sure the strips stay closed.
- Make sure you keep enough room at the top of the cup where you fold the strips so the frosting isn’t damaged.
-
5Leave the cupcakes loose if you won't be able to transport them in their packaging. Although creative individual packaging can make a big impact, it can make your cupcakes difficult to transport. Consider placing your cupcakes in a caddy, cupcake box, or other holder while you travel.
- If you have time, you might be able to individually package your cupcakes once you arrive at your destination.


Transporting Your Cupcakes
-
1Place the cupcakes in a shallow, plastic resealable container. Use a non-skid shelving liner in the bottom of the container to keep the cupcakes from moving around. Put the cupcakes in the container so they are just touching each other on the sides. Make sure the box is deep enough so when you put the lid on, the frosting on the top of the cupcakes does not touch the lid.[1]
- When you transport the container, make sure it stays level and does not tip over.
- This method may help you if you have individually packaged your cupcakes in take-out boxes, plastic wrap, or another decorative option.
-
2Put the cupcakes in berry boxes if you are transporting a large amount. Get strawberry boxes from your local grocery store. Place the cupcakes next to each other in the boxes. Once all of the boxes are full, stack them on top of each other in your car.[2]
- For added stability, you can wrap a couple of layers of tape or string around the boxes so they can’t shift as you drive.
- This is a great option for individually-packaged cupcakes, although it could also work for loose cupcakes.
-
3Use a cupcake caddy or specialty cupcake box for a ready-made solution. Place the loose cupcakes in the container as directed by the label. These boxes are made specifically for transporting cupcakes in mind and will have enough room to make sure they are not squished. However, they are pricier than other options like Tupperware or berry boxes.[3]
- Caddies and other cupcake boxes hold cupcakes in multiples of 12. Some hold only 12 cupcakes while others can hold 36 or more!
-
4Use a freezer bag if you are transporting the cupcakes on a hot day. Hold the container with the cupcakes parallel to the ground. Slide the freezer bag over the container. Without tipping the container, lay the freezer bag on its side so the container stays parallel with the ground. Close the freezer bag and away you go![4]
- To keep the cupcakes even cooler, place the freezer bag in a cooler full of ice.
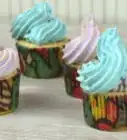
- If you want to use whipped cream frosting, it’s better to wait to frost them until you get to your final destination. This way, the frosting will not melt on the way and you’ll have a great presentation.
-
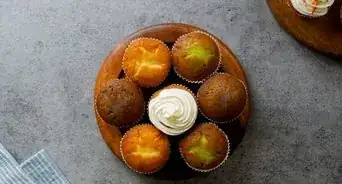
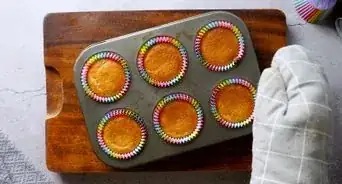
5Keep the cupcakes in the tin and place the tin a large cereal box. Instead of taking the cupcakes out of the tin and placing them in a separate holder, simply leave them in their original tin and place the tin in a box large enough so the frosting will not be damaged.
-
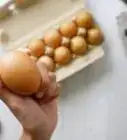
6Place mini cupcakes in an empty egg carton. Put a loose mini cupcake in each hole of the egg carton. Close the lid carefully, making sure you don’t bump the frosting.[5]


References
- ↑ http://www.foodandwine.com/blogs/4-ways-transport-cupcakes
- ↑ https://www.onehundreddollarsamonth.com/how-to-transport-600-cupcakes-safely/
- ↑ http://www.foodandwine.com/blogs/4-ways-transport-cupcakes
- ↑ http://bakingbites.com/2013/06/how-to-store-cakes-and-cupcakes-in-the-summer/
- ↑ https://www.bakedbyrachel.com/egg-carton-mini-cupcakes/
About This Article