This article was medically reviewed by Jeremy Silverman, DMD. Jeremy Silverman is a Dentist and Founder of Peace of Mind Dental Studio in Chandler, Arizona. With a decade of professional dental experience, he focuses his practice on incorporating mental well-being into the core of oral care. He also partakes in continuing education and stays up to date with the newest techniques, technology, and products. Dr. Silverman holds a BA in Psychobiology from the University of California at Los Angeles and a DMD from Midwestern University. He is a member of the American Dental Association, Arizona Dental Association, and Central Arizona Dental Society. Dr. Silverman is also Laser Certified by the World Clinical Laser Institute.
This article has been viewed 90,632 times.
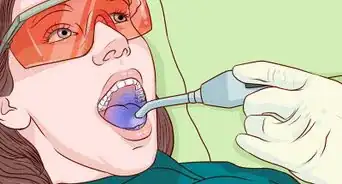
Tooth whitening gels are essentially Hydrogen Peroxide (HP) or Carbamide Peroxide (CP), a product that eventually breaks down into HP. [1] Both oxygenate the teeth into the enamel and dentin to remove stains within the teeth. These gels are effective on teeth up to a certain extent, based upon strength of product, duration of use, and what staining products are counteracting the efforts. They do not, however, work on dental work like caps, bridges, veneers, or crowns. With the right preparation, usage, and cleaning, using teeth whitening gel can improve the shade of your teeth and aid your self-esteem.
Steps
Applying the Gel
-
1Ask your dentist to construct a fitted tray. A poorly fitted tray can be created by your dentist. The custom tray can fit the curves and contours of your teeth to properly cover all applicable surfaces, and maximize the ability of the gel. There are a few downsides if an ill-fitting tray:
- Tooth sensitivity can occur, but typically only lasts until the gel is removed.
- Gum irritation is a common side-effect of whitening gel.[2] Slight burns may even appear.
- Some using whitening gels experience lips and throat as well.
-
2Consult with your dentist about using the gel. Depending on the type of gel and the construction of tray, there could be variations in the amount of gel to use. Have your dentist provide you with instructions on how to use the gel, when to use it, and for how long.[3] These things depend on your clinical status and desired final result as well as your oral hygiene and eating habits, which are crucial in the whitening procedure. Your dentist may even demonstrate gel use.Advertisement
-
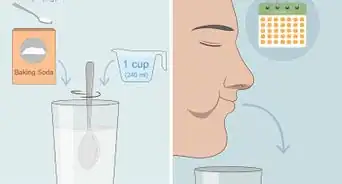
3Desensitize and heal your mouth beforehand. To decrease the chances of experiencing sensitivity complications, you’ll want to condition your teeth with something containing potassium nitrate and fluoride. There are a few things you can do to make the transition easier.
- Brush using a desensitizing toothpaste for a few weeks prior to starting bleaching treatments.
- Allow ample time for any inner-mouth cuts to heal. Use plain glycerin or alcohol-free mouthwash if there are any existing mouth ulcers
- Give your tray a bleach-free test-run for fit and comfort. Check if the margins of the tray go over your gum line for more than 4 mm. If they do, you will need to have it reshaped by your dentist.
-
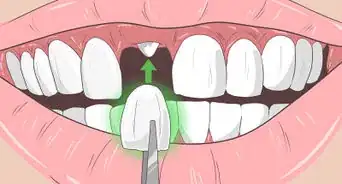
4Put a small amount of gel into the tray. Use either a dab per tooth or put a small line into the front part of the tray. Do not fill the tray or spread the gel around. An ideal amount is about halfway up the inner front of the tray.[4]
- Approximately 0.5 ml of gel is the amount per arch you’d like to apply.
- Apply firm pressure and try moving the tray from left to right for a better distribution of the gel on your teeth. Do not push so hard that the gel oozes outward.
- Some recommend bleaching just the front 6-8 teeth since back teeth are rarely seen.
-
5Wipe away the excess material. Holding the tray firm with one hand, gently wipe away any excess that moves out towards the gums. Some recommend using a dry toothbrush, so there is not water dripping into the gel tray and diluting the product. Another method is to hold the tray firmly with one hand and use a tissue in the other hand to wipe the excess.[5]
-
6Use the tray for the prescribed time. While the gels are almost universally made with Carbamide Peroxide or Hydrogen Peroxide, and the general strength falls anywhere between 10% and 22%, there are nonetheless differing application times. Most effectiveness is lost after the first two hours, so typical usage is for two to three hours per day.[6]
- Use the gel for 30–60 minutes the first time. Duration can be increased if there is no sensitivity.
- Hydrogen Peroxide gels are normally used 30–60 minutes per session, once or twice per day.
- Carbamide Peroxide bleaching gels are generally broken down into two larger groups of strength:
- 10%-16% – used for longer periods, 2-4 hours split into two sessions per day
- 20%-22% – used for 30–60 minutes once or twice per day


Cleaning Up After Treatment
-
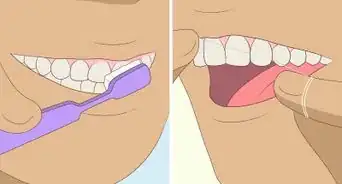
1Remove the tray and clean your mouth. After removing the tray, there may be some gel residue on your teeth, gums, or elsewhere in your mouth. It’s recommended that you rinse, brush, and floss to remove the remaining gel, then continue on with your typical hygiene routine.
- Apply a desensitizing gel if there is pain. [7]
- If you do not have a desensitizing gel, try fluoride gel or a desensitizing toothpaste for five minutes.
-
2Clean and store the tray. Using warm water and a toothbrush, gently scrub the tray. Some even recommend using cold water, since water that is too hot could damage the integrity of the tray.[8] If you’d like to have a smoother coverage, substituting a Q-tip for the toothbrush is also a great way to clean out leftover gel.
- After cleaning, put the tray in its tray holder and store in a cool, dry location out of the sunlight.
-
3Refrigerate the gel. Depending on the brand, the shelf-life of some gels can be greatly improved with refrigeration. It’s recommend to follow the guidance and instructions in the package, but a gel that lasts for a year unrefrigerated may last up to two years in the refrigerator.[9]


Troubleshooting Gel Effectiveness and Tooth Sensitivity
-
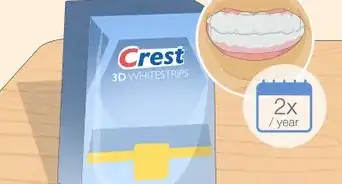
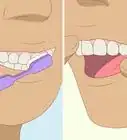
1Look for whitening progress. Most gels take consistent usage in order to see results. Optimum results have been shown in 20–30 minute sessions for some products. The minimum time for real results is roughly two weeks, with minimal shade differentiation showing up after a few days. Maximum results should take at least two weeks, but some programs take as long as four weeks to show the best results.
- Longer wear times can potentially create faster results, but also increase the possibility of sensitivity.
- Results also depend on your enamel structure, which may vary from person to person.
- Using bleaching gel with a higher concentration has the potential to give you quicker results.[10]
- Results are maximized in the first few hours, and you can typically expect the whiteness to lift four or five shades over the course of treatment.
-
2Ensure you’re not overloading the tray. If too much of the gel is squeezing out of the top of the tray, the excess is probably causing the sensitivity. Try to use a smaller amount of gel with each treatment until there's a good balance of coverage and oozing is minimal. The goal is to have complete frontal tooth coverage without gel waste.
-
3Shorten the treatments. Depending on the treatment, it’s possible to use the whitening gel for multiple hours per day or while you sleep. While the gel loses most effectiveness during the first two hours or so, lessening the amount of time that the gel is touching your teeth could help with reducing or eliminating any pain you're feeling.
- If you are using the tray overnight, discontinue using the tray for such long periods.
- Shorten the length of time your use the tray. Some treatments call for over an hour of use. Try lessening the time by about 10 minutes per treatment, or to around 20 minutes.
-
4Break up the treatments. Since the amount of time used is directly related to the effectiveness of the gel, you may want to continue the current length of time the tray is being used. If you’re experiencing sensitivity, however, you may try breaking the treatments up into smaller periods.
- Take a two-hour treatment and divide it into two separate one-hour treatments.
- A one-hour usage could easily be broken down into two 30-minute periods.
- The obvious downside to breaking up treatments is the usage of more gel than normal, however, you may also be able to maintain the whitening effect for a longer period of time.
-
5Suspend treatments and see your doctor. If you’re having major issues with sensitivity or pain, you probably need to suspend use of the gel. In general, you should probably take one or two courses of action.[11]
- Skip a few days. Or, skip a few weeks. Most sensitivity diminishes after the first few days, but some instances have been shown to take weeks to subside.
- Seek professional advice. Only a dentist can truly determine the cause of specific tooth sensitivity. If you’ve discontinued use of the gel, and you’re still experiencing pain, there may be a larger issue requiring an x-ray and/or dental work.
-
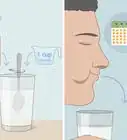
6Discontinue or minimize counteractive products. While the gel tray is in your mouth, ensure you do not eat, drink, or smoke. Similarly, refrain from eating citrus fruit just after application. Improve your results by minimizing consumption of coffee, tobacco, sodas, sports drinks, wine, and tomatoes in your daily diet.
- Drink with a straw. This helps staining fluids to bypass the teeth but it will not prevent staining completely.


Expert Q&A
-
QuestionCan you use whitening gel with braces?
 Jeremy Silverman, DMDJeremy Silverman is a Dentist and Founder of Peace of Mind Dental Studio in Chandler, Arizona. With a decade of professional dental experience, he focuses his practice on incorporating mental well-being into the core of oral care. He also partakes in continuing education and stays up to date with the newest techniques, technology, and products. Dr. Silverman holds a BA in Psychobiology from the University of California at Los Angeles and a DMD from Midwestern University. He is a member of the American Dental Association, Arizona Dental Association, and Central Arizona Dental Society. Dr. Silverman is also Laser Certified by the World Clinical Laser Institute.
DentistThis is definitely not advisable. Even if you were able to whiten teeth while in braces, it would not whiten the tooth structure under the brackets and bands. Further, when the braces are removed, the color of the teeth would be uneven and not aesthetically pleasing.
Warnings
- Silver fillings may take on a green shade after significant bleaching. If possible, have them changed before whitening.⧼thumbs_response⧽
- Do not swallow the gel.⧼thumbs_response⧽
- Using a bleaching product when you have dental work may cause the need to redo dental work to match the new shade of your teeth.⧼thumbs_response⧽


References
- ↑ https://www.ncbi.nlm.nih.gov/pmc/articles/PMC4058574/
- ↑ https://www.nature.com/articles/sj.bdj.2013.1047
- ↑ https://www.nhs.uk/conditions/teeth-whitening/
- ↑ https://www.robertsolowdds.com/wp-content/uploads/2017/09/Teeth_Whitening_InsDirections_on_use_of_professional_bleaching_gel_and_whitening_trays.pdf
- ↑ https://www.robertsolowdds.com/wp-content/uploads/2017/09/Teeth_Whitening_InsDirections_on_use_of_professional_bleaching_gel_and_whitening_trays.pdf
- ↑ https://www.robertsolowdds.com/wp-content/uploads/2017/09/Teeth_Whitening_InsDirections_on_use_of_professional_bleaching_gel_and_whitening_trays.pdf
- ↑ https://www.ncbi.nlm.nih.gov/pmc/articles/PMC7331929/
- ↑ https://www.robertsolowdds.com/wp-content/uploads/2017/09/Teeth_Whitening_InsDirections_on_use_of_professional_bleaching_gel_and_whitening_trays.pdf
- ↑ https://www.robertsolowdds.com/wp-content/uploads/2017/09/Teeth_Whitening_InsDirections_on_use_of_professional_bleaching_gel_and_whitening_trays.pdf
About This Article
To use teeth whitening gel, start by putting a small dab of gel into each tooth mold in your tray. Avoid filling the tray or spreading the gel around in it. Then, put the tray over your teeth and leave it on for the prescribed time, which is usually around 1-2 hours. When you're done, remove the tray and rinse your mouth to remove any leftover gel. You should also clean the tray by scrubbing it with warm water before you put it away. To learn how to prevent tooth sensitivity when using whitening gel, scroll down!


Medical Disclaimer
The content of this article is not intended to be a substitute for professional medical advice, examination, diagnosis, or treatment. You should always contact your doctor or other qualified healthcare professional before starting, changing, or stopping any kind of health treatment.
Read More...