This article was co-authored by Kelly Chu. Kelly is the lead makeup artist and educator of the Soyi Makeup and Hair team that is based in the San Francisco Bay Area. Soyi Makeup and Hair specializes in wedding and event makeup and hair. Over the past 5 years, the team has created bridal looks for over 800 brides in America, Asia, and Europe.
There are 8 references cited in this article, which can be found at the bottom of the page.
This article has been viewed 15,895 times.
A fan brush is a flat, fluffy makeup brush that comes in a variety of sizes and has lots of different uses. Larger fan brushes are perfect for things like contouring your face, applying blush, or blending. Medium fan brushes will allow you to highlight your eyelids and finer details, while small fan brushes are great for applying mascara to lashes for a natural look.
Steps
Applying Powdered Makeup
-
1Create an airbrushed effect by fan brushing foundation. Use a large fan brush to even out your powdered foundation, using the top of the brush to gently buff the foundation on your entire face. This will leave you with a streak-free complexion.[1]
-
2Contour your cheekbones using a large fan brush. To contour your cheekbones, apply some bronzer to your brush and swipe the brush back and forth between the top of your ear and the edge of your mouth. This will make your cheekbones look sharper without any harsh lines.
- You can also contour your nose, forehead, and jawline.
- Contouring allows you to use the powder to reshape or define these areas on your face.
Advertisement -
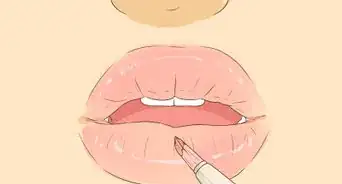
3Highlight your facial features for a brightened look. Dip your brush into your powder highlighter, and dust it lightly over areas that are naturally highlighted on your face, such as the top of your cheekbones, the edge of your nose, or the tip of your chin. Use the tip of the fan brush and soft strokes.
- Highlighting attracts the light, allowing the parts that you fan brushed to look brighter and more glowing.
- A large fan brush is best for highlighting.
- To highlight your cheeks, swipe the brush from your temples to the top of your cheekbones.
- You can highlight your eyelids by sweeping your fan brush along your brow bones, or right under the outer part of your eyebrows.
-
4Apply blush using a fan brush for a rosy glow. Rub your fan brush into some blush, and then apply it to the top of your cheekbones. Use a backwards sweeping motion to create a soft, natural glow.[2]
- Use the wide side of the brush to make your rosy glow look natural and blended.
- Tap your brush against the blush compact to get rid of any excess blush before applying it.
- Choose blush that complements your skin tone. For example, if you have fair skin, you'd want a blush in pale pink.
-
5Use your fan brush for blending. If you apply your makeup and it seems streaky or full of visible lines where different products have been applied, use your fan brush to blend over the harsh lines. Use the edges of the fan brush to gently go back and forth over a spot that needs to be smoothed out.[3]
- The large brush is best for this, as it will cover a larger portion of your face and blend very evenly.
-
6Clean up extra powder using the fan brush. If eye shadow fell under your eyes or you applied too much bronzer, use a large or medium fan brush to brush away the excess. Just swipe the brush under your eyes or where there’s too much powder, and it’ll clean your face right up.
- Make sure your fan brush is clean each time you use it to avoid clogging your pores.


Practicing Additional Techniques
-
1Get rid of a shiny T-zone using a large fan brush. If you have oily skin, dip your fan brush into a translucent powder. Brush the powder along any shiny spots on your face, including your forehead, nose, and chin. The fan brush will give you even, blended coverage.[4]
- You can tap your brush against the translucent powder's container before applying it to your skin to get rid of any excess.
-
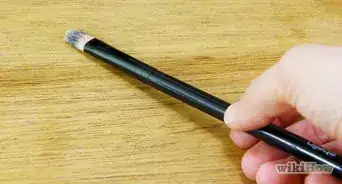
2Brush mascara onto your lashes with a small fan brush for a natural look. Apply the mascara to your brush by swiping the brush along the mascara wand’s bristles. Brush the mascara onto both your top and bottom lashes using the small brush to create a clump-free look.[5]
- The brush coats your lashes in a thin layer of mascara as opposed to a clumpier, thicker layer that a mascara wand creates.
- If you want your lashes to look full, start applying the mascara at the roots, moving the brush back and forth between your lashes.
- If you just want a natural look, avoid applying mascara to the roots.
- The brush is also useful for removing clumps from freshly-applied mascara.
-
3Use a fan brush to apply a facial mask. Dip a medium-sized fan brush into your facial mask so that there's a quarter-sized amount on the brush. Start spreading the mask over your face using the flat side of the brush. This will give you thin, even coverage without wasting any of the mask.[6]
- If you didn't apply enough of the facial mask to your brush the first time, add another quarter-sized dollop and keep going.
Choosing a Brush Size
-
1Use a large fan brush for dusting and contouring. The large fan brush is the most popular size, and it can be used for multiple things. Sweep excess powder from your face, highlight your cheekbones, or apply bronzer — the options are endless.[7]
- Large fan brushes are great for overall blending.
-
2Purchase a medium brush for smaller areas of your face. If you want to highlight the bridge of your nose or the line above your lips, a medium-sized fan brush is perfect. It’s also great for brushing and blending eyeshadow.[8]
-
3Opt for a small fan brush to apply mascara. It may seem weird to swipe mascara onto a brush before applying it to your lashes, but using a small fan brush to apply mascara will give you a more natural look. Small fan brushes are also great for getting rid of clumps after you've applied mascara.[9]
-
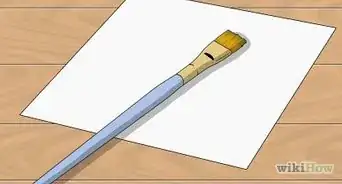
4Pick a brush with natural bristles if you use powdered makeup. Brushes with natural bristles are the best type when dealing with any sort of powdered makeup, which is what fan brushes are mainly used with. Natural bristles are super durable and will give you great texture.[10]
- Be aware these bristles come from animals, so if you're allergic to animal hair or are against this type of product, you'll want to opt for synthetic bristles.
-
5Try out synthetic bristles for precise makeup application. Synthetic bristles can be used with powders, liquids, or creams. The bristles tend to align next to one another, making them perfect for applying your makeup in specific areas.
-
6Go with a duo fibre brush for a blend of both synthetic and natural bristles. Whether you're applying a cream or a powder, duo fibre brushes will give you a natural look. They're great for blending and can make your skin look air-brushed.
-
7Choose well-made brushes with bristles that don't fall out. Check to make sure the brush you're getting doesn't have harsh bristles that could irritate your skin or a loose ferrule. It's also a good idea to make sure the bristles don't come loose easily.[11]
- The ferrule is the metal piece that holds the bristles together on the brush.
- If you're ordering your brush online and can't physically see it, read the reviews to get a good idea of the brush's quality.


Cleaning the Brush
-
1Wet the brush's bristles using lukewarm water. When you're wetting the bristles, try not to get the ferrule wet, as this can cause the bristles to loosen over time.[12]
- Avoid hot water, which will cause the glue in the ferrule to disintegrate.
-
2Place a drop or 2 of soap into the palm of your hand. Use a mild dish soap or baby shampoo as the soap. You can also buy a special makeup cleanser from a beauty store, drug store, or big box store.[13]
- You can use a special makeup cleaning surface, such as a silicone pad, instead of your hand if desired.
-
3Massage the bristles against your palm. Move the bristles of the fan brush back and forth across the palm of your hand. You can also use your fingers to massage some of the makeup out of the bristles.[14]
-
4Rinse the bristles under running water until the water runs clear. Turn on lukewarm or cool running water. Hold the bristles under the water and squeeze them until the water runs clear and all of the makeup is out of your brush.[15]
-
5Squeeze out any excess water before reshaping the brush. Use a clean towel to gently squeeze the bristles of the brush to soak up the water. Once the brush is just a little damp, use your fingers to flatten and reshape the brush as it was before.[16]
-
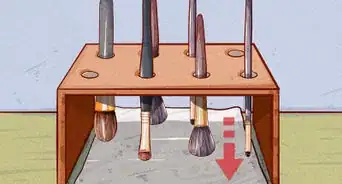
6Let the fan brush dry laying flat. This will keep the water from leaking down into the ferrule, which will cause damage to the fan brush. Lay the brush on its flat side overnight so that it's dry and ready to be used in the morning.[17]


Expert Q&A
-
QuestionHow do you get rid of eyeshadow fallout?
 Kelly ChuKelly is the lead makeup artist and educator of the Soyi Makeup and Hair team that is based in the San Francisco Bay Area. Soyi Makeup and Hair specializes in wedding and event makeup and hair. Over the past 5 years, the team has created bridal looks for over 800 brides in America, Asia, and Europe.
Professional Makeup ArtistUse your fan brush! Simply dust away the excess eye shadow fallout without messing up the rest of your makeup.
References
- ↑ https://www.makeup.com/how-to-blend-makeup-the-right-way
- ↑ https://www.youtube.com/watch?v=KMRJliejH0U#t=1m23s
- ↑ https://www.makeup.com/how-to-use-a-fan-makeup-brush
- ↑ https://www.makeup.com/how-to-use-a-fan-makeup-brush
- ↑ http://www.byrdie.com/insider-tip-how-to-use-a-mascara-fan-brush
- ↑ https://www.makeup.com/how-to-use-a-fan-makeup-brush
- ↑ https://www.refinery29.com/how-to-use-fan-brush
- ↑ https://www.refinery29.com/how-to-use-fan-brush
- ↑ https://www.refinery29.com/how-to-use-fan-brush
- ↑ http://stylecaster.com/beauty/makeup-brushes-natural-synthetic/
- ↑ https://www.antonymcosmetics.com/blogs/be-chic-be-antonym-blog/100358150-guide-the-5-cs-to-choosing-a-makeup-brush
- ↑ https://www.allure.com/story/how-clean-are-your-makeup-brus
- ↑ https://www.allure.com/story/how-clean-are-your-makeup-brus
- ↑ https://www.allure.com/story/how-clean-are-your-makeup-brus
- ↑ https://www.allure.com/story/how-clean-are-your-makeup-brus
- ↑ https://www.allure.com/story/how-clean-are-your-makeup-brus
- ↑ https://www.allure.com/story/how-clean-are-your-makeup-brus
About This Article