wikiHow is a “wiki,” similar to Wikipedia, which means that many of our articles are co-written by multiple authors. To create this article, 22 people, some anonymous, worked to edit and improve it over time.
There are 12 references cited in this article, which can be found at the bottom of the page.
This article has been viewed 116,921 times.
Learn more...
MIG welding is a great way to add professional touches to your DIY projects. MIG welding has many practical applications, from auto work to home repair. Follow this guide to learn how.
Steps
Understanding MIG Welding
-
1Learn the basics of MIG welding. The process is GMAW (Gas Metal Arc Welding), commonly known as MIG welding (Metal Inert Gas welding). MIG welding was developed during World War II as a fast, portable process to create strong, durable joints. Today it is used in many shop and factory applications as well as by home hobbyists and welding enthusiasts.[1]
-
2Learn how it works. MIG welding uses a machine to feed a wire through a contact tip into a MIG gun. The electrically charged contact tip transfers the welding current to the wire. The arc is established between the wire and the base metal. Often times an inert gas is used, which flows out of the gas nozzle to shield the welding process from the atmosphere.[2] There are several modes of metal transfer:
- Short circuit (thin metals)
- Globular transfer (heavier metals)
- Spray transfer (hottest)
Advertisement -
3Understand the applications. Once you learn how to use a MIG welder, you can make repairs around the home. A MIG welder can be used on stainless steel, mild steel, and aluminium of all thicknesses. Shielding gases will vary depending on base metal and welding wire.[3]


Preparing to Weld
-
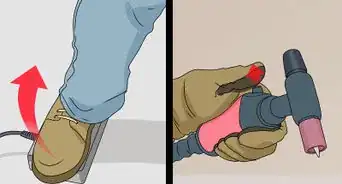
1Assemble your safety gear. You will need a full set of safety equipment to ensure your safety while welding. This includes gloves, masks, and protective clothing.[4]
- Make sure that all of your skin is covered to prevent overexposure from UV rays. You will need a mask with at least a #10 shade or darker. This will help prevent arc eye.
- If you are working in a poorly ventilated area, you will need a vapor mask to minimize the amount of toxic vapors inhaled during the welding process.
- Wear gloves that can protect your skin from molten metal.
- Keep a CO2 extinguisher and a bucket of sand nearby for emergency fires.
-
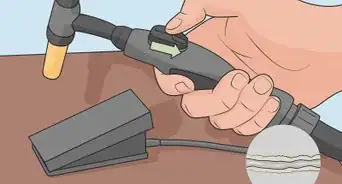
2Select a comfortable MIG gun. Some are shaped like pistols, while others may look like acetylene torches. The size of the machine will depend on the size of the project.
- A MIG gun may also be water or air cooled. Air-cooled guns are used for 200 amps or less and are easier to manipulate in small areas. The air-cooled gun is the type that home MIG welders typically use.[5]
-
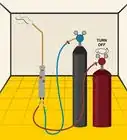
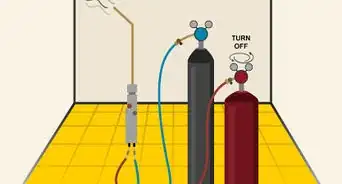
3Prepare the area to be welded in. Remove all flammable material and find a good surface to weld on. Although you can put the ground connection right on the piece you are welding, most shops have a large metal workbench that the ground is hooked up to.
- If there are other people present, set up welding curtains around the work area. This will protect them from UV damage.[6]


Installing the Wire
-
1Obtain the proper wire. Use the same wire type as the material you are welding. For example, if you are welding stainless steel, use a stainless steel wire.
- For steel welding, there are two main types of wire. AWS ER70S-3 is an all-purpose steel wire. This is usually the most economical choice. AWS ER70S-6 is a high-quality steel wire, designed for welding on rusty or dirty steel. [7]
- E71TGX requires no shielding gas. It is suited for welding in high winds and for painted or rusty materials.
- Vary the diameter of your wire based on the thickness of the metal you are welding. Use thin wire for thin metals, and thicker wire for thicker metals. You may need a larger machine for thicker metals.
-
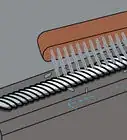
2Prepare the reel. Tighten the tension on the reel so that the wire doesn’t unravel due to its own tension. Make the first 3 inches (7.6 cm) of the wire as straight as possible to avoid tangles or damage to the line feeder. Use a wire cutter to trim the wire accordingly.[8]
-
3Feed the wire to the torch. Insert the wire into the guide tube and feed it over the roller. Insert it in to the wire liner. If you have to use force, chances are that the wire is not aligned properly.[9]
- Make sure the wire is free from rust or grease, this will cause bad welds. Use a dry cloth to clean any dirty wire before inserting it. Wire will become rusty if left in the welder when not in use.
- Once the wire is inserted into the liner, turn the welder on and use the wire feed mechanism to push the wire through the welder.
-
4Adjust the tension. Once your wire is fed through, you will need to adjust the tensioner. TOO much tension will cause the mountings to bend, damaging the welder. Keep the tension at the minimum amount that still allows the line to be fed through.[10]
- Make sure to check the tension on the reel as well as on the line feeder. Both should be as low as possible.


Making the Weld
-
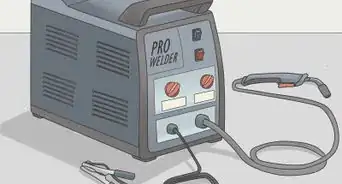
1Set the welding machine polarity to DCEP. This is reverse polarity.
-
2Keep a consistent electrode length. As you are welding, keep your electrode extended between ¼” and 3/8” from the contact tube. This will help make for a clean, regular weld.
-
3Use the proper shielding gas. Use carbon dioxide as an economical choice to provide deeper penetration on steel.[11] This will be too hot for thin metals though. Use argon for aluminum welding, and a mix of argon (75%) and carbon dioxide (25%) for thinner steel.
-
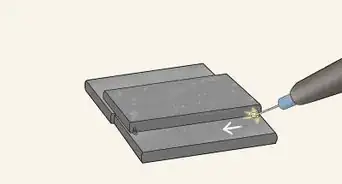
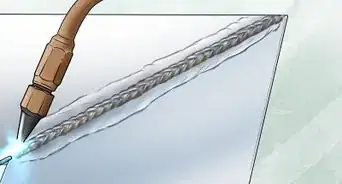
4Weld a joint using a drag or push welding technique. The angle should not exceed 10 degrees in either technique. Keep the wire at the front edge of your weld pool. This will give you greater control over your weld.[12]
- Drag welding pulls the bead along with the tip. This will give you a deeper penetration and a narrower bead.
- Push welding pushes the bead with the tip. This will give you a wider bead.
-
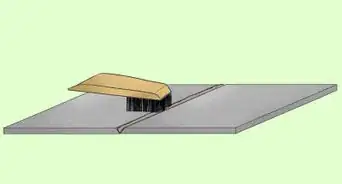
5Make a flat weld. Use the welder to place material directly into the joint. You can use a back and forth method to fill large gaps. For flat joints, hold the gun at a 90° angle.
-
6Make a horizontal weld.[13] You must lower the gun angle slightly to keep the filler from sagging. Keep the same push or pull angle as normal. Use a back-and-forth weave motion to fill large gaps.
- Keep the amperage the same as a flat weld. You may need to use a slightly smaller diameter wire to keep the weld pool from getting too big.
-
7Make a vertical weld.[14] For thin materials, start at the top and move the pool down with gravity. This keeps the arc from penetrating the material. For thicker metals, start at the base and work up. This will help increase penetration.
- You may want to lower the amperage by around 10-15% to help fight gravity.
-
8Make an overhead weld. Use standard welding techniques, but increase your travel speed. This will help prevent filler from falling out of the joint. You may need to increase your gas flow rate.
- Keep your nozzle clean, as spatter will build up faster when welding overhead.
-
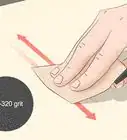
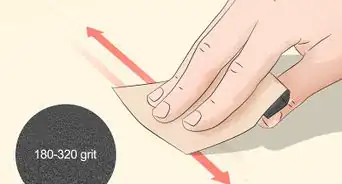
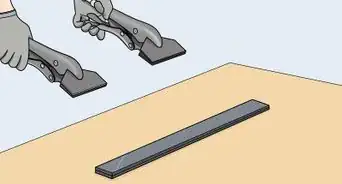
9Finish the weld. Once you are done with the weld process, grind off any excess filler. If the weld is defective, grind it down and re-weld the joint.


Community Q&A
-
QuestionCan a gas leak from welding be harmful?
 T. ChinsenTop AnswererAny gas can be inhaled and become harmful if inhaled in sufficient quantities. The gases reduce the oxygen level of the air when they are present. Aspirators absorb toxic gas and stop it from being inhaled into the body.
 -
QuestionI am replacing the floor pans on a VW. Which welder should I use?
 Community AnswerIn general, the GMAW/MIG or Stick will work. If you don't know how to use a MIG welder, then get a skilled MIG welder to teach you how or take a welding class at a local community college. Learning on the fly is not sound or safe. Have your VW pan welding checked out by a skilled welder.
 -
QuestionHow do I reduce porosity?
 Community AnswerChances are your shielding gas pressure is too low or too high. Try adjusting your work pressure to 22 to 25 pounds.
Warnings
- Always wear a welding helmet when undertaking welding of any kind or looking at an arc of any kind (mig, tig, arc, fcaw, etc) Failure to do so will result in a condition known as "arc eye", an inflammation/ burn of the eye caused by the intense UV light caused from the arc while welding. This will typically not be felt until several hours after the damage has been done, usually when trying to go to sleep.⧼thumbs_response⧽
- It is also Highly recommended to Always wear closed shoes, long sleeve shirts, long pants, and gloves, not only to protect from slag (small pieces of molten metal caused from arc welding) but to also protect from sunburn that can be caused from the UV light from arc welding.⧼thumbs_response⧽
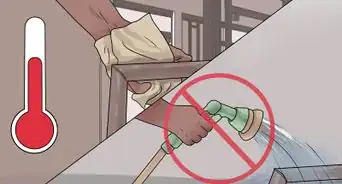
- Always be aware that a workpiece you have just welded will remain extremely hot for quite a while, so make sure other people are aware of this and they do not attempt to handle the workpiece without gloves.⧼thumbs_response⧽
Things You'll Need
- MIG welder
- Welding apparel
- MIG welding wire
- Shielding gas
- Metal for welding
- Grinder (as needed)
- Air extraction


References
- ↑ https://www.millerwelds.com/resources/article-library/mig-welding-the-basics-for-mild-steel
- ↑ https://www.youtube.com/watch?v=wPeHA9Szhhg
- ↑ https://www.thefabricator.com/article/arcwelding/mig-welding-the-basics-and-then-some
- ↑ http://gowelding.org/welding/mig-gmaw/safety/
- ↑ https://blog.binzel-abicor.com/air-cooled-vs.-water-cooled-mig-guns
- ↑ http://blog.gaf.com/how-to-avoid-welding-arc-flash/
- ↑ https://weldingpros.net/how-to-mig-weld/#Selecting_The_Wire
- ↑ https://www.mig-welding.co.uk/wire-feed.htm
- ↑ https://www.mig-welding.co.uk/wire-feed.htm
About This Article
To use a MIG welder, make sure you're wearing all of the necessary safety equipment, like gloves, a mask, and protective clothing, and that you're working in a well-ventilated area. Then, install your welding wire and set the machine's polarity to DCEP. Then, use a push or drag welding technique to make flat, horizontal, vertical, and overhead welds. As you're welding, keep a consistent electrode length and make sure you're using the proper shielding gas for the metal you're working with. To learn how to set up a MIG welder, read on!