This article was co-authored by wikiHow Staff. Our trained team of editors and researchers validate articles for accuracy and comprehensiveness. wikiHow's Content Management Team carefully monitors the work from our editorial staff to ensure that each article is backed by trusted research and meets our high quality standards.
There are 12 references cited in this article, which can be found at the bottom of the page.
This article has been viewed 71,410 times.
Learn more...
A table saw is a versatile piece of equipment that's easy to use and can save you time and effort. Table saws are used to cut boards and can make long vertical cuts called rips or short angled cuts called crosscuts. If you follow the right techniques, have the correct safety equipment, and properly set up your saw, you can make accurate and precise cuts using your table saw.
Steps
Staying Safe
-
1Wear eye and ear protection when using the table saw. Wear safety goggles or a hardhat with a visor when cutting boards on your table saw. This will prevent sawdust and wood debris from flying into your face or eyes. Also, proper ear protection should be used because saw blades can be incredibly loud and hurt your eardrums. You can either purchase cheap, disposable earplugs or more sturdy earmuffs to protect your hearing.[1]
-
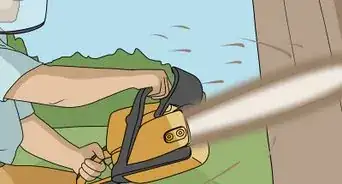
2Use a push shoe, push stick, or splitter when cutting thin boards. When cutting narrow, short boards, there may not be much clearance for your hands between the blade and the side fence. For this reason, you should use a push stick or a notched sled to help guide your wood as it gets cut. You can purchase these table saw pushing devices at hardware stores, online, or you can create them yourself.[2]
- Some push devices will have adjustable parts for different sizes of wood.
Advertisement -
3Use clearance inserts. If you are ripping really thin boards, you'll want to use an insert to protect your fingers from being close to the blade. An insert is a piece of wood that fits between the side fence and your saw blade and allows a buffer zone when cutting especially thin pieces of wood.[3]
- In addition to using a clearance insert, you should also use a pushing device when cutting very thin boards.
-
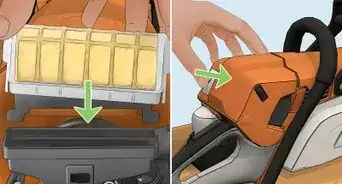
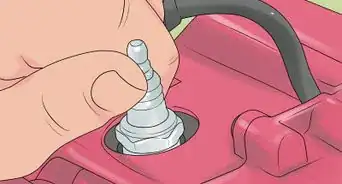
4Install the blade guard properly. Blade guards prevent debris from kicking back and keep your fingers away from the blade. If blade guard is no longer installed, purchase one from your table saw manufacturer, or re-install the one that came with the table saw originally. Many modern blade guards can be reattached to your blade by simply fitting it on top of the blade and tightening screws or plastic clamps.[4]
-
5Don't cut warped boards. Warped or bent boards will make rough cuts and will cause wood to kick back. Do not use any boards that have been water damaged or warped.[5]
-
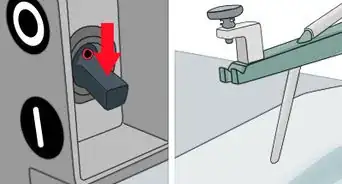
6Locate your emergency turn off button. Most table saws will come with a large button or paddle for an emergency turn off. If there is an accident or a board is kicking back you may need to turn off your machine quickly. Many times this button can be hit with your leg if your hands are occupied.[6]
-
7Avoid wearing loose hanging jewelry or clothing. Avoid wearing things that can get caught in the saw like loose sleeves or a tie. Other baggy or loose fitting clothing could get trapped in the saw and pull you towards it. If you have long hair, tie it up before using your table saw.[7]
-
8Read the instruction manual. Make sure to read the instructions that came with your saw for proper use and installation of the saw. Although most table saws are similar, there are differences among brands. Reading the manual will let you know where each part of the saw is, what it does, and the proper safety precautions that you should take when using your specific model.[8]


Ripping Boards
-
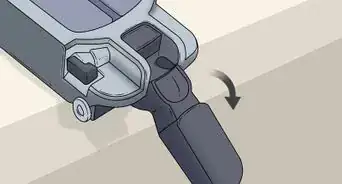
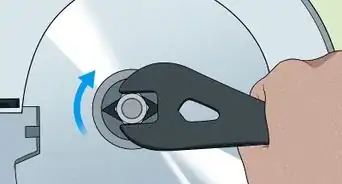
1Adjust the blade so it's higher than the thickness of the wood. To avoid potential kickback, you want to make sure that the blades of the saw are as high as the thickness of the piece of wood you are cutting. Use the blade adjusting handle on the bottom of your table saw to either raise or lower the blade. The blade should be about a .25 inches (0.635 cm) higher than the thickness of the wood you intend to cut.[9]
-
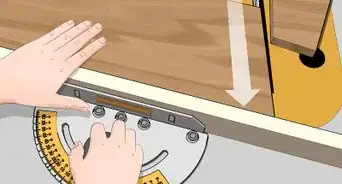
2Adjust the width of the fence that you need to cut. Use a tape measure to measure the distance from the saw blade to the fence. There will be a handle that will tighten and loosen the side rail, so that you can move it left to right. Move the side fence to the distance that you want to cut your board.
- For instance, if you need to cut a 2-foot (61 cm) wide board, you'd measure 2 feet (61 cm) between the side fence and the saw blade.[10]
-
3Hold the wood against the fence. Place your thumb and hand carefully behind the piece of wood between the fence and saw blade. Set the wood firmly against the table saw and the side fence to prevent kickback.
-
4Lower the blade guard and turn on the table saw. Lower the plastic guard blade over the blade to protect you from debris. Turn on the blade and get ready to cut.
-
5Push your board through the blade. At a slow and steady rate, push your board through the blade. Concentrate on keeping the board flush with your fence as you push it through. Never put your hand close to the blade, and always use a push device or insert if there is not at least 6 inches (15.24 cm) between your hand and your blade.[11]
- A sharp blade and a flat board will prevent your wood from splintering or chipping.
-
6Switch off the saw. Flip the switch on your table saw to turn it off. Your board should now be properly cut to your intended dimensions.


Making a Crosscut
-
1Adjust the blade to the thickness of the wood you are cutting. Adjust the saw blade to about .25 inches (0.635 cm) above the thickness of your board. Setting the blade too high could splinter your wood and setting it too low will cause it to not cut all the way through.[12]
-
2Set your miter gauge into its slot. If you don't have a built-in miter gauge, you'll have to set one into the miter gauge slot, which should be on the left of your saw blade. If your saw didn't come with a miter gauge, you can purchase one at a hardware store or online.[13]
-
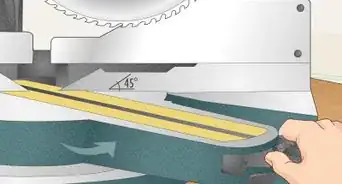
3Square the miter gauge to your blade. To make perfect crosscuts, the miter gauge must be squared with the sawblade. Loosen the handle on the miter gauge and place a 45-degree drafting triangle along the length of your saw blade. Adjust the gauge until both sides of your drafting triangle runs at a 90-degree angle against the blade and the miter gauge. Once it's perfect, retighten the handle on the gauge to hold it in place.[14]
-
4Hold your board against the miter gauge fence. Use your right hand to pull the miter gauge handle and set the gauge to the back of the saw. Using your left hand, firmly hold your board against the edge of the miter gauge. Keep your fingers at least 6 inches away from the saw blade cover.[15]
- The board should be sitting at a 90-degree angle to your blade on the miter gauge fence.
-
5Push the board through the blade. Push slowly but deliberately with your right hand onto the miter gauge handle and keep a firm grip on the board with your left hand. Push the miter gauge fence forward and cut your board.[16]
-
6Pull back the board and turn off the saw. Once you've cut through your piece of wood, pull back the board to the starting position. Turn off your table saw, and you've just made a crosscut.


Community Q&A
-
QuestionHow do I measure wood?
 GEttingerCommunity AnswerUse a tape measure to measure wood. You can then mark your measurements using a pencil.
 -
QuestionWhat size is the smallest piece wood that can be cut with a table saw?
 Community AnswerYou can cut any size of wood with a table saw if you have the right equipment.
 -
QuestionShould I kneel on the floor to use the table saw to cut material?
 Community AnswerNo, that would be very dangerous. If it kicks back, it can hit you right in the face. Also, you won't be able to see the board very well.

References
- ↑ https://www.alce.vt.edu/content/dam/alce_vt_edu/teacher-resources/lab-safety-resources/tablesaw.pdf
- ↑ http://www.popularmechanics.com/home/tools/how-to/a21348/learn-how-to-make-the-most-popular-cut-with-your-table-saw-the-rip-cut/
- ↑ http://www.rockler.com/how-to/table-safety-tips/
- ↑ https://www.familyhandyman.com/tools/table-saws/how-to-use-a-table-saw-ripping-boards-safely/view-all
- ↑ https://www.familyhandyman.com/tools/table-saws/how-to-use-a-table-saw-ripping-boards-safely/view-all
- ↑ https://www.youtube.com/watch?v=Lxi8EWBWcOU
- ↑ https://www.assh.org/handcare/safety/table-saw
- ↑ https://www.ccohs.ca/oshanswers/safety_haz/woodwork/tbl_saw.html
- ↑ https://www.familyhandyman.com/tools/table-saws/how-to-use-a-table-saw-ripping-boards-safely/view-all
- ↑ https://www.bobvila.com/articles/991-quick-tip-table-saw-techniques/#.WK3RmvkrLcc
- ↑ https://www.familyhandyman.com/tools/table-saws/how-to-use-a-table-saw-ripping-boards-safely/view-all
- ↑ http://www.startwoodworking.com/post/tablesaw-primer-ripping-and-crosscutting
- ↑ https://www.youtube.com/watch?v=d3aKCC2CtgQ
- ↑ https://www.familyhandyman.com/tools/table-saws/how-to-use-a-table-saw-cross-cutting/view-all
- ↑ http://www.startwoodworking.com/post/tablesaw-primer-ripping-and-crosscutting
- ↑ https://www.shopsmith.com/academy/tblsaw_basiccuts/
About This Article

Before you use a table saw, make sure you follow safety precautions, like wearing eye and ear protection, and make sure you know where the emergency shut off button is before turning it on. If you want to rip boards, adjust your blades so that they are higher than the thickness of the wood. Next, move the side fence to the width that you want to cut your board. Hold the wood firmly against the fence and lower the blade guard. Then, turn on the table saw, push your board through the blade at a slow and steady rate, and turn off the power when you’re done. For more tips, including how to make a crosscut, read on!