This article was medically reviewed by Sarah Gehrke, RN, MS. Sarah Gehrke is a Registered Nurse and Licensed Massage Therapist in Texas. Sarah has over 10 years of experience teaching and practicing phlebotomy and intravenous (IV) therapy using physical, psychological, and emotional support. She received her Massage Therapist License from the Amarillo Massage Therapy Institute in 2008 and a M.S. in Nursing from the University of Phoenix in 2013.
There are 10 references cited in this article, which can be found at the bottom of the page.
This article has been viewed 141,424 times.
A urine dipstick test is a type of fluid analysis used by medical professionals to screen for various diseases and health complications. When the test strip is saturated with urine, it changes color to indicate the presence of compounds like proteins, ketones, hemoglobin, and nitrites, as well as harmful pathogens. To use a subject’s urine to determine their health, it’s first necessary to collect a fresh sample. Afterwards, you can mark any changes on the strip and interpret your findings to make a diagnosis.
Steps
Collecting a Urine Sample
-
1Wash your hands. Wet your hands with warm water then rub antibacterial soap between them for at least 20 seconds. Rinse your hands with warm, running, water then dry them with a clean single-use paper towel. You should always wear gloves when performing a test on any body fluid.[1]
-
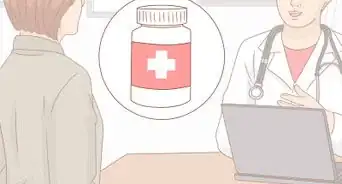
2Fill a sterile specimen container with urine. Urinalysis tests should always be conducted using fresh urine. Urinate a small amount in the toilet, then stop urinating and position the collection container underneath the urethra or penis tip. Urinate directly into the container until it is half full, then secure the lid.[2]
- To ensure an accurate reading, it’s essential to keep the urine from coming into contact with contaminants from the environment.
- For a home test, you can also position the strip directly under the stream, the way you would with a traditional pregnancy test.[3]
- Swirl or shake the container lightly to mix the urine prior to testing.[4]
Advertisement -
3Dip the test strip into the urine. Take hold of the gripping surface at the thick end of the dipstick. Submerge the strip all the way, making sure you completely cover each individual test square. Once you’ve saturated the strip, remove it from the container immediately. Drag the strip along the edge of the container. [5]
-
4Use an absorbent material to blot the edge of the strip against. Do not touch the pads with any material. A sheet of filter paper or absorbent paper towel will soak up the excess urine, preventing drips and keeping the testing area clean and sanitary. The remaining urine will be enough to react with the test squares.[7]
- Let the urine drip off the side of the strip, not down its length.
- Never shake the dipstick or blot it with another object.
-
5Turn the strip sideways before reading it. When held in a horizontal position, you can make sure that the reactive chemicals won’t run from one square to another. Be sure to keep the test squares facing up so they’ll be plainly visible.[8]
- Mingling the urine from different squares can easily throw off the results of the test.
- Wash your hands after collecting and testing the urine sample.


Reading the Test Strip
-
1Wait approximately 2 minutes for the results. It can take anywhere from 30 to 120 seconds for the compounds in the urine to begin reacting with the reagents on the test squares. Read the instructions for the specific test you are performing to know the exact time needed. Once a reaction is underway, the squares will gradually begin to change color.[9]
- Trying to track the time in your head is too imprecise. Set a timer or keep a close eye on the second hand of your watch so you’ll know exactly when the test is complete.
-
2Compare the test squares to the color chart. Each package of test strips should come with a color chart for easy analysis. Keep this chart handy when it comes time to read the strip. It will tell you what substances cause each change in color, which will help you narrow down your course of treatment.[10]
- The color chart will most often be displayed somewhere on the packaging itself, though it may also be included as a separate sheet.
-
3Read the test squares in chronological order. The squares on a testing strip are designed to react sequentially—this makes trying to examine your findings less chaotic. It will typically take about half a minute before you’ll start to observe any changes. Check the value of the first square (the one closest to your hand), then move on to the next and proceed from there until you’ve reviewed the entire strip.[11]
- Take a few moments to read the instructions specific to the brand of test strips you’re working with to verify that you’re examining the squares in the correct order.
- Any color changes that take place after the initial two minutes should be disregarded, as the longer the urine remains exposed, the more likely it is to produce false positives.
-
4Interpret the results carefully. Different colors indicate the presence of different substances. High amounts of proteins, for example, will turn the corresponding protein square (abbreviated as “PRO”) a cyan hue, while elevated nitrite levels (“NIT”) are common with UTIs. Refer to your color chart frequently to get a better sense of the significance of each value.[12]
- You’ll always want to take a look at the pH, specific gravity (“SG”), and glucose levels (“GLU”) of a urine sample, regardless of what you’re screening for.
- The leukocyte and ketone ranges can point to potentially serious conditions like bacterial infections or diabetes.[13]


Ensuring Accurate Results
-
1Test the urine right away. Ideally, the sample should be analyzed as soon as it leaves the body. If this isn’t possible, refrigerate the fresh urine until it can be examined. Keeping it in cold conditions will slow the breakdown of different chemicals and the onset of bacteria.[14]
- Always refrigerate a sample if it’s going to be more than 2 hours before you can get around to testing it.[15]
- Discard samples that are more than a couple hours old if they’ve been exposed to air or left to sit at room temperature. If necessary, you can wait and take a new sample at a later time.
-
2Pay attention to the physical characteristics of the urine. The way a sample looks will provide the first clues about what’s going on inside the body. Healthy urine should be clear or faintly yellow. If the urine you’re testing is a dark or unusual color, is especially cloudy, or has an abnormal odor, you may not need a full urinalysis to tell you that something is off.[16]
-
3Keep in mind that a dipstick test is not infallible. Generally speaking, urinalysis is a convenient and reliable way to get an overview of a patient’s level of health, but it’s not a perfect system. Bacteria, external contaminants, and the passing seconds can all contribute to inaccurate readings. Furthermore, it’s possible for testing machines and other materials to occasionally provide false results.[18]
- If you need to be able to detect potentially serious health complications, another type of test (such as a detailed blood screening) may be necessary.


Warnings
- Never test a sample from a toilet, bottle, or other unsuitable container. Unless the urine has been properly collected and stored, the resulting values will be untrustworthy.⧼thumbs_response⧽
Things You'll Need
- Sealed package of test strips
- Lidded sterile container for collection
- Filter paper or absorbent paper towel
- Timer or stopwatch
- Color chart to interpret readings
- Refrigerator (for storing samples)


References
- ↑ https://www.gla.ac.uk/media/Media_678207_smxx.pdf
- ↑ https://patient.info/treatment-medication/urine-dipstick-test
- ↑ https://www.ncbi.nlm.nih.gov/pubmedhealth/PMH0072534/
- ↑ http://pathology.jhu.edu/department/staff/poct/selfstudy/urinedipstick.pdf
- ↑ https://www.ncbi.nlm.nih.gov/pubmedhealth/PMH0072534/
- ↑ https://patient.info/doctor/urine-dipstick-analysis
- ↑ http://conovers.org/ftp/Urine_Dipstick_Testing__Everything_You_Need_to.33.pdf
- ↑ http://pathology.jhu.edu/department/staff/poct/selfstudy/urinedipstick.pdf
- ↑ http://conovers.org/ftp/Urine_Dipstick_Testing__Everything_You_Need_to.33.pdf
- ↑ https://patient.info/treatment-medication/urine-dipstick-test
- ↑ http://pathology.jhu.edu/department/staff/poct/selfstudy/urinedipstick.pdf
- ↑ http://www.bpac.org.nz/BT/2013/June/urine-tests.aspx
- ↑ https://www.ncbi.nlm.nih.gov/pubmedhealth/PMH0072534/
- ↑ https://www.ncbi.nlm.nih.gov/books/NBK279350/
- ↑ http://conovers.org/ftp/Urine_Dipstick_Testing__Everything_You_Need_to.33.pdf
- ↑ https://patient.info/doctor/urine-dipstick-analysis
- ↑ https://health.clevelandclinic.org/what-urine-color-means/
- ↑ http://conovers.org/ftp/Urine_Dipstick_Testing__Everything_You_Need_to.33.pdf
About This Article
A urine dipstick test is used by medical professionals to screen for various diseases and health conditions. To use a dipstick test, fill a container halfway with urine and dip your test strip into the container. If you’re doing the test at home, you can hold the strip directly under your urine stream instead. When you’ve finished, wipe the end of the stick with a paper towel. Hold the stick horizontally so the reactive chemicals don’t run into each other and wait for 2 minutes. Use a stopwatch or your phone to time it accurately. After 2 minutes, use the included color chart to read your dipstick test. For more tips from our Medical co-author, including how to avoid false positives from a urine dipstick test, read on.


Medical Disclaimer
The content of this article is not intended to be a substitute for professional medical advice, examination, diagnosis, or treatment. You should always contact your doctor or other qualified healthcare professional before starting, changing, or stopping any kind of health treatment.
Read More...