This article was co-authored by wikiHow staff writer, Danielle Blinka, MA, MPA. Danielle Blinka is a Writer, Editor, Podcaster, Improv Performer, and Artist currently living in Houston, TX. She also has experience teaching English and writing to others. Danielle holds a Bachelor of Arts in English, Bachelor of Arts in Political Science, Master of Arts in English with a concentration in writing, and Master of Public Administration from Lamar University.
There are 15 references cited in this article, which can be found at the bottom of the page.
The wikiHow Video Team also followed the article's instructions and verified that they work.
This article has been viewed 10,589 times.
Learn more...
You’re super excited to try out your Ecoline brush pens, but you might not know how to get started. Ecoline pens look like markers, but their ink is a type of watercolor paint. You can use your pens like a regular marker or you can add water to create watercolor paintings. These pens have a thick nib compared to other pens, so they’re best for thicker lines and coloring if you’re using them to draw or hand-letter.
Steps
Mastering the Basics
-
1Check the number and underside of the pen for the shade name. Ecoline pens are all numbered, and that number corresponds to a color shade. The number is typically printed near the nib of the pen on top of a color swatch. Additionally, look for the name of the shade in black lettering on the underside of the pen.[1]
- Ecoline brush pens come in 59 colors, and you can also get a blender pen.
-
2Choose a thick paper so your pen won’t bleed through. Ecoline pens are super-saturated with ink, so they might bleed through thin paper. Test your pens on the paper you plan to use before you do a full drawing. In general, a paper that’s at least as thick as cardstock is ideal.[2]
- If you’re planning to do a watercolor painting, using watercolor paper will produce the best result.
- Keep in mind that thin papers may tear or bead from the liquid in the pen, even if you don’t add any water to the ink.
Advertisement -
3Color with your pens like you’d use a marker. Although Ecoline pens aren’t markers, they work similarly to markers. However, you’ll likely notice that the color is richer, and you can blend Ecoline pens, which isn’t possible with markers. Hold your pens like a regular marker to draw and color.[3]
- Keep in mind that, unlike with makers, the color from your Ecoline pens will run and blend if it gets wet, even after your drawing dries.
-
4Use the blender pen to dilute or merge colors if you have one. Some Ecoline brush pen sets include a blender pen. This pen lightens colors, spreads color around the page, and blends multiple colors together. Play around with your blender pen to create gradient colors or a watercolor look.[4]
- For example, you might use your blender pen to merge the edges of red and blue splotches of ink to create purple in the middle.
- Remove excess ink from your blender pen by drawing strokes on a piece of scrap paper. Keep scribbling until the pen runs clear.[5]
-
5Allow the ink to dry for several minutes before touching it. Since Ecoline brush pens are like watercolor paint, they take longer to dry than a regular marker or ink pen does. If you touch the ink too soon or store your art too early, your artwork could smear. Wait at least 5 minutes for the ink to dry.[6]
- If you’re using your pens in a sketchbook or coloring book, prop the book open for at least 5 minutes after you’re finished drawing or coloring.


Creating a Watercolor Effect
-
1Apply the color where you want it on the paper. The ink is going to spread out when you get it wet, so you may only want to add a little color to the paper at once. As one option, do a full drawing with your pens before applying water to see how the colors move and blend. Alternatively, scribble a little color on the page, then use your paint brush to create your artwork.[7]
- You might need to do a little trial and error with your pens to see what works best for your style.
- If you’ve ever used watercolor pencils, treat your Ecoline pens similarly.
-
2Use less ink if you want a wash effect. In watercolor painting, a wash effect is a sheer layer of color. You might use this effect for background color, layering, or shading. Since the color in Ecoline pens is so saturated, apply a small amount of color to your paper if you plan to do a wash.[8]
- For example, you might dot the color onto the paper in a few spots or lines.
-
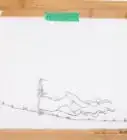
3Spread the color with a wet watercolor brush. After you mark the color on the page using your Ecoline pen, dilute and move the color using a regular watercolor brush. Dip your brush tip into a cup of water, then swipe it over the Ecoline color. Use your brush to move the color around the page to create your art piece.[9]
- For instance, let’s say you’re painting a sky and have drawn a few blue lines onto the page. You could swipe a wet brush over the lines to pick up the color and spread it around the page.
- If you have a watercolor brush pen, you can use that instead of a brush and water.
-
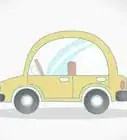
4Add a few drops of water over multiple colors to blend them. One of the benefits of using Ecoline pens is that you can easily combine the colors to create a new color or to make a cool effect. To do this, apply the colors you want to combine near each other. Then, swipe a wet paint brush over them. Watch as the colors bleed together and use your paint brush to guide them.[10]
- Let’s say you’re coloring a drawing of a cat. You might scribble inside the drawing with your pink, blue, and yellow Ecoline pens. Then, swipe your wet watercolor brush over the colors. Guide the wet ink around the drawing to merge the colors together and create a multi-color cat.
- You might also use your pens to make a cool background. Simply use your Ecoline pens to scribble big splotches of color on the paper. Then, wet the ink using your watercolor brush and drag it around.
-
5Layer fresh ink over dry color to create a new blend. You can easily create a kaleidoscope of colors by layering your pens. Anytime you wet the ink, it'll become liquid again. This means you can go back and add more color blends to your page. Simply color on top of the existing color, then wet it with your brush. The fresh color and old color will start to blend together, so use your brush to guide the colors.[11]
- For example, you might have a blue wash on your paper. You could draw red circles on the blue wash so that it'll create purples splotches when you wet the colors.
-
6Reactivate dried color by adding more water. You can still make changes to an Ecoline watercolor painting even after the ink dries. Just use your wet watercolor brush to add a bit of water to the color. It’ll instantly become runny again.[12]
- You can move the wet paint around the page with your brush until it dries again.
- In some cases, you can even remove some of the paint by gently blotting with a tissue. However, you likely won’t be able to remove all of it and could damage your paper.
-
7Use just the ink to add a top layer of color without blending. Since the Ecoline brush pen ink will reactivate when wet, layered colors will always blend as soon as you add water. If you want to layer colors without blending, don't add water to the top color or colors. Simply draw on the paper like you're using markers and let it dry.[13]
- For example, let's say you've painted a sky background and want to add a bird on top. Use your pens like markers to draw the bird. Don't add any water because the colors will mix with the blue.
-
8Clean your nibs by scribbling on scratch paper, if necessary. You probably won't need to worry about your nibs picking up other colors. However, if this happens, it's a fairly easy problem to fix. Simply get a piece of scratch paper and draw lines on it until the excess ink is gone.[14]
Hand-Lettering with Brush Pens
-
1Use Ecoline pens for larger letters because they have a big nib. You can still make thin lines with an Ecoline pen, but they won’t be fine lines like you can create with smaller nibs. In general, Ecoline pens work best for drawing larger fonts. Try out your pen with different style fonts to see how it fits with your writing style.[15]
- For instance, an Ecoline pen is a great option if you want to hand-letter a quote to display in an 8x10 picture frame. You might also use it to make the front of a greeting card or a mock-up of a sticker.
- Ecoline pens might not work as well for hand-lettering the details on wedding invitations or projects with small print.
-
2Create thicker lines with your downstroke. Like with any hand-lettering pen, you’ll draw the thick lines on your letters as you drag your Ecoline pen down. Press the side of the nib onto the page so your line is thick. Release and lift your hand as you get to the end of the line.[16]
- If you’re new to hand-lettering, you’ll probably need to practice this technique a few times to master it.
-
3Make thinner lines on an upstroke. It might seem tricky to figure out what’s an upstroke and what’s a downstroke. Anytime you’re moving your pen in an upward motion, even on a curve, it’s considered an upstroke. When you make these strokes, lift some of the pressure off your nib so you’re drawing with the tip. This will give you a thinner line.[17]
- Most of your strokes will be downstrokes.
- If you’re having trouble with this, it might help to draw little arrows on a few of your practice drawings to help you recognize when you made downstrokes and when you made upstrokes.
-
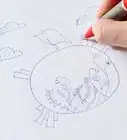
4Color block letters with Ecoline pens to create a watercolor effect. One perk in using Ecoline pens to do hand-lettering is that you can use them to create unique color patterns inside your letters. Sketch out your letters block style, then color them with your Ecoline pens. Use your watercolor brush to dab a few drops of water into the color to blend them together.[18]
- Be careful with how much water you add. If you get the ink too wet, the ink may smear outside the edges of the letters. You can always add more if it’s not enough.
-
5Practice hand-lettering if you’re new to the art form. It may take some time to get used to hand-lettering with Ecoline pens since they have a larger nib than other pens. Don’t give up if it seems challenging at first. Instead, spend a little extra time practicing to master your technique. Here are some ways to practice:[19]
- Trace your favorite fonts.
- Use grid paper for guidelines.
- Write your favorite quotes.
- Use an online worksheet.


Warnings
- Don’t let your artwork get wet, as the ink will run.⧼thumbs_response⧽


References
- ↑ https://www.youtube.com/watch?v=1bkrSCPogCE&feature=youtu.be&t=37
- ↑ https://doodlewash.com/ecoline-watercolor-brush-pens-review/
- ↑ https://www.youtube.com/watch?v=1bkrSCPogCE&feature=youtu.be&t=234
- ↑ https://www.stepbystepart.co.uk/royal-talens-ecoline-brush-pens.html
- ↑ https://www.youtube.com/watch?v=1bkrSCPogCE&feature=youtu.be&t=907
- ↑ https://www.stepbystepart.co.uk/royal-talens-ecoline-brush-pens.html
- ↑ https://www.youtube.com/watch?v=1bkrSCPogCE&feature=youtu.be&t=150
- ↑ https://www.youtube.com/watch?v=1bkrSCPogCE&feature=youtu.be&t=631
- ↑ https://www.youtube.com/watch?v=1bkrSCPogCE&feature=youtu.be&t=157
- ↑ https://www.youtube.com/watch?v=1bkrSCPogCE&feature=youtu.be&t=116
- ↑ https://www.youtube.com/watch?v=KbKp3zHVHhs&feature=youtu.be&list=PLp6jcnnFvbFjv_95vjjxI8Ps8jnIp_t48&t=107
- ↑ https://www.youtube.com/watch?v=1bkrSCPogCE&feature=youtu.be&t=667
- ↑ https://doodlewash.com/ecoline-watercolor-brush-pens-review/
- ↑ https://www.youtube.com/watch?v=1bkrSCPogCE&feature=youtu.be&t=907
- ↑ https://www.youtube.com/watch?v=1bkrSCPogCE&feature=youtu.be&t=126
- ↑ https://www.youtube.com/watch?v=UKUkSWxNJFc&feature=youtu.be&t=68
- ↑ https://www.youtube.com/watch?v=UKUkSWxNJFc&feature=youtu.be&t=75
- ↑ https://www.youtube.com/watch?v=1bkrSCPogCE&feature=youtu.be&t=116
- ↑ https://lettering.org/
About This Article