This article was co-authored by wikiHow staff writer, Christopher M. Osborne, PhD. Christopher Osborne has been a wikiHow Content Creator since 2015. He is also a historian who holds a PhD from The University of Notre Dame and has taught at universities in and around Pittsburgh, PA. His scholarly publications and presentations focus on his research interests in early American history, but Chris also enjoys the challenges and rewards of writing wikiHow articles on a wide range of subjects.
This article has been viewed 69,683 times.
Learn more...
Many of Thule's outdoor recreation products — like carrying racks for bikes or skis — come with integrated locks that are based on universal (for Thule gear), removable lock cylinders. So, to remove a Thule roof rack, for example, you'll need to remove the lock by removing the cylinder. Removing (or initially installing) the lock cylinder can be a head-scratcher if you don't know what you're doing, but a few simple instructions (and the included “master key”) will make the whole process a snap.
Steps
Installing a Lock Cylinder
-
1Follow the instructions provided with your Thule product. Like their Swedish compatriots Ikea, Thule tends to use lots of pictures and very few words in their product instructions.[1] However, once you get the hang of it, the instructions are relatively easy to follow.
- If you don't have the instructions, however, don't despair. The lock cylinder systems for Thule products are standardized across practically the entire product line.
-
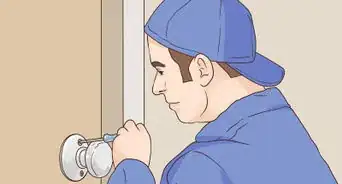
2Pop out the plastic tab covering the cylinder slot. Check the product instructions for the location, or look for a perforated circle roughly the diameter of an average adult's index finger. Use a key or screwdriver to pop out the circular plastic cover, revealing a cylindrical opening beneath. Clear away any excess bits of plastic that might get in the way of the lock cylinder.[2]Advertisement
-
3Put the master key into the key slot in the lock cylinder. The lock cylinder is the silver-colored mechanism (about half the length of an adult index finger) that will fit into the exposed opening and serve as the actual lock for the Thule product. The master key is the same size as the locking key, but has no “teeth” (ridges along the blade edge). You will get 2 locking keys and 1 master key with your Thule product.[3]
- If you don't have the master key, you can order a new one from Thule retailers or directly from Thule. The master key is universal across the product line.
-
4Push the lock cylinder fully into the exposed opening. Grasp the master key (which is still in the lock cylinder) and press the combination into the opening. It may help to jiggle the key and cylinder a bit while you press. Keep going until the face of the lock cylinder is flush with the rim of the opening.[4]
- If you meet more than token resistance, check to make sure the master key is pressed fully into the key slot in the cylinder.
-
5Remove the master key and try the locking key. Press your finger against the lock cylinder to keep it in place, and use your other hand to pull out the master key. Then, try using the locking key. Once it's inserted fully, a quarter-turn clockwise should lock in place the mechanism — for instance, one of the four “feet” of a car roof rack.[5]
- If the locking key won't turn or the mechanism won't lock, try reinserting the master key and pressing the cylinder in further, or remove and reinsert the cylinder. If you have a faulty cylinder, you can buy replacements.


Removing a Lock Cylinder with a Master Key
-
1Unlock the mechanism with the locking key. Insert the locking key (one of the keys with “teeth”) into the slot and make a counterclockwise quarter-turn. The mechanism should unlock — for instance, you'd now be able to remove your ski from the rack.[6]
-
2Insert the master key fully into the lock cylinder. Push the master key (the one without “teeth”) all the way into the cylinder until you hear a “click.” If you don't hear that click, the lock cylinder won't come along for the ride when you pull on the master key.[7]
-
3Pull the master key and cylinder out of the opening together. You may find that wiggling the key a bit as you pull on it helps extricate the lock cylinder from its place within the mechanism.[8]
-
4Troubleshoot a stubborn lock cylinder. If you're having trouble getting the master key fully into the slot and/or getting the cylinder to come out with the key, you can try a few tricks. For a master key that won't push in until you hear the click, try spraying some compressed air or a lubricating spray (e.g., WD-40) into the slot. If the key will go in but the cylinder won't come out, try one or more of the following:[9]
- Spray WD-40 around the edge of the cylinder.
- Wiggle the key more vigorously and tap on the cylinder (with the locking key, perhaps) while pulling it out.
- If possible, turn the mechanism so the top (slotted face) of the cylinder is facing down, so that gravity helps it to fall out.
- Put the mechanism in the locked position before inserting the master key (this shouldn't work, but some people swear it does occasionally!).


Removing a Cylinder when the Master Key is Missing
-
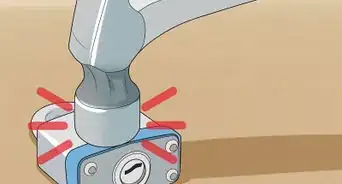
1Buy or borrow another master key. There are DIY methods that tend to work, but they can also damage the lock cylinder (which you can replace fairly cheaply) or the larger Thule product itself (which isn't so cheap to replace). Thule master keys are universal, so use one from another Thule product (if you have one) or borrow one from a friend.
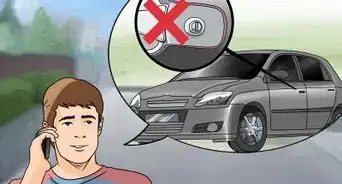
- You can also buy them from online or brick-and-mortar retailers that sell Thule products, or directly from Thule at 888-238-2388 (in the U.S.) or https://www.thule.com/en-us/us/thule-support/spare-parts-keys?keycode=D1251 for $2.75 USD.[10]
-
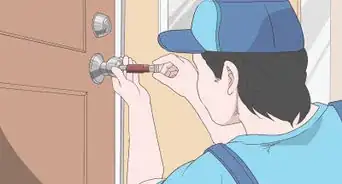
2Access the back side of the cylinder. If you just can't wait to find or buy a new master key, the easiest key-less way to remove the cylinder requires you to reach the other side of the cylinder. If you can't access the back side of the cylinder, you should really just get a new master key instead of potentially trashing your Thule product.[11]
- Use your locking key to unlock the mechanism (via a quarter-turn counterclockwise) before proceeding to your work on the back side.
-
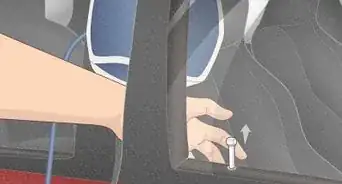
3Locate the small metal tab next to the end of the lock cylinder. The back (not key-slotted) end of the lock cylinder has a rectangular bulge protruding out from the top of the cylinder. To one side of this you'll see a small metal tab. This tab is spring-loaded and holds the lock cylinder in place.[12]
- Find a screwdriver that is small enough to access this small tab.
-
4Push down and in on this tab with your small screwdriver. This will depress the spring mechanism and the tab. While continuing to press on the tab with the screwdriver, use a finger on your other hand to push down on the lock cylinder. This should pop the lock cylinder loose.[13]
-
5Return to the front side and pull out the freed lock cylinder. The lock cylinder will be protruding out a bit (perhaps a centimeter or two), so you can grab it and the locking key and pull both out together. Once again, try wiggling the key and cylinder a bit as you pull to aid in the removal.[14]
- If you want to install the lock cylinder without a master key, you'll essentially reverse the process: push the inserted locking key and cylinder into the opening as far as it will go; access the back side of the cylinder; and press on the tab with your screwdriver (while pushing in from the front side) so the cylinder can pop into place.


References
- ↑ https://www.carid.com/images/thule/cargo-carriers/pdf/859-installation-instructions.pdf
- ↑ https://www.youtube.com/watch?v=lrNVTJxAOSU
- ↑ https://www.youtube.com/watch?v=lrNVTJxAOSU
- ↑ https://www.youtube.com/watch?v=lrNVTJxAOSU
- ↑ https://www.youtube.com/watch?v=lrNVTJxAOSU
- ↑ http://goneoutdoors.com/thules-lock-cylinders-out-8046297.html
- ↑ http://goneoutdoors.com/thules-lock-cylinders-out-8046297.html
- ↑ http://goneoutdoors.com/thules-lock-cylinders-out-8046297.html
- ↑ http://goneoutdoors.com/thules-lock-cylinders-out-8046297.html
About This Article