This article was co-authored by Marshall Stephens. Marshall Stephens is an Aquarium Expert at Private Oceans Aquariums in West Palm Beach, Florida. Marshall has over 20 years of experience in the aquarium industry and focuses on captive-bred animals. They specialize in tropical and marine aquariums and are a contributor to the Loggerhead Marine life center in Jupiter Florida.
There are 15 references cited in this article, which can be found at the bottom of the page.
This article has been viewed 23,281 times.
To keep an aquarium healthy and clean, it's important to change part of the water out on a regular basis. The aqueon water changer helps you change the water in your tank quickly and effectively without needing to use buckets. It also helps you clean out the tank by siphoning out debris in the gravel at the bottom. This tool just needs to be attached to a home faucet in order to begin taking out tank water. After that, it will pull water out of your tank and down your sink drain, as well as putting water back into the tank when you're ready to refill it.
Steps
Setting Up the Aqueon Water Changer
-
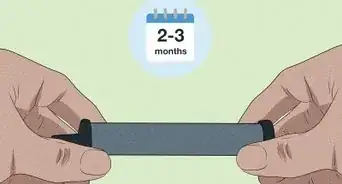
1Measure the distance between your tank and your sink. An aqueous water changer comes in two lengths: 25 ft (7.6 m) and 50 ft (15 m). Once you measure the distance between your sink and your tank you can pick the length that is right for you. [1]
Tip: The faucet needs to be at a higher level than the aquarium in order for siphoning to begin and the water changer to work.
-
2Attach the faucet valve to the hose. Remove the compression nut on the faucet valve and place it onto the end of the hose, with the threads facing the end of the hose. Then insert one end of the hose onto the barbed tip inside the faucet valve. Once the end of the hose is inserted fully, re-attach and tighten the nut.[2]
- The compression nut is the only opening on the faucet valve that will fit the included hose perfectly.
- Your water changer should come with a hose, siphon tube, water flow valve assembly, and faucet adapter.
Advertisement -
3Attach the other end of the hose to the siphon tube. Unscrew the compression nut on the siphon tube and put the nut onto the end of the hose, with the threads facing the end of the hose. Then insert the end of the hose into the end of the siphon tube and tighten the nut back in place.[3]
- Make sure the hose is inserted securely onto the barbs on the end of the siphon hose. Inserting it fully will help ensure that you won't have leaks once you start using the water changer.
-
4Unscrew the aerator nozzle at the tip of your faucet. The aerator nozzle will be threaded onto the tip of the faucet. In some cases, you will be able to loosen the aerator nozzle with your fingertips. However, if it won't unscrew easily, get a pair of pliers and use them to unscrew it.
- Set the aerator pieces safely aside so that you can reattach them later.
Tip: To protect the surface of the aerator, put a thin piece of cardboard between the aerator and the teeth of the pliers before using them.
-
5Hook the faucet valve to your faucet. Screw the faucet adapter piece of the aqueon water changer onto the faucet. This is a small piece that can be unscrewed off the end of the faucet valve in order to attach it to the faucet easily. Once it's on the faucet securely, screw the main piece of the faucet valve back onto the adapter.[4]
- The faucet valve can attach to a wide variety of faucets, as long as they have an aerator nozzle that can be removed. However, it won't fit every single one. If it doesn't fit your faucet, contact that water changer manufacturer for an attachment that will work.
-
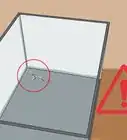
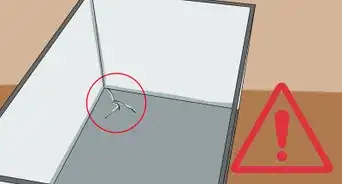
6Prepare your tank by removing obstacles on the top of it. Turn off your heater, filter, and tank light. Then remove any lid you have on the tank and any of the items you turned off that will get in the way of your cleaning.[5]
- You can keep your fish in the tank while you change the water, as you will not be taking all of the water out.
- In most cases, you will only need to take off the lid and the light you have on the top of the tank.


Siphoning Off Water and Cleaning Your Tank
-
1Put the intake tube into the tank. It should be submerged in the tank water. You can even let the intake tube sit at the bottom of the tank while you set up the rest of the process.[6]
- You want the intake tube to be submerged so that the siphoning can begin successfully.
-
2Turn on the levers on the siphon tube and the water flow valve. The levers on the tube and the valve should both be in the open position, so that water can flow through them. You can tell they are open when the end of the handles is pointing in the same direction as the water will flow.[7]
- The valves are closed if the handles are in a perpendicular position to the tube and valve flow.
- The levers are bright blue, so they should be easily identified.
-
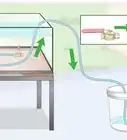
3Turn on the faucet. As the water comes out of the faucet valve, it will begin drawing water out of the tank as well. You will know that siphoning has begun by looking for water disturbance around the intake tube.[8]
- As you siphon the water out of your tank, you will be allowing clean water coming out of the faucet to go down the drain as well.
-
4Clean your gravel as the water is siphoned out. As the water is flowing from your aquarium, clean the gravel by inserting the end of the intake tube into the gravel and then pulling it out slowly. This should be a smooth action that goes down to the bottom of the gravel, pulls up, allows the gravel to drop, and then goes back into the gravel in a different spot. As the gravel falls out of the end of the tube, you should also be able to see dirty water being pulled up into the hose.[9]
- If your intake tube has so much suction that it is drawing the gravel up into the hose, you need to adjust the pressure. Turn the lever on the intake tube to slightly close it and test the suction once again. The goal is to have the gravel go up into the intake tube but drop back down before being sucked into the actual hose.
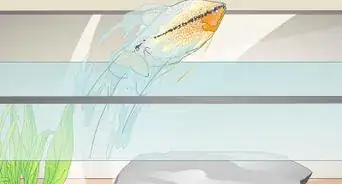
Tip: As you are cleaning, be careful of your fish and any plants in the tank. The suction of the tube can injure fish and plants.
-
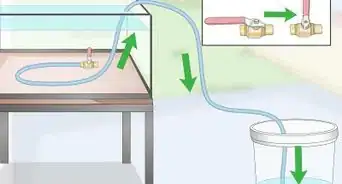
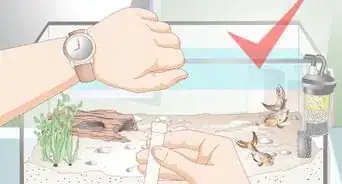
5Take the intake tube out of the tank once you've removed enough water. After you've removed about 25% of the aquarium water, it's time to stop siphoning. Pull the intake tube out of the aquarium and move it into the basin of your sink. As you do this, the faucet should still be running and the valves should still be open.[10]
- It's important to keep the intake tube valve open and the sink running so that the siphoning continues and the excess water in the hose doesn't drain out onto your floor.
-
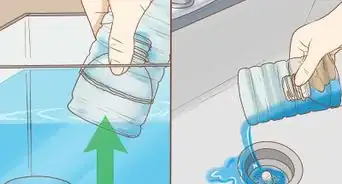
6Rinse the hose into the sink. Once the intake tube is in the sink, turn the blue valve lever on the faucet valve to the closed position. This will release the suction on the hose and send the water coming out of the faucet into the hose and out the intake tube.[11]
- Let the water run through the hose until all the dirty aquarium water is out of the hose.
- Once the hose is clean, turn the faucet valve lever to the on position once again, so that the water flows straight into the sink.


Refilling the Tank
-
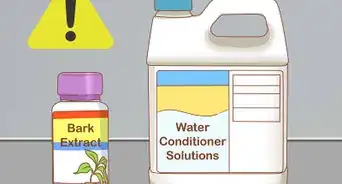
1Adjust the water temperature coming out of the faucet. Make sure that the water is running at a steady and appropriate temperature before you start refilling the tank. The temperature of the water coming out of the faucet will be the temperature that you are putting into your tank.
- The ideal temperature for a freshwater aquarium is between 76 °F (24 °C) and 80 °F (27 °C).[12]
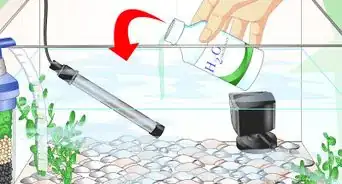
Tip: As you are adjusting the temperature, it's a good time to add tank conditioner to your tank. This will ensure that any chemicals in the water are neutralized and won't hurt your fish.
-
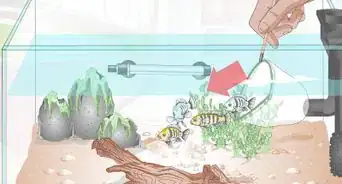
2Refill the tank by turning the faucet valve lever to the closed position. When the aquarium water has been removed from the hose and the temperature adjusted, take the intake tube back to the aquarium. Then turn the blue lever on the faucet valve to the closed position. Once you do this, water will begin flowing through the hose and out the intake tube into the tank. [13]
- When the lever on the faucet valve is in the closed position and the faucet is turned on, it will send water through the hose.
- Let the water run until the tank is as full as you would like it.
- It's important to keep an eye on this process so that you don't accidentally forget about it and allow the tank to overflow.
-
3Turn off the faucet once the aquarium is full. Once the water is at the right level, go to the sink and turn off the faucet. Once you do that, the water that is left in the hose will continue to drain into the tank, but that typically only adds a small amount of additional water.[14]
-
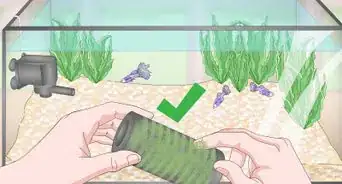
4Remove the aqueon water changer from the aquarium and the sink. Pull the intake tube and hose out of the aquarium. Roll up the hose as you move it towards the sink. Once there, disconnect the faucet valve from the sink and store all the pieces together for later use.[15]
- Once the faucet valve is removed, put the faucet aerator back in place.
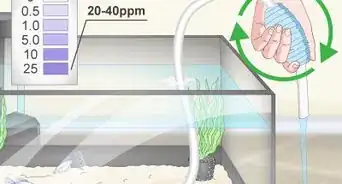
- At this point you should test the quality of the water in your tank, including its pH and hardness.


Things You'll Need
- Aqueon water changer
- Sink
- Pliers, if necessary


References
- ↑ https://fishlab.com/aqueon-water-changer/
- ↑ https://youtu.be/VMgsvzge6-s?t=28
- ↑ https://youtu.be/VMgsvzge6-s?t=46
- ↑ https://youtu.be/VMgsvzge6-s?t=101
- ↑ https://youtu.be/VMgsvzge6-s?t=109
- ↑ https://youtu.be/VMgsvzge6-s?t=120
- ↑ https://youtu.be/VMgsvzge6-s?t=132
- ↑ https://fishlab.com/how-to-use-a-water-changer/
- ↑ https://youtu.be/VMgsvzge6-s?t=147
About This Article