This article was co-authored by wikiHow Staff. Our trained team of editors and researchers validate articles for accuracy and comprehensiveness. wikiHow's Content Management Team carefully monitors the work from our editorial staff to ensure that each article is backed by trusted research and meets our high quality standards.
There are 8 references cited in this article, which can be found at the bottom of the page.
This article has been viewed 17,011 times.
Learn more...
After a lacrosse game or practice, your pads and gloves may have seen better days. Luckily, everyday cleaners can help your lacrosse gear look clean and new again. Wash your lacrosse equipment after every use to keep it in good condition and prevent mold or bacteria from growing on it. With soap, water, and a little elbow grease, your lacrosse gear will be squeaky clean in no time! Read on for all the care info you'll ever need on cleaning lacrosse pads, gloves, uniforms, helmets, and more.
Steps
Washing Pads, Gloves, and Uniforms
-
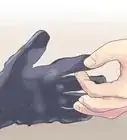
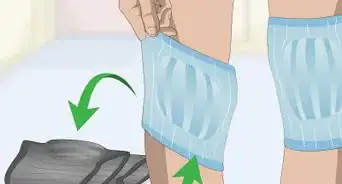
1Hand-wash your pads and gloves with a non-acidic detergent. Most gloves and pads are made of leather and need a detergent with a pH of less than 10. Mix the detergent with water and dip a washcloth in the solution. Wipe the pads and gloves with the washcloth, removing any dirt and debris.[1]
- Adding a tablespoon of fabric softener to the detergent solution can help eliminate odors and make your pads and gloves flexible.
- You can check your detergent's pH levels by reading the label, checking online, or contacting its manufacturer.
-
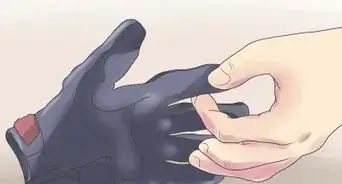
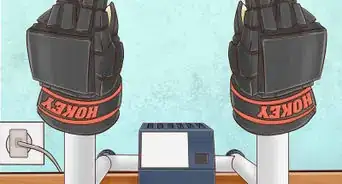
2Let your pads and gloves air-dry. Do not put your pads or gloves in the dryer, as this can damage any leather or plastic pieces. Instead, stuff the pads or gloves with a washcloth or newspaper and let them dry overnight.[2]Advertisement
-
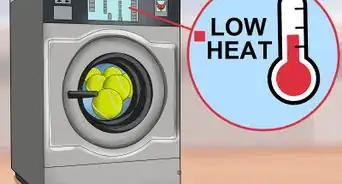
3Machine wash the uniform. Wash the lacrosse uniform after every game and practice to keep it fresh. Put your lacrosse uniform in the washing machine and turn it to the gentle cycle with cold water. You can use regular laundry detergent to clean the uniform, but do not add any fabric softener if your uniform is made of spandex. Most fabric softeners restrict the elasticity of spandex.
- Washing the uniform with other clothes is okay so long as they can handle the gentle cycle with cold water.
- You can machine wash the pads and gloves as well, but use a non-acidic detergent.
-
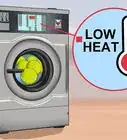
4Tumble dry your uniform. Put your uniform in the dryer immediately after your washing cycle ends. Set the dryer to low heat and check its dryness after the cycle ends. If the uniform is still damp, start another cycle and repeat the process as needed.[3]
- Do not dry clean or iron your lacrosse uniform, as doing either can discolor the fabric.[4]


Cleaning the Helmet and Stick
-
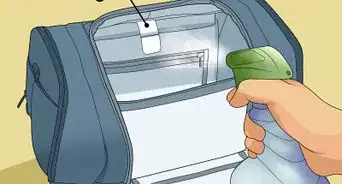
1Wash your helmet with a damp cloth. Mix a mild detergent with water and dip a washcloth in the solution. Wipe the inside and outside of the helmet with the cloth to get rid of dirt, debris, and bacteria.[5]
- To disinfect the helmet after a long game or time in storage, use a sanitizing spray after washing it. Hold the bottle several inches from the helmet's surface and spray the sanitize evenly over the interior and exterior.
- The ratio of detergent to water should be about 1:16.
- You can also use an antibacterial wipe as an alternative to the damp cloth.
-
2Let your helmet air-dry. Exposure to high heat can damage your helmet, so do not put the helmet in the dryer. Wipe any excess moisture off of the helmet with a towel, then let the helmet sit undisturbed until it dries completely.[6]
-
3Clean the lacrosse stick with cold water. Spray the lacrosse stick off with a garden hose. Use a wet washcloth to spot clean any dirt that the hose doesn't remove.[7]
- After rinsing the lacrosse stick, you can either air dry the lacrosse stick or dry it off with a towel.
-
4Wash, rinse, and shape the lacrosse stick pocket. Wash the pocket off with cold water and a mild dish soap. Let the pocket soak for 5-10 minutes, then rinse off the soap. Shape the pocket so that it faces outward in the position you'd use it while playing lacrosse. Then, stuff the pocket with newspaper to soak up moisture while it air dries.[8]


Taking Care of Cleats
-
1Wash the cleats with cold water and vinegar. Open the shoes up and rinse the interior and exterior under cold running water. To get rid of odors, mix the cold water with distilled white vinegar in a 50:50 ratio first.[9]
- If your shoes are muddy, soak them in hot water and dish soap for several minutes before rinsing them.[10]
-
2Put your cleats in the washer if they're excessively dirty. If hand-washing and rinsing your shoes doesn't remove excess dirt, put them in a washing machine. Set your washing machine to the delicate cycle with cold water and a mild detergent.[11]
- Place the cleats in a bag or pillowcase before putting them in the washer. This will prevent them from banging around excessively.
- Do not put any other items in the washer while you're cleaning the cleats.
-
3Get rid of any excess water from the cleats. Open up your shoes and squeeze out water from the shoes' tongues and foot supports. Dry the interior and exterior of the cleats with a towel.[12]
-
4Let your cleats air-dry. Stuff your cleats with newspaper or a washcloth to help them keep their shape. Set them outside and leave them outside until they're completely dry.[13]
- Do not put your cleats in the dryer. Your shoes will stay in best condition if you air-dry them.


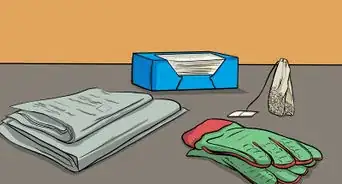
Things You'll Need
- Non-acidic detergent
- Fabric softener
- Washing machine and dryer
- Washcloth
- Water
- Dish soap
- Garden hose
- Newspaper
- Distilled white vinegar
- Sanitizing wipe or spray (optional)


References
- ↑ https://www.creeklinehouse.com/clean-deodorize-smelly-sneakers-cleats-sports-gear/
- ↑ https://www.creeklinehouse.com/clean-deodorize-smelly-sneakers-cleats-sports-gear/
- ↑ https://www.cdc.gov/headsup/pdfs/helmets/headsup_helmetfactsheet_lacrosse_508.pdf
- ↑ https://s3.amazonaws.com/pubtemp/live/content/PlainfieldEast/documents/Uniform_Care_Instructions.pdf
- ↑ https://www.cdc.gov/headsup/pdfs/helmets/headsup_helmetfactsheet_lacrosse_508.pdf
- ↑ https://www.cdc.gov/headsup/pdfs/helmets/headsup_helmetfactsheet_lacrosse_508.pdf
- ↑ https://www.coachup.com/nation/articles/lacrosse-stick-maintenance
- ↑ https://www.youtube.com/watch?v=aWrhB-vK0TE&feature=youtu.be&t=120
- ↑ https://housewifehowtos.com/clean/deodorize-smelly-shoes
About This Article