This article was co-authored by wikiHow staff writer, Travis Boylls. Travis Boylls is a Technology Writer and Editor for wikiHow. Travis has experience writing technology-related articles, providing software customer service, and in graphic design. He specializes in Windows, macOS, Android, iOS, and Linux platforms. He studied graphic design at Pikes Peak Community College.
The wikiHow Tech Team also followed the article's instructions and verified that they work.
This article has been viewed 11,664 times.
Learn more...
When you erase and format a disk drive using Disk Utility on macOS, you are asked to choose from one of three partition schemes.[1] You are also asked to choose a format for your hard drive. This wikiHow article will teach you how to partition a disk drive on macOS, the different partition schemes and formats, and which ones you should choose for compatibility with macOS and other devices.
Steps
What is a Partition, Scheme, and Format?
-
1A partition is a division of a disk drive that is a specific size. The computer's operating system (i.e, macOS) treats each partition as a separate disk drive. When you partition a disk drive, you are asked to select how much storage space you want to allocate to the partition on the disk drive, as well as what format you want to use for the disk drive.
-
2A partition scheme determines how a partition is maintained by the operating system. It also determines what code is used to boot from the hard drive, if Every operating system has different partition schemes that they support and don't support. MacOS has three partition schemes that it supports. You can choose which scheme you want to use when you erase and format a hard disk.[2]
- A disk drive can only have one partition scheme. You can not select a different partition scheme for different partitions.
Advertisement -
3The disk drive format dictates how files are organized on the hard drive. There are a variety of hard drive formats you can choose from. Some formats will only work for a specific operating system such as macOS. Other formats are compatible with a wide variety of computer systems, including Windows, macOS, Linux, and other electronic devices, such as cameras or game consoles.


What Partition Schemes does macOS Support?
-
1GUID Partition Map is the best partition scheme for most situations. GUID stands for globally unique identifiers. It is the bootable standard for computers that use united extensible firmware interlace (UEFI). It is the standard for all the latest versions of Windows, macOS and Linux. However, older Power PC Macs and other non-intel-based Macintosh computers and non-UEFI based computers running a 32-bit version of Windows will not be able to boot from this partition map.
-
2Apple Partition Map is the best partition scheme if you need compatibility with older Macs. Apple Partition Map (APM) was developed for use with older Power PC Macs, which can only boot from disks formatted with APM. All versions of macOS starting with macOS version 10.4 (Tiger) can boot from both APM and GUID Partition Map.
-
3Master Boot Record is the best partition scheme for compatibility with older Windows computers. This is an older partition scheme. Master Boot Record only supports drives that have less than 2 TB storage space and less than 4 primary partitions. You only need to use Master Boot Record if you are making a bootable drive that is compatible with non-UEFI computers running a 32-bit version of Windows.
- All version of Windows can read a GUID Partition Map drive, but only UEFI computers running a 64-bit version of Windows and macOS, can boot from a GUID Partition Map drive.


What Format Should I Use on macOS?
-
1Apple File System (APFS) is a good format for newer versions of macOS. APFS was developed for use with macOS 10.13 (High Sierra) and later. It is optimized for solid-state drives (SSD) and Flash storage drives, though it can be used on older hard disk drives (HDD) as well. It is not compatible with Windows or other devices. You can also select APFS Encrypted or APFS Case-sensitive.[3]
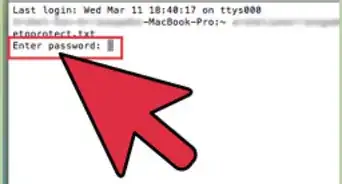
- APFS Encrypted keeps the data on the hard drive secure by requiring you to enter a password in order to access the data on the hard drive.
- APS Case-sensitive organizes the file system so that all folders and files on the system are sensitive to letter capitalization. On a case-sensitive partition, two folders called "Documents" and "DOCUMENTS" would be two separate folders. Using the non-case sensitive format, they would both be the same folder.
-
2Mac OS Extended is what you should choose if you are using an older version of macOS. This was the standard file format for macOS 10.12 (Sierra) and earlier. Select this file format if you need compatibility with older versions of macOS, or if you are using an HDD storage device instead of an SDD. As with APFS, you can also select if you want to use Mac OS Extended Encrypted or Mac OS Extended Case-sensitive. Mac OS Extended format is not compatible with Windows or other electronic devices.
- Mac OS Extended Encrypted keeps the data on the hard drive secure by requiring you to enter a password in order to access the data on the hard drive.
- Mac OS Extended Case-sensitive organizes the file system so that all folders and files on the system are sensitive to letter capitalization. On a case-sensitive partition, a folder called "Documents" and "DOCUMENTS" would be two separate folders.
-
3MS-Dos FAT is good for all-purpose disk drives that are 32 GB or smaller. FAT or FAT32 is best used with smaller flash drivers that are 32 GB or smaller. This file format is compatible with a wide variety of systems, including Windows, macOS, and other electronic devices.
-
4ExFAT is good for all-purpose disk drives that are 32 GB or larger. Select exFAT if you want to create a disk partition that is larger than 32 GB and is compatible with a wide variety of devices. This format can be used with macOS, Windows, and other electronic devices.


How Do I Partition a Disk Drive on MacOS?
-
1Connect your disk drive. Connect the hard drive to any available USB port on your Mac.
- Your Mac's internal hard drive is already formatted with the correct partition scheme. You can add a new partition to your Mac's internal storage drive, but you cannot change the partition scheme.
-
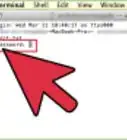
2Open Disk Utility. The Disk Utility app has an icon that resembles a hard drive with a stethoscope over it. You can find Disk Utility in the "Utilities" folder in your Applications folder. Alternatively, you can use the following steps to open Disk Utility:
- Click the magnifying glass icon in the upper-right corner to open the Spotlight Search bar.
- Enter "Disk Utility" in the search bar.
- Click the Disk Utility app.
-
3Select the disk drive you want to partition. Disk Drives are listed in the menu panel to the left.
- If you don't see the disk drive you want to partition in the menu panel to the left, click View in the upper-left corner and then click Show All Devices.
-
4Click Erase. It's the middle button at the top of the Disk Utility app. This button will erase and reformat the disk drive.
- Warning: This process will erase all data on the disk drive. Be sure to back up any files you want to keep before proceeding.
- You must erase and reformat a disk drive in order to change the partition scheme. You can add a partition to a disk drive without erasing and reformatting it, but you can only use the partition scheme it is already formatted with.
-
5Enter a name for the disk drive. This will be the name that is given to the disk drive after it has been reformatted. Enter any name you want next to "Name."
-
6Select a format for the disk drive. This will be the file format that the disk drive uses after it has been reformatted. Use the drop-down menu next to "Format" to select whichever format you want to use.
-
7Select a partition scheme. This will be the partition scheme the disk drive uses after it has been reformatted. Use the drop-down menu next to "Scheme" to select whichever partition scheme you want to use.
-
8Click Erase. It's in the lower-right corner of the dialogue box. This will erase all data on the drive and reformat it with the name, format, and partition scheme you selected.
- Do not remove the drive until it is finished reformatting the drive.
-
9Make sure the drive is still selected. After the drive has been formatted, make sure it is still selected in the menu panel to the left. If it is not, click the drive again to select it.
-
10Click Partition. It's the second tab at the top of the Disk Utility app. This allows you to create a new partition for the disk drive.
-
11Click +. It's below the pie chart to the left of the partition dialogue box. This adds a new partition to the disk drive.
-
12Adjust the size of the partition. You can enter the exact size of the partition next to "Size" at the bottom of the menu on the left. Use the drop-down menu next to the "Size" text box to select gigabytes (GB), megabytes (MB), or kilobytes (KB). Alternatively, you can click and drag the white dot in the pie chart to adjust the partition size.
-
13Enter a name for the partition. Use the text field next to "Name" to enter a new name that will be applied to the partition.
-
14Select a format for the partition. Use the drop-down menu next to "Format" to select a format for the partition on the disk drive.
-
15Click Apply. It's in the lower-right corner of the dialogue box. This displays a confirmation pop-up window.
-
16Click Partition. It's in the lower-right corner of the confirmation window. This confirms that you want to partition the disk drive and applies the partition.
- Do not remove the disk drive until it is done partitioning.
-
17Click Done. The disk drive has been partitioned. You can now use the disk drive and it's partitions however you want.
- When removing a USB drive from your Mac, be sure to click the Eject icon in Disk Utility or Finder. This prevents damage to your disk drive when removing it.


References
About This Article