This article was co-authored by Marvin Woo. Marvin Woo is a licensed electrician and the Owner of Woo's Electrical & Appliance based in East O’ahu. With over two decades of experience, he specializes in troubleshooting issues and maintaining residential electrical systems. Marvin is both licensed and insured to complete electrical work in the state of Hawaii.
There are 9 references cited in this article, which can be found at the bottom of the page.
This article has been viewed 39,590 times.
LED lights are a great way to add functional lighting or a bit of flair to a space. They’re also super easy to wire. You can connect an LED strip to an adapter and then plug it in to power it. You can also use a wire splicer to tap your LED lights into an existing and functioning wire to provide power for the lights.
Steps
Powering LED Strip Lighting
-
1Trim the strip to size by cutting at the indicated lines with scissors. The strip of LED lighting needs to be trimmed to the size you need it to be before you can use it. Take a pair of scissors and cut along the dotted lines indicated on the strip.[1]
- You can cut the strip to be any length you need, but you must cut along the dotted lines.
- The cutting distance, or the distance between the dotted cut lines, can vary depending on the manufacturer.
- If you don’t cut along the indicated lines, some of the lights will not turn on.
-
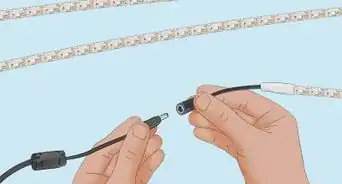
2Clip on a connector to the end of the strip. A wire connector is a fastener that allows you to connect 2 or more wires together so they can power the lights. Align the red wire on the connector with the positive (+) mark on the strip and the black wire is aligned with the negative (-) mark on the strip. Gently pull back the black locking bar at the end of the connector. Slide the end of the strip into the connector and then push the black bar back into place to lock the strip into position.[2]
- Lightly tug at the strip to make sure it’s securely locked into the connector.
- You can find connectors at hardware stores, electronic stores, and online.
Tip: If you don’t have a connector with a locking bar for you to insert the wires, use a soldering iron to fuse the positive wire to the positive connection and the negative wire to the negative connection.
Advertisement -
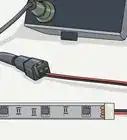
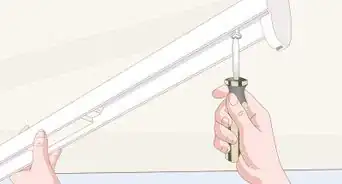
3Attach the wires into the adapter. Connect the positive wire of the strip to the positive slot on the adapter, then connect the negative wire to the negative slot on the adapter. Then, take a small flathead screwdriver and tighten the screws on the adapter so the wires are secure.[3]
- Give the wires a gentle pull to make sure they’re firmly attached.
-
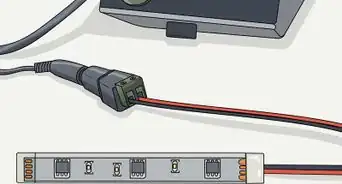
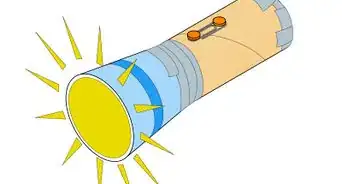
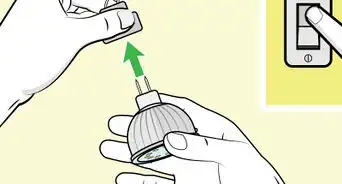
4Plug in the adapter to power the strip. Once the wires are securely attached to the adapter, plug in a power supply cord into an outlet. Then, plug the power cord into the slot on the adapter. The lights on the strip will turn on.[4]
- Cover the LED strip with a plastic or aluminum casing to keep them protected.


Tapping LED Lights into Wires
-
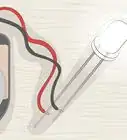
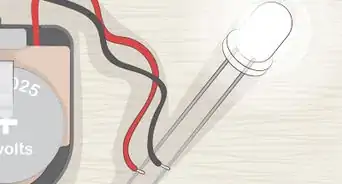
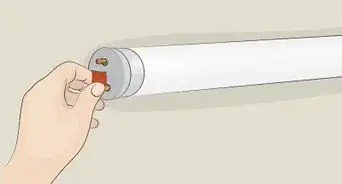
1Test the lights to identify the negative and positive wires. Check near where the wires are connected to the light and look for a positive (+) or a negative (-) symbol. If there isn’t one, connect the wires to a car battery to find out the correct order. If the lights don’t turn on, switch the wire connections. When the lights do turn on, note which wire was connected to the positive terminal and which was connected to the negative terminal.
- The wires connected to the LED lights need to be plugged into a power source correctly in order for the light to turn on.
- Generally, red wires indicate a positive connection and black wires indicate a negative connection.
- You may not be able to tell which wires are positive or negative due to their coloring or lack of labeling. [5]
-
2Slide a splicer over the wire you want to connect your lights to. A splicer is a device you can use to tap into an existing power supply and connect new wires that can draw power from it. Pull the metal pin back on the splicer with your fingers or a pair of pliers so you can fit it over the wire. Slip the splicer over the wire.[6]
- Be sure to use a functioning wire that you want to tap power from for your LED lights.
- Use a splicer with a gauge that fits over the wire you want to tap.
- You can find splicers at hardware stores and online.
Warning: Unplug the wire you plan to tap before you start working on it to avoid accidentally shocking yourself.
-
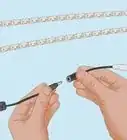
3Insert the wires of the LED lights into the splicer. Connect the positive wire to the positive slot and the negative wire to the negative slot on the splicer. The wires won’t be secure, but they need to be inserted as far as they can go into the slot.[7]
- Usually, the positive wire will go into the slot on the right and the negative wire on the left.
- You don’t have to strip the sheathing around the wires
-
4Clamp the pin on the splicer with a pair of pliers. Once the wires are inserted into the slots, take a pair of pliers and squeeze on the metal pin. Continue to apply pressure until it penetrates the sheath of the wire you’re splicing into.[8]
- Don’t snap down the pliers or squeeze too hard or you could crack the splicer.
-
5Snap the cover of the splicer into place. After the pin has been pushed into the wire, give the wires a gentle tug to make sure they’re secure. Then, close the cover of the splicer until it snaps closed and is secure.[9]
- The cover will keep the pin of the splicer from coming into contact with anything and prevent power from escaping the wire.
-
6Plug in the tapped wire to power your LED lights. Restore power to the tapped wire by plugging it into an outlet. The lights will draw power from the cord that you spliced into and turn on.[10]
- The LED lights will turn on whenever the tapped wire has power running through it.


Community Q&A
-
QuestionHow long can I leave the LED lights on?
 Garrie NassauCommunity AnswerIf you use a high-quality LED brand, you can leave them on 24/7 without significantly using up their lifespan. Also, most LED light strips come with a warranty if you have any problems with them.
Warnings
- Always make sure any wires you’re tapping into are unplugged to avoid being shocked.⧼thumbs_response⧽
Things You’ll Need
Powering LED Strip Lighting
- Scissors
- Wire connectors
Tapping LED Lights into Wires
- Wire splicer
- Pliers


References
- ↑ https://youtu.be/bTRLt-fzTwg?t=14
- ↑ https://youtu.be/bTRLt-fzTwg?t=213
- ↑ https://youtu.be/bTRLt-fzTwg?t=276
- ↑ https://youtu.be/bTRLt-fzTwg?t=322
- ↑ https://youtu.be/HAshrnmaWSo?t=40
- ↑ https://youtu.be/HAshrnmaWSo?t=239
- ↑ https://youtu.be/HAshrnmaWSo?t=275
- ↑ https://youtu.be/HAshrnmaWSo?t=324
- ↑ https://youtu.be/HAshrnmaWSo?t=344
About This Article