This article was co-authored by Daniel Stoescu. Daniel Stoescu is a Master Electrician and the Owner and Operator of Home Tech Solutions, LLC in Hampton, Virginia. With over a decade of experience, Daniel specializes in wiring residential, commercial, and light industrial structures. The Home Tech Solutions team has over four decades of combined experience and offers comprehensive solutions for residential electrical needs.
This article has been viewed 44,770 times.
Electric wall switches last a long time. Still, you will want to replace a switch when it wears out, in part, because it presents a fire hazard. Another reason to change out the switch is appearances; you may want to change the size, color, or style of the switch. As with all things electrical, safety is a real issue, so you need to know how to wire a wall switch safely, securely, and easily.
Steps
Preparing Your Wall
-
1Pick a single-pole light switch for most applications.
- Common applications include ceiling or hallway light switches, a cellar or attic light, a ceiling fan or chandelier, or an outdoor patio light.
- A single-pole wall switch usually has a lever or toggle that completes the circuit when it is flipped up to turn a light, device, or appliance on.
- When the toggle is flipped down, the circuit is broken, and the power goes off.
- Single-pole switches have 2 brass terminal screws on the side, and newly purchased switches usually have a ground wire.
-
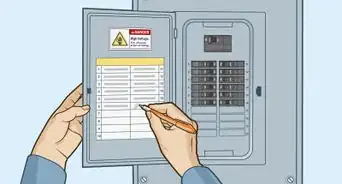
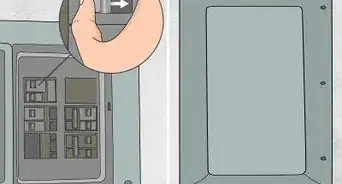
2Turn off the electricity carefully.[1]
- Locate your circuit breaker box and the circuit breaker specific to the switch to be wired.
- Turn off that circuit breaker.
Advertisement -
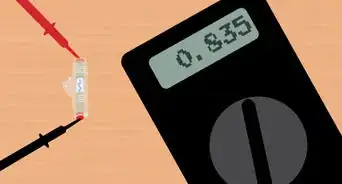
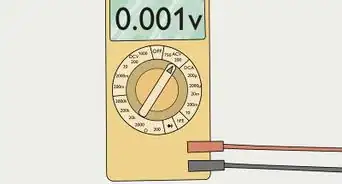
3Confirm the electricity is off at the spot you want to install the switch.
- Remove the faceplate from the switch with a screwdriver.
- Touch a non-contact voltage detector near each of the 2 screw terminals.
- If the voltage detector lights, electricity is still on, and you are at risk, so return to the circuit breaker to determine if it is off and/or if it is the correct circuit breaker.
- If the voltage detector does not light, the electricity is off, and you can proceed.


Installing a Wall Switch
-
1Unscrew the top and bottom of the switch in place, and remove it gently from the box.
- Measure the height, width, and depth of the electrical box in place to determine if your new light switch will fit.
-
2Disconnect the wires from the existing switch with a screwdriver.
- Keep the wires separate; the wire from the top terminal should be positioned differently from the wire from the bottom terminal.
-
3Strip insulation away on each wire to expose 3/8 inch (0.9525 cm) of wire.
-
4Attach the wires in the box to the appropriate terminal, top or bottom, on the new switch.
- Use needle-nose pliers to shape a loop at end of each wire.
- Place loops over terminals and tighten terminal screws with screwdriver.
-
5Ground the new switch.
- Attach the ground wire to the ground post in the box.
- Clip a grounding clip to the bottom edge of the box if there is no grounding post.
-
6Bundle the package together in your hand, and gently insert it into the wall box without undoing any of the connections.
- Try to fold the wires like an accordion to avoid crowding.
-
7Screw the top and bottom of the switch body to the top and bottom of the box.
-
8Screw on the faceplate.
-
9Restore the electricity by turning the circuit breaker back on.
-
10Test the light switch.
-
11Finished.


Expert Q&A
-
QuestionDoes it matter which wire goes where on a light switch?
 Daniel StoescuDaniel Stoescu is a Master Electrician and the Owner and Operator of Home Tech Solutions, LLC in Hampton, Virginia. With over a decade of experience, Daniel specializes in wiring residential, commercial, and light industrial structures. The Home Tech Solutions team has over four decades of combined experience and offers comprehensive solutions for residential electrical needs.
Master ElectricianYes! You should always identify the wires to know which one is the power supply and which one is the switch leg going to the light. If you have any questions, contact a licensed electrician to avoid problems.
Warnings
- Call an electrician to do the work if the wires are aluminum, silvery gray instead of shiny copper. Aluminum wiring requires trained professional handling.⧼thumbs_response⧽
- Turn circuit breakers off and on with one hand; do not let the other hand touch the circuit breaker in case there is not adequate grounding.⧼thumbs_response⧽
Things You'll Need
- Single-pole light switch
- Flat-end and Phillips head screwdrivers
- Wire strippers
- Non-contact voltage detector
- Electrical tape
- Tape measure
- Needle-nose pliers


References
- ↑ Daniel Stoescu. Master Electrician. Expert Interview. 16 August 2021.
- http://www.electrical-online.com/lightsandswitches/
- http://www.allaboutcircuits.com/worksheets/switches.html
About This Article