X
wikiHow es un "wiki", lo que significa que muchos de nuestros artículos están escritos por varios autores. Para crear este artículo, 9 personas, algunas anónimas, han trabajado para editarlo y mejorarlo con el tiempo.
Este artículo ha sido visto 4939 veces.
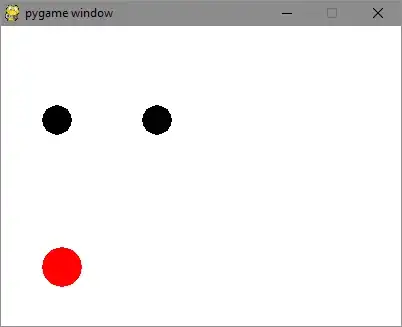
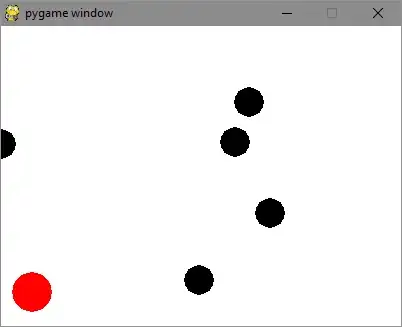
Esta es una introducción a Pygame para personas que ya estén familiarizadas con Python. En este artículo verás los pasos necesarios para crear un simple juego estilo "balón prisionero" en el cual el jugador tiene que esquivar pelotas que rebotan.
Pasos
Parte 1
Parte 1 de 8:Instalar Pygame
Parte 1
-
1Descarga Pygame. Busca la versión correspondiente a tu plataforma en el sitio http://www.pygame.org/download.shtml.
-
2Ejecuta el instalador.
-
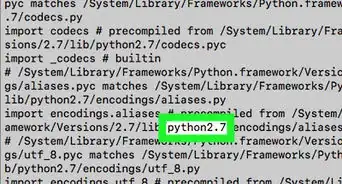
3Verifica que la instalación haya funcionado. Abre la terminal de Python y escribe "import pygame". Si no aparece un error, entonces Pygame se habrá instalado correctamente.
import pygame
Anuncio
Parte 2
Parte 2 de 8:Configurar una ventana básica
Parte 2
-
1Abre un archivo nuevo.
-
2Importa Pygame. Pygame es una biblioteca que te dará acceso a funciones gráficas. Si quieres más información sobre cómo trabajan estas funciones, puedes buscar información sobre ellas en el sitio web de Pygame: https://www.pygame.org/docs/.
import pygame
from pygame.locals import *
-
3Configura la resolución de pantalla. Ahora deberás crear una variable global para la resolución de la pantalla de modo que puedas referenciarla en distintas partes del juego. Generalmente va en la parte superior del archivo para que sea más fácil cambiarla más adelante. En proyectos avanzados, es mejor poner esta información en un archivo separado.
resolution = (400,300)
-
4Define algunos colores. Los colores en Pygame son RGBA, con valores que varían entre 0 y 255. El valor alfa (A) es opcional, pero los demás colores (rojo, azul y verde) son obligatorios.
white = (255,255,255)
black = (0,0,0)
red = (255,0,0)
-
5Inicializa la pantalla. Utiliza la variable de la resolución que habías definido anteriormente.
screen = pygame.display.set_mode(resolution)
-
6Crea un bucle para el juego. Repite ciertas acciones en todos los cuadros del juego. Crea un bucle que se repita indefinidamente replicando estas acciones.
while True:
-
7Colorea la pantalla.
screen.fill(white)
-
8Muestra la pantalla. Si ejecutas el programa, la pantalla se volverá blanca y luego el programa dejará de responder. Esto se debe a que el sistema operativo estará enviándole eventos al juego y el juego no puede hacer nada con ellos. Al recibir tantos eventos no controlados, el juego dejará de responder.
while True:
    ...
    pygame.display.flip()
-
9Controla los eventos. Obtén una lista de todos los eventos que ocurren en cada cuadro. Por ahora te ocuparás de un solo evento, el evento de salida. Este evento ocurre cuando el usuario cierra el juego. Al hacerlo, evitarás que el programa deje de responder como consecuencia del exceso de eventos.
while True:
    ...
    for event in pygame.event.get():
        if event.type == QUIT:
            pygame.quit()
-
10¡Prueba el juego! Así es como deberá verse tu código ahora:
import pygame
from pygame.locals import *

resolution = (400,300)
white = (255,255,255)
black = (0,0,0)
red = (255,0,0)

screen = pygame.display.set_mode(resolution)

while True:
    screen.fill(white)
    pygame.display.flip()

    for event in pygame.event.get():
        if event.type == QUIT:
            pygame.quit()
Anuncio
Parte 3
Parte 3 de 8:Crear un objeto del juego
Parte 3
-
1Crea una nueva clase y un constructor. Configura todas las propiedades del objeto. También deberás proporcionar valores para cada una de esas propiedades.
class Ball:
    def __init__(self, xPos =  resolution[0] / 2, yPos = resolution[1] / 2, xVel = 1, yVel = 1, rad = 15):
        self.x = xPos
        self.y = yPos
        self.dx = xVel
        self.dy = yVel
        self.radius = rad
        self.type = "ball"
-
2Determina la forma en la que se dibujará el objeto. Utiliza las propiedades que definiste en el constructor tanto para dibujar la pelota como un círculo, como para pasarle a la función la superficie sobre la cual se dibujará el objeto. La superficie será el objeto de la pantalla que creaste anteriormente a través de la resolución.
    def draw(self, surface):
        pygame.draw.circle(surface, black, (self.x, self.y), self.radius)
-
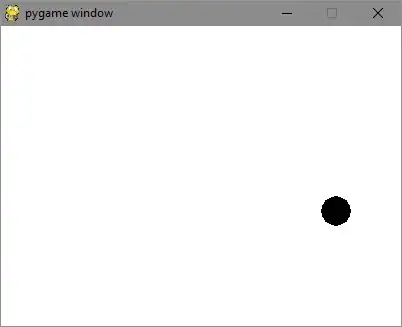
3Crea una instancia de la clase y haz que el bucle del juego dibuje la pelota en cada repetición.
ball = Ball()

while True:
	...
    ball.draw(screen)
-
4Haz que el objeto se mueva. Crea una función que actualice la posición del objeto. Llama a esta función en cada repetición del bucle.
class Ball:
	...
    def update(self):
        self.x += self.dx
        self.y += self.dy
-
5Limita la tasa de cuadros por segundo. La pelota se moverá rápido porque el bucle del juego se ejecuta cientos de veces por segundo. Utiliza el reloj de Pygame para limitar la tasa a 60 cuadros por segundo.Anuncio
clock = pygame.time.Clock()

while True:
	...
	clock.tick(60)
class Ball:
	...
    def update(self):
		...
        if (self.x <= 0 or self.x >= resolution[0]):
            self.dx *= -1
        if (self.y <= 0 or self.y >= resolution[1]):
            self.dy *= -1
import pygame
from pygame.locals import *

resolution = (400,300)
white = (255,255,255)
black = (0,0,0)
red = (255,0,0)

screen = pygame.display.set_mode(resolution)

class Ball:
    def __init__(self, xPos =  resolution[0] / 2, yPos = resolution[1] / 2, xVel = 1, yVel = 1, rad = 15):
        self.x = xPos
        self.y = yPos
        self.dx = xVel
        self.dy = yVel
        self.radius = rad
        self.type = "ball"

    def draw(self, surface):
        pygame.draw.circle(surface, black, (self.x, self.y), self.radius)

    def update(self):
        self.x += self.dx
        self.y += self.dy
        if (self.x <= 0 or self.x >= resolution[0]):
            self.dx *= -1
        if (self.y <= 0 or self.y >= resolution[1]):
            self.dy *= -1

ball = Ball()
clock = pygame.time.Clock()

while True:
    screen.fill(white)
    ball.draw(screen)
    ball.update()
    pygame.display.flip()
    clock.tick(60)

    for event in pygame.event.get():
        if event.type == QUIT:
            pygame.quit()
Parte 4
Parte 4 de 8:Organizar el juego
Parte 4
-
1Organiza todo a través de clases. El juego se volverá más complicado. Utiliza las técnicas de la programación orientada a objetos para organizar tu código.
-
2Convierte el bucle del juego en una clase. Como el juego ahora tiene datos que incluyen los objetos y las funciones del juego, sería lógico convertir el bucle del juego en una clase.
class game():
-
3Agrega un constructor. En él instanciarás algunos objetos del juego, crearás la pantalla y el reloj, e inicializarás Pygame. Es necesario inicializar Pygame para poder usar ciertas características como texto y sonido.
class game():
    def __init__(self):
        pygame.init()

        self.screen = pygame.display.set_mode(resolution)
        self.clock = pygame.time.Clock()
-
4Controla los eventos a través de una función.
class game():
	...
	def handleEvents(self):
        for event in pygame.event.get():
            if event.type == QUIT:
                pygame.quit()
-
5Convierte el bucle del juego en una función. Llama a la función que controla al evento en cada repetición.
class game():
	...
	def run(self):
        while True:
            self.handleEvents()

			self.screen.fill(white)

            self.clock.tick(60)
            pygame.display.flip()
-
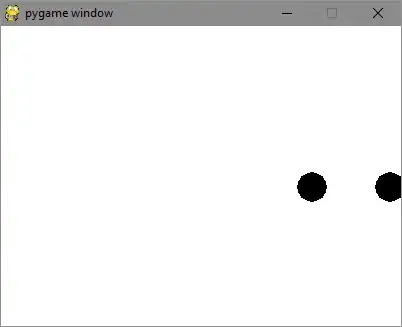
6Controla varios objetos del juego. Ahora mismo, el código debe llamar a la función de dibujo y de actualización del objeto en cada cuadro. Esto podría volverse muy complicado si tuvieras muchos objetos, por lo que sería mejor agregar el objeto a un arreglo y posteriormente actualizar y dibujar todos los objetos el arreglo en cada repetición. Así podrás agregar fácilmente otro objeto y asignarle una posición inicial diferente.
class game():
    def __init__(self):
		...
        self.gameObjects = []
        self.gameObjects.append(Ball())
        self.gameObjects.append(Ball(100))

    ...

    def run(self):
        while True:
            self.handleEvents()

            for gameObj in self.gameObjects:
                gameObj.update()

            self.screen.fill(white)

            for gameObj in self.gameObjects:
                gameObj.draw(self.screen)

            self.clock.tick(60)
            pygame.display.flip()
-
7¡Prueba el juego! Así es como deberá verse tu código ahora:
import pygame
from pygame.locals import *

resolution = (400,300)
white = (255,255,255)
black = (0,0,0)
red = (255,0,0)

screen = pygame.display.set_mode(resolution)

class Ball:
    def __init__(self, xPos =  resolution[0] / 2, yPos = resolution[1] / 2, xVel = 1, yVel = 1, rad = 15):
        self.x = xPos
        self.y = yPos
        self.dx = xVel
        self.dy = yVel
        self.radius = rad
        self.type = "ball"

    def draw(self, surface):
        pygame.draw.circle(surface, black, (self.x, self.y), self.radius)

    def update(self):
        self.x += self.dx
        self.y += self.dy
        if (self.x <= 0 or self.x >= resolution[0]):
            self.dx *= -1
        if (self.y <= 0 or self.y >= resolution[1]):
            self.dy *= -1

class game():
    def __init__(self):
        pygame.init()

        self.screen = pygame.display.set_mode(resolution)
        self.clock = pygame.time.Clock()
        self.gameObjects = []
        self.gameObjects.append(Ball())
        self.gameObjects.append(Ball(100))

    def handleEvents(self):
        for event in pygame.event.get():
            if event.type == QUIT:
                pygame.quit()

    def run(self):
        while True:
            self.handleEvents()

            for gameObj in self.gameObjects:
                gameObj.update()

            self.screen.fill(white)

            for gameObj in self.gameObjects:
                gameObj.draw(self.screen)

            self.clock.tick(60)
            pygame.display.flip()

game().run()
Anuncio
Parte 5
Parte 5 de 8:Agregar un objeto del jugador
Parte 5
-
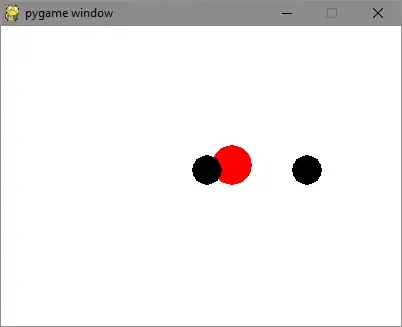
1Crea una clase y un constructor para el jugador. Ahora deberás crear otro círculo que se controle a través del ratón. Inicializa los valores en el constructor. El radio es el único valor importante.
class Player:
    def __init__(self, rad = 20):
        self.x = 0
        self.y = 0
        self.radius = rad
-
2Define cómo dibujar el objeto del jugador. Se dibujará del mismo modo que dibujaste los otros objetos del juego.
class Player:
	...
    def draw(self, surface):
        pygame.draw.circle(surface, red, (self.x, self.y), self.radius)
-
3Agrégale el control del ratón al objeto del jugador. En cada cuadro, revisa la ubicación del ratón y establece la ubicación de los objetos del jugador en ese punto.
class Player:
	...
    def update(self):
        cord = pygame.mouse.get_pos()
        self.x = cord[0]
        self.y = cord[1]
-
4Agrega un objeto del jugador a los objetos del juego (gameObjects). Crea una nueva instancia de jugador y agrégala a la lista.
class game():
    def __init__(self):
		...
        self.gameObjects.append(Player())
-
5¡Prueba el juego! Así es como deberá verse tu código ahora:
import pygame
from pygame.locals import *

resolution = (400,300)
white = (255,255,255)
black = (0,0,0)
red = (255,0,0)

screen = pygame.display.set_mode(resolution)

class Ball:
    def __init__(self, xPos =  resolution[0] / 2, yPos = resolution[1] / 2, xVel = 1, yVel = 1, rad = 15):
        self.x = xPos
        self.y = yPos
        self.dx = xVel
        self.dy = yVel
        self.radius = rad
        self.type = "ball"

    def draw(self, surface):
        pygame.draw.circle(surface, black, (self.x, self.y), self.radius)

    def update(self):
        self.x += self.dx
        self.y += self.dy
        if (self.x <= 0 or self.x >= resolution[0]):
            self.dx *= -1
        if (self.y <= 0 or self.y >= resolution[1]):
            self.dy *= -1

class Player:
    def __init__(self, rad = 20):
        self.x = 0
        self.y = 0
        self.radius = rad
        self.type = "player"

    def draw(self, surface):
        pygame.draw.circle(surface, red, (self.x, self.y), self.radius)

    def update(self):
        cord = pygame.mouse.get_pos()
        self.x = cord[0]
        self.y = cord[1]

class game():
    def __init__(self):
        pygame.init()

        self.screen = pygame.display.set_mode(resolution)
        self.clock = pygame.time.Clock()
        self.gameObjects = []
        self.gameObjects.append(Player())
        self.gameObjects.append(Ball())
        self.gameObjects.append(Ball(100))

    def handleEvents(self):
        for event in pygame.event.get():
            if event.type == QUIT:
                pygame.quit()

    def run(self):
        while True:
            self.handleEvents()

            for gameObj in self.gameObjects:
                gameObj.update()

            self.screen.fill(white)

            for gameObj in self.gameObjects:
                gameObj.draw(self.screen)

            self.clock.tick(60)
            pygame.display.flip()

game().run()
Anuncio
Parte 6
Parte 6 de 8:Hacer que los objetos interactúen con el jugador
Parte 6
-
1Cambia las funciones de actualización. Para que los objetos puedan interactuar, es necesario que dichos objetos puedan accederse entre sí. Agrega otro parámetro a la función de actualización para pasarle la lista de objetos del juego (gameObjects). Tendrás que agregársela tanto al objeto del jugador como a los objetos de la pelota. Si tienes muchos objetos de juego, la herencia podría ayudarte a hacer que todas las firmas del método sean iguales.
class Ball:
	...
	def update(self, gameObjects):

...

class Player:
	...
	def update(self, gameObjects):
-
2Ocúpate de las colisiones entre el jugador y las pelotas. Revisa todos los objetos del juego para determinar si son de tipo "ball" (pelota). Luego utiliza las fórmulas de radios y distancias entre dos objetos para determinar si estos colisionarán. Los círculos son formas en las cuales resulta muy sencillo determinar si se producirá una colisión. Esta es la principal razón por la cual no se usan otros tipos de formas en el juego.
class Player:
	...
	def update(self, gameObjects):
		...
		for gameObj in gameObjects:
            if gameObj.type == "ball":
                if (gameObj.x - self.x)**2 + (gameObj.y - self.y)**2 <= (gameObj.radius + self.radius)**2:
-
3Finaliza el juego si el jugador es "golpeado" por una pelota. Por ahora, simplemente se cerrará el juego si eso sucede.
if (gameObj.x - self.x)**2 + (gameObj.y - self.y)**2 <= (gameObj.radius + self.radius)**2:
	pygame.quit()
-
4¡Prueba el juego! Así es como deberá verse tu código ahora:
import pygame
from pygame.locals import *

resolution = (400, 300)
white = (255,255,255)
black = (0,0,0)
red = (255,0,0)

screen = pygame.display.set_mode(resolution)

class Ball:
    def __init__(self, xPos =  resolution[0] / 2, yPos = resolution[1] / 2, xVel = 1, yVel = 1, rad = 15):
        self.x = xPos
        self.y = yPos
        self.dx = xVel
        self.dy = yVel
        self.radius = rad
        self.type = "ball"

    def draw(self, surface):
        pygame.draw.circle(surface, black, (self.x, self.y), self.radius)

    def update(self, gameObjects):
        self.x += self.dx
        self.y += self.dy
        if (self.x <= 0 or self.x >= resolution[0]):
            self.dx *= -1
        if (self.y <= 0 or self.y >= resolution[1]):
            self.dy *= -1

class Player:
    def __init__(self, rad = 20):
        self.x = 0
        self.y = 0
        self.radius = rad
        self.type = "player"

    def draw(self, surface):
        pygame.draw.circle(surface, red, (self.x, self.y), self.radius)

    def update(self, gameObjects):
        cord = pygame.mouse.get_pos()
        self.x = cord[0]
        self.y = cord[1]
        for gameObj in gameObjects:
            if gameObj.type == "ball":
                if (gameObj.x - self.x)**2 + (gameObj.y - self.y)**2 <= (gameObj.radius + self.radius)**2:
                    pygame.quit()

class game():
    def __init__(self):
        pygame.init()

        self.screen = pygame.display.set_mode(resolution)
        self.clock = pygame.time.Clock()
        self.gameObjects = []
        self.gameObjects.append(Player())
        self.gameObjects.append(Ball())
        self.gameObjects.append(Ball(100))

    def handleEvents(self):
        for event in pygame.event.get():
            if event.type == QUIT:
                pygame.quit()

    def run(self):
        while True:
            self.handleEvents()

            for gameObj in self.gameObjects:
                gameObj.update(self.gameObjects)

            self.screen.fill(white)

            for gameObj in self.gameObjects:
                gameObj.draw(self.screen)

            self.clock.tick(60)
            pygame.display.flip()

game().run()
Anuncio
Parte 7
Parte 7 de 8:Agregar un controlador de juego para crear objetos
Parte 7
-
1Crea una clase de controlador de juego. Los controladores de juego son los responsables de mantener el juego "en ejecución". Son distintos a la clase del juego, que se encarga de dibujar y actualizar todos los objetos. El controlador agregará periódicamente otra pelota a la pantalla para que el juego se vuelva más difícil. Agrega un constructor e inicializa algunos valores básicos. El intervalo representará al tiempo que deberá transcurrir antes de agregar una nueva pelota.
class GameController:
    def __init__(self, interval = 5):
        self.inter = interval
        self.next = pygame.time.get_ticks() + (2 * 1000)
        self.type = "game controller"
-
2Agrega la función de actualización. Esta función se encargará de determinar cuánto tiempo ha transcurrido desde que se agregó la última pelota o desde que se inició el juego. Si el tiempo es mayor al intervalo, se reiniciará el tiempo y se agregará una pelota.
class GameController:
	...
    def update(self, gameObjects):
        if self.next < pygame.time.get_ticks():
            self.next = pygame.time.get_ticks() + (self.inter * 1000)
            gameObjects.append(Ball())
-
3Asígnales velocidades aleatorias a las pelotas. Deberás utilizar números aleatorios para hacer que el juego varíe a lo largo del tiempo. Sin embargo, las velocidades de las pelotas ahora estarán representadas por un número en punto flotante en lugar de un entero.
class GameController:
    ...
    def update(self, gameObjects):
        if self.next < pygame.time.get_ticks():
            self.next = pygame.time.get_ticks() + (self.inter * 1000)
            gameObjects.append(Ball(xVel=random()*2, yVel=random()*2))
-
4Arregla la función de dibujo. La función de dibujo no acepta números en punto flotante, por lo que deberás convertir la posición de las pelotas a enteros para que estas se puedan dibujar.
class Ball:
    ...
    def draw(self, surface):
        pygame.draw.circle(surface, black, (int(self.x), int(self.y)), self.radius)
-
5Define un método de dibujo para el controlador del juego. Al tratarse de un objeto del juego, el bucle principal intentará dibujarlo. Deberás definir una función de dibujo que no haga nada para que el juego no deje de responder.
class GameController:
    ...
    def draw(self, screen):
        pass
-
6Agrega el controlador del juego a "gameObjects" y elimina las dos pelotas. El juego ahora generará una nueva pelota cada cinco segundos.
class game():
    def __init__(self):
        ...
        self.gameObjects = []
        self.gameObjects.append(GameController())
        self.gameObjects.append(Player())
-
7¡Prueba el juego! Así es como deberá verse tu código ahora:
import pygame
from random import random
from pygame.locals import *

resolution = (400,300)
white = (255,255,255)
black = (0,0,0)
red = (255,0,0)

screen = pygame.display.set_mode(resolution)

class Ball:
    def __init__(self, xPos =  resolution[0] / 2, yPos = resolution[1] / 2, xVel = 1, yVel = 1, rad = 15):
        self.x = xPos
        self.y = yPos
        self.dx = xVel
        self.dy = yVel
        self.radius = rad
        self.type = "ball"

    def draw(self, surface):
        pygame.draw.circle(surface, black, (int(self.x), int(self.y)), self.radius)

    def update(self, gameObjects):
        self.x += self.dx
        self.y += self.dy
        if (self.x <= 0 or self.x >= resolution[0]):
            self.dx *= -1
        if (self.y <= 0 or self.y >= resolution[1]):
            self.dy *= -1

class Player:
    def __init__(self, rad = 20):
        self.x = 0
        self.y = 0
        self.radius = rad
        self.type = "player"

    def draw(self, surface):
        pygame.draw.circle(surface, red, (self.x, self.y), self.radius)

    def update(self, gameObjects):
        cord = pygame.mouse.get_pos()
        self.x = cord[0]
        self.y = cord[1]
        for gameObj in gameObjects:
            if gameObj.type == "ball":
                if (gameObj.x - self.x)**2 + (gameObj.y - self.y)**2 <= (gameObj.radius + self.radius)**2:
                    pygame.quit()

class GameController:
    def __init__(self, interval = 5):
        self.inter = interval
        self.next = pygame.time.get_ticks() + (2 * 1000)
        self.type = "game controller"

    def update(self, gameObjects):
        if self.next < pygame.time.get_ticks():
            self.next = pygame.time.get_ticks() + (self.inter * 1000)
            gameObjects.append(Ball(xVel=random()*2, yVel=random()*2))

    def draw(self, screen):
        pass

class game():
    def __init__(self):
        pygame.init()

        self.screen = pygame.display.set_mode(resolution)
        self.clock = pygame.time.Clock()
        self.gameObjects = []
        self.gameObjects.append(GameController())
        self.gameObjects.append(Player())

    def handleEvents(self):
        for event in pygame.event.get():
            if event.type == QUIT:
                pygame.quit()

    def run(self):
        while True:
            self.handleEvents()

            for gameObj in self.gameObjects:
                gameObj.update(self.gameObjects)

            self.screen.fill(white)

            for gameObj in self.gameObjects:
                gameObj.draw(self.screen)

            self.clock.tick(60)
            pygame.display.flip()

game().run()
Anuncio
Parte 8
Parte 8 de 8:Agregar el puntaje y el mensaje de "Juego terminado"
Parte 8
-
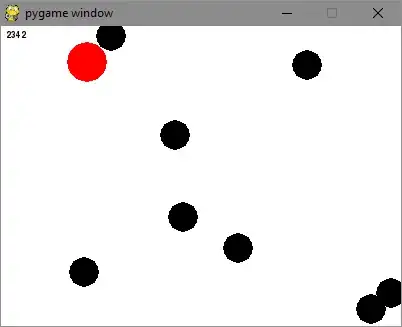
1Agrégale un puntaje a la clase del controlador del juego. Crea un objeto de fuente y una variable de puntaje. Deberás dibujar la fuente en cada cuadro para que muestre el puntaje e incrementar dicho puntaje en cada cuadro a través de la función de actualización.
class GameController:
    def __init__(self, interval = 5):
        ...
        self.score = 0
        self.scoreText = pygame.font.Font(None, 12)

    def update(self, gameObjects):
        ...
        self.score += 1

    def draw(self, screen):
        screen.blit(self.scoreText.render(str(self.score), True, black), (5,5))
-
2Modifica la finalización del juego. Ahora en vez de cerrar el juego cuando el jugador sufra una colisión, puedes configurar una variable en el jugador para que el juego pueda verificarla. Cuando la variable "gameOver" (juego terminado) tome el valor "true" (verdadero), deja de actualizar los objetos. Al hacerlo, se congelará la pantalla para que el jugador pueda ver lo que sucedió y revisar su puntaje. Ten en cuenta que los objetos quedarán dibujados, solo que no se actualizarán.
class Player:
    def __init__(self, rad = 20):
        ...
        self.gameOver = False

    def update(self, gameObjects):
        ...
        for gameObj in gameObjects:
            if gameObj.type == "ball":
                if (gameObj.x - self.x)**2 + (gameObj.y - self.y)**2 <= (gameObj.radius + self.radius)**2:
                    self.gameOver = True

class game():
    def __init__(self):
        ...
        self.gameOver = False

    def run(self):
        while True:
            self.handleEvents()

            if not self.gameOver:
                for gameObj in self.gameObjects:
                    gameObj.update(self.gameObjects)
                    if gameObj.type == "player":
                        self.gameOver = gameObj.gameOver
-
3¡Prueba el juego! Así es como deberá verse tu código ahora:
import pygame
from random import random
from pygame.locals import *

resolution = (400,300)
white = (255,255,255)
black = (0,0,0)
red = (255,0,0)

screen = pygame.display.set_mode(resolution)

class Ball:
    def __init__(self, xPos =  resolution[0] / 2, yPos = resolution[1] / 2, xVel = 1, yVel = 1, rad = 15):
        self.x = xPos
        self.y = yPos
        self.dx = xVel
        self.dy = yVel
        self.radius = rad
        self.type = "ball"

    def draw(self, surface):
        pygame.draw.circle(surface, black, (int(self.x), int(self.y)), self.radius)

    def update(self, gameObjects):
        self.x += self.dx
        self.y += self.dy
        if (self.x <= 0 or self.x >= resolution[0]):
            self.dx *= -1
        if (self.y <= 0 or self.y >= resolution[1]):
            self.dy *= -1

class Player:
    def __init__(self, rad = 20):
        self.x = 0
        self.y = 0
        self.radius = rad
        self.type = "player"
        self.gameOver = False

    def draw(self, surface):
        pygame.draw.circle(surface, red, (self.x, self.y), self.radius)

    def update(self, gameObjects):
        cord = pygame.mouse.get_pos()
        self.x = cord[0]
        self.y = cord[1]
        for gameObj in gameObjects:
            if gameObj.type == "ball":
                if (gameObj.x - self.x)**2 + (gameObj.y - self.y)**2 <= (gameObj.radius + self.radius)**2:
                    self.gameOver = True

class GameController:
    def __init__(self, interval = 5):
        self.inter = interval
        self.next = pygame.time.get_ticks() + (2 * 1000)
        self.type = "game controller"

        self.score = 0
        self.scoreText = pygame.font.Font(None, 12)

    def update(self, gameObjects):
        if self.next < pygame.time.get_ticks():
            self.next = pygame.time.get_ticks() + (self.inter * 1000)
            gameObjects.append(Ball(xVel=random()*2, yVel=random()*2))

        self.score += 1

    def draw(self, screen):
        screen.blit(self.scoreText.render(str(self.score), True, black), (5,5))

class game():
    def __init__(self):
        pygame.init()

        self.screen = pygame.display.set_mode(resolution)
        self.clock = pygame.time.Clock()
        self.gameObjects = []
        self.gameObjects.append(GameController())
        self.gameObjects.append(Player())
        self.gameOver = False

    def handleEvents(self):
        for event in pygame.event.get():
            if event.type == QUIT:
                pygame.quit()

    def run(self):
        while True:
            self.handleEvents()

            if not self.gameOver:
                for gameObj in self.gameObjects:
                    gameObj.update(self.gameObjects)
                    if gameObj.type == "player":
                        self.gameOver = gameObj.gameOver

            self.screen.fill(white)

            for gameObj in self.gameObjects:
                gameObj.draw(self.screen)

            self.clock.tick(60)
            pygame.display.flip()

game().run()
Anuncio
Acerca de este wikiHow
Anuncio


