This article was co-authored by Adarsh Vijay Mudgil, MD. Dr. Adarsh Vijay Mudgil is a board certified Dermatologist, Dermatopathologist, and the Owner of Mudgil Dermatology, a state-of-the-art dermatology practice based in New York, New York. As one of the few dermatologists in the area to achieve board certification in both dermatology and dermatopathology, Dr. Mudgil specializes in all aspects of medical, surgical, and cosmetic dermatology. He received his Bachelor's degree with Phi Beta Kappa honors from Emory University and earned his Doctor of Medicine (MD) with Alpha Omega Alpha honors from the Stony Brook University School of Medicine. In medical school, Dr. Mudgil was among a handful of students nationwide to receive a coveted Howard Hughes Medical Institute Fellowship and Scholarship. He then completed his residency in dermatology at the Mount Sinai Medical Center in Manhattan, where he served as chief resident. Additionally, Dr. Mudgil went on to complete a fellowship at the prestigious Ackerman Academy of Dermatopathology. He is a fellow of the American Academy of Dermatology, the American Society for Dermatologic Surgery, and the American Society of Dermatopathology. Dr. Mudgil is also a member of the Mount Sinai School of Medicine teaching faculty.
There are 8 references cited in this article, which can be found at the bottom of the page.
wikiHow marks an article as reader-approved once it receives enough positive feedback. This article has 20 testimonials from our readers, earning it our reader-approved status.
This article has been viewed 844,868 times.
Face masks are an easy and inexpensive way to perk up your skin and pamper yourself. Different types of masks can be purchased (or made at home) to accomplish many different skin benefits. In order to apply your mask effectively, you will first want to prep your skin, then carefully apply your mask. You will also want to gather the right materials. With just a little effort and time, you can have healthy, glowing skin.
Things You Should Know
- Pick your mask based on what treatment your skin needs, and prepare either a homemade or store-bought mask along with a soft bristle brush.
- Wash and exfoliate your face before taking a hot shower to open up your pores.
- Apply the face mask evenly across your face, and let it sit on your face for an average of 15 minutes before washing it away with warm water.
Steps
Gathering Materials
-
1Assess your skin. There are many types of masks on the market, and even more that you can make at home. First, look in the mirror and determine what you want your mask to accomplish. Are you aiming to hydrate your skin or to clear up oil? Do you want to get rid of breakouts or are you looking for an anti-aging product? Once you know what kind of mask (or masks) you need, you can find, or make, the right product.[1]
-
2Prepare your mask. There are two routes you can take when using a mask product: purchasing a store-bought mask, or making a DIY mask at home. Read and follow all directions. (Some clay masks, for example, require the addition of water or apple cider vinegar). If you will be using a homemade mask, gather all of your ingredients and follow the recipe.
- Homemade masks can be made from egg whites, avocado, milk, oatmeal, and many other household products. Find a recipe that works for you.
- Store-bought masks can be found for all manner of skin ailments and skin types. Read ingredient labels and find a mask that you’d like to use.[2]
Advertisement -
3Get a brush. Face masks are best applied with a soft-bristle brush, such as a paintbrush (normally used for art making) or a tint brush (normally used to apply hair dye). Invest in a brush that you will use for this purpose, and be sure to clean it when you are done.[3]
- You will also need a bowl for your mask, and possibly a washcloth.
-
4
-
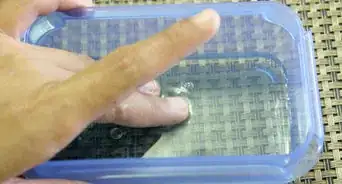
5Refrigerate your items. Keep all of these things in the refrigerator until you are ready to use them. This is especially true if you are using perishable ingredients in your mask, but even if you are using a store-bought mask product, applying it cold can feel great and be good for your skin.[6]
- For a cooling effect, place face mask in the refrigerator at least one hour prior to application.

Prepping Your Skin
-
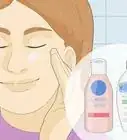
1Wash your face. Before you apply your mask, be sure to cleanse your skin thoroughly. Using warm water and your favorite facial cleanser, remove any makeup, dirt, and oil. Do not apply moisturizer.[7]
-
2Exfoliate. If it has been a while since you last exfoliated, it is a good idea to do so before you apply your mask. It removes the dead skin cells and helps your mask absorb better.
- You can use a store-bough facial scrub, such as St. Ives Apricot Scrub.
- Alternatively, you can mix a small bit of ground coffee or sugar into your face wash.
- Apply the product to wet skin, gently scrub, and rinse with warm water.
-
3Open your pores. Your mask will do the most good if open up your pores before applying it. The simplest way to do this is to take a hot shower before applying your mask.[8]
- As an alternative, you can take a washcloth and dip it in hot water (as hot as your face can bear) and cover your face with the washcloth until it cools off.
- A third option is to hold your face over a bowl of steaming water for 1-2 minutes.
Applying the Mask
-
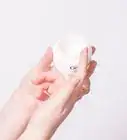
1Apply the mask. Using a paintbrush (or another soft-bristled wide brush) or your fingertips apply the mask evenly to your face. If you do not have a brush and plan to use your fingertips, then make sure your hands are clean before applying the mask. Be sure that the application of the product is even and smooth. Avoid going too close to your eyes or mouth, but don’t forget your neck![9]
-
2Set cucumber slices on your eyes (optional). After applying the mask, set cucumber (or potato) slices on your eyes, if you are using them, and relax. You may want to switch off the light. It relaxes you better.[10]
-
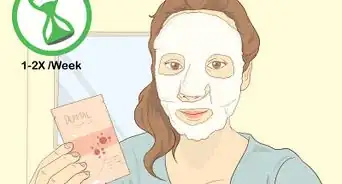
3Set a timer and wait. The length of time you will leave on your mask will vary based on the type of mask you are using, and the type of skin you have. In general, 15 minutes is a good average for most masks. Set a timer for yourself and relax.[11]
- If using a clay mask, do not wait for the clay to dry. Remove the mask while the clay is still slightly wet.[12]
-
4Remove the mask. After the proper waiting time, use warm water and a washcloth to gently remove the mask. Be sure to gently wipe away the mask from around your hairline and under your chin.[13]
-
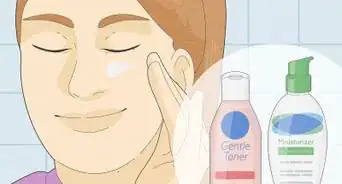
5Follow with a toner and a moisturizer. Use a cotton ball to apply toner to your face and neck. This shrinks your pores and locks in all the benefits of your mask. Finally, apply a bit of your favorite moisturizer.[14]
- Avoid applying too much moisturizer, as this will clog your freshly-cleared pores.[15]
-
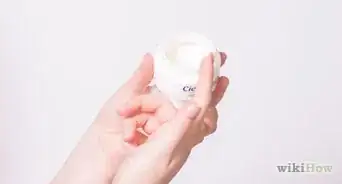
6Repeat the process once per week. It is important to avoid using clay masks too often because it can irritate your skin. However, using a clay mask can be a refreshing treatment for your skin. Use a clay mask only once per week to reduce the chances of irritation.
- If your skin is dry, then you may want to use a clay mask less often.
- If your skin is oily, then you might be able to use the treatment more often.


Expert Q&A
Did you know you can get expert answers for this article?
Unlock expert answers by supporting wikiHow
-
QuestionHow long should I leave a face mask on for?
 Adarsh Vijay Mudgil, MDDr. Adarsh Vijay Mudgil is a board certified Dermatologist, Dermatopathologist, and the Owner of Mudgil Dermatology, a state-of-the-art dermatology practice based in New York, New York. As one of the few dermatologists in the area to achieve board certification in both dermatology and dermatopathology, Dr. Mudgil specializes in all aspects of medical, surgical, and cosmetic dermatology. He received his Bachelor's degree with Phi Beta Kappa honors from Emory University and earned his Doctor of Medicine (MD) with Alpha Omega Alpha honors from the Stony Brook University School of Medicine. In medical school, Dr. Mudgil was among a handful of students nationwide to receive a coveted Howard Hughes Medical Institute Fellowship and Scholarship. He then completed his residency in dermatology at the Mount Sinai Medical Center in Manhattan, where he served as chief resident. Additionally, Dr. Mudgil went on to complete a fellowship at the prestigious Ackerman Academy of Dermatopathology. He is a fellow of the American Academy of Dermatology, the American Society for Dermatologic Surgery, and the American Society of Dermatopathology. Dr. Mudgil is also a member of the Mount Sinai School of Medicine teaching faculty.
Board Certified Dermatologist & DermatopathologistIt all depends on the ingredients in the mask. I suggest you follow whatever the manufacturer's instructions recommend.
Support wikiHow by unlocking this expert answer.
-
QuestionDo I need to follow a special process for store-bought masks?Adarsh Vijay Mudgil, MDDr. Adarsh Vijay Mudgil is a board certified Dermatologist, Dermatopathologist, and the Owner of Mudgil Dermatology, a state-of-the-art dermatology practice based in New York, New York. As one of the few dermatologists in the area to achieve board certification in both dermatology and dermatopathology, Dr. Mudgil specializes in all aspects of medical, surgical, and cosmetic dermatology. He received his Bachelor's degree with Phi Beta Kappa honors from Emory University and earned his Doctor of Medicine (MD) with Alpha Omega Alpha honors from the Stony Brook University School of Medicine. In medical school, Dr. Mudgil was among a handful of students nationwide to receive a coveted Howard Hughes Medical Institute Fellowship and Scholarship. He then completed his residency in dermatology at the Mount Sinai Medical Center in Manhattan, where he served as chief resident. Additionally, Dr. Mudgil went on to complete a fellowship at the prestigious Ackerman Academy of Dermatopathology. He is a fellow of the American Academy of Dermatology, the American Society for Dermatologic Surgery, and the American Society of Dermatopathology. Dr. Mudgil is also a member of the Mount Sinai School of Medicine teaching faculty.
Board Certified Dermatologist & DermatopathologistAlways read the directions that came with your store-bought mask to make sure you use it correctly. Follow the instruction exactly. Pay special attention to how long you need to leave the mask on your face.Support wikiHow by unlocking this expert answer.
-
QuestionWhat will happen if I don't use a toner or moisturizer after application
 Ashley AdamsAshley Adams is a Licensed Cosmetologist and Hair Stylist in Illinois. She completed her Cosmetology education at John Amico School of Hair Design in 2016.
Professional Hair StylistYou won't receive the maximum benefits of the mask. Your face will lack moisture, and look and feel dry.Support wikiHow by unlocking this expert answer.
Things You'll Need
- Your DIY face mask / product
- Brush / Applicator
- Washcloth
- Cucumber / Potato
- Toner/Moisturizer


References
- ↑ http://stylecaster.com/beauty/face-masks-facts/
- ↑ http://www.self.com/beauty/skin/2015/08/7-easy-diy-face-masks/
- ↑ http://www.mindbodygreen.com/0-21339/4-simple-tips-that-will-change-the-way-you-apply-a-face-mask.html
- ↑ https://www.huffpost.com/entry/puffy-eyes-undereyes-cucumbers-cures-remedies_n_1964329
- ↑ http://womanitely.com/best-home-remedies-puffy-eyes/
- ↑ http://stylecaster.com/beauty/beauty-products-you-should-be-keeping-in-the-fridge/
- ↑ http://www.mindbodygreen.com/0-21339/4-simple-tips-that-will-change-the-way-you-apply-a-face-mask.html
- ↑ http://www.mindbodygreen.com/0-21339/4-simple-tips-that-will-change-the-way-you-apply-a-face-mask.html
- ↑ http://stylecaster.com/beauty/face-masks-facts/
- ↑ http://www.huffingtonpost.com/2012/10/16/puffy-eyes-undereyes-cucumbers-cures-remedies_n_1964329.html
- ↑ http://www.self.com/beauty/skin/2015/08/7-easy-diy-face-masks/
- ↑ http://stylecaster.com/beauty/face-masks-facts/
- ↑ http://www.mindbodygreen.com/0-21339/4-simple-tips-that-will-change-the-way-you-apply-a-face-mask.html
- ↑ http://www.mindbodygreen.com/0-21339/4-simple-tips-that-will-change-the-way-you-apply-a-face-mask.html
- ↑ http://stylecaster.com/beauty/face-masks-facts/
About This Article

To apply a face mask correctly, always wash your face beforehand with a facial cleanser. You may also want to exfoliate first if you haven't in a while. Next, take a hot shower or cover your face with a warm, damp washcloth for several minutes, which will open up your pores and make the mask more effective. Then, when you're ready, apply your face mask and leave it on for around 15 minutes unless the directions say otherwise. After the time is up, rinse the mask off with warm water and apply your regular toner and moisturizer. To learn how to make your own face masks right at home, keep reading!