This article was co-authored by wikiHow staff writer, Janice Tieperman. Janice is a professional and creative writer who has worked at wikiHow since 2019. With both a B.A. and M.A. in English from East Stroudsburg University, she has a passion for writing a wide variety of content for anyone and everyone. In her free time, you can find her working on a new crochet pattern, listening to true crime podcasts, or tackling a new creative writing project.
There are 14 references cited in this article, which can be found at the bottom of the page.
This article has been viewed 10,537 times.
Learn more...
When it comes to home improvement, it doesn’t get much simpler than gamazine. Unlike other paints and coatings, a single coat of gamazine gets the job done—plus, you can apply it to most hard surfaces, like wood, cement, fiberglass, brick, and more. With a little prep work, applying gamazine to your ceiling is an easy, straightforward process that doesn’t require many painting tools.
Steps
Prep
-
1Drape drop cloths over the floor and furniture. Working on your ceiling can be tricky; even if you’re super careful, a few stray drops of gamazine can still drip and splatter on the floor and furniture blow. For easy cleanup, lay out large sections of drop cloth along your floor, and over any nearby pieces of furniture.[1]
- If possible, remove or push away as much furniture from the room ahead of time—this will make your prep and clean-up a lot easier.
-
2Remove any covers, fans, faceplates, or fixtures. Inspect your ceiling for any lights, ceiling fans, air vents, or other attachments—gamazine can be pretty messy, and you don’t want any leftover product sticking where it doesn’t belong. Unscrew all of these attachments and set them aside for later.[2]Advertisement
-
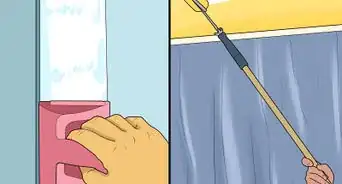
3Apply painter’s tape along the ceiling perimeter. Painter’s tape isn’t just for paint—it’s also great when you’re using textured coatings, like gamazine. Stick strips of tape along the edge, where the ceiling meets the wall.[3]
-
4Set up a ladder so you can reach the ceiling. Check that all 4 ladder feet are planted firmly on the ground, and nothing is uneven or wobbly. Avoid standing higher than the fourth rung, so you don’t risk losing your balance.[4]
-
5


Application
-
1
-
2Scoop a potato-sized amount of gamazine along the edge of a flat, handled tray. You don’t need too much—with gamazine, it helps to work in small sections. Keep your mud tray nearby, so you have easy access.[9]
- A flat, handled tray gives you some extra freedom and flexibility while you’re applying the gamazine.
-
3Scoop up half the gamazine along the edge of your paint trowel. Grab a stainless steel paint trowel, sliding it in a swift, upward motion along the tray to scoop up some of the gamazine. Don’t scoop up all the product on your tray at once—just swipe up enough to coat a small, 1 to 2 ft (0.30 to 0.61 m) section of your ceiling.[10]
- Don’t use plain steel trowels—these can rust and stain your surface.[11]
-
4Apply the product in vertical motions. Swipe the trowel along your ceiling in a quick, vertical motion to spread out a thin, 3-4 mm layer of gamazine.[12] If you notice any obvious marks or lines forming on the product, swipe your trowel in a quick, horizontal motion to smooth out these creases.[13]
- If you’d prefer, you can apply the product in a circular motion to smooth out the surface and finish off the texture.[14]
-
5Flatten the product with a plastic float. A plastic float is a flat tool that’s very similar to a trowel—however, instead of applying the gamazine, it’ll help get rid of the extra product. Move the float in small, circular motions over the gamazine to thin out the product.[15]
-
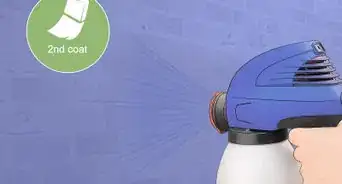
6Work in small, 1 to 2 ft (0.30 to 0.61 m) sections until the ceiling is completely covered. Continue making your way across the ceiling, scooping and swiping the product in thin, 3-4 mm layers along the surface. Repeat this process until your ceiling is completely coated.[16] With gamazine, only 1 coat is needed.[17]
-
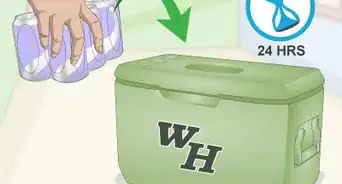
7Wait at least 24 hours for the product to dry. For more specific instructions, check the gamazine container to figure out the exact drying time. Once the gamazine is completely dry, put away your drop cloths and rearrange the room so it’s back to normal.[18]


Warnings
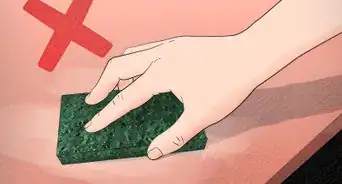
- Stir the gamazine if you haven’t used the product in over a month.[22]⧼thumbs_response⧽
- If your ceiling has an oil paint base coat, level the surface with an extra coat of paint before applying any gamazine.[23]⧼thumbs_response⧽
- Don’t stretch too far to the left or right while standing on a ladder. Instead, adjust the ladder so you can paint a new section of the ceiling more easily.[24]⧼thumbs_response⧽
Things You’ll Need
- Drop cloths
- Painter’s tape
- Microfiber cloth
- Broom
- Step ladder
- Gamazine
- Stainless steel trowel
- Plastic float
- Mud pan
- Flat tray


References
- ↑ https://www.bobvila.com/articles/how-to-texture-a-ceiling/
- ↑ https://www.bobvila.com/articles/how-to-texture-a-ceiling/
- ↑ https://www.bobvila.com/articles/how-to-texture-a-ceiling/
- ↑ https://www.popularmechanics.com/home/how-to/a9631/dont-be-an-idiiot-how-to-use-any-kind-of-ladder-safely-16123359/
- ↑ https://gamaking.co.za/gamazine
- ↑ https://www.apartmenttherapy.com/dust-your-ceiling-the-easy-way-160880
- ↑ https://m.youtube.com/watch?v=xwDHpzlZMHk&t=1m17s
- ↑ https://gamaking.co.za/gamazine
- ↑ https://m.youtube.com/watch?v=hdfbPQRmX88&t=0m31s
- ↑ https://m.youtube.com/watch?v=hdfbPQRmX88&t=0m36s
- ↑ https://m.youtube.com/watch?v=xwDHpzlZMHk&t=0m26s
- ↑ https://gamaking.co.za/gamazine
- ↑ https://m.youtube.com/watch?v=xwDHpzlZMHk&t=4m17s
- ↑ https://m.youtube.com/watch?v=xwDHpzlZMHk&t=3m10s
- ↑ https://m.youtube.com/watch?v=xwDHpzlZMHk&t=2m31s
- ↑ https://m.youtube.com/watch?v=hdfbPQRmX88&t=0m36s
- ↑ https://gamaking.co.za/gamazine
- ↑ https://www.bobvila.com/articles/wall-texture-types/
- ↑ https://www.southernliving.com/home/remodel/how-to-remove-painters-tape-with-joanna-gaines-video
- ↑ https://gamaking.co.za/gamazine
- ↑ https://m.youtube.com/watch?v=xwDHpzlZMHk&t=4m43s
- ↑ https://gamaking.co.za/gamazine
- ↑ https://gamaking.co.za/gamazine
- ↑ https://www.popularmechanics.com/home/how-to/a9631/dont-be-an-idiiot-how-to-use-any-kind-of-ladder-safely-16123359/