This article was co-authored by Kathy Leader. Kathy Leader is an Artist and the Owner of The Art Process. With more than 36 years of art education experience, she specializes in providing mixed media art workshops for individuals and groups. In addition, she works with businesses and organizations to build morale, encourage creative problem solving, and find de-stressing tools. Kathy holds a BFA in Art Education from The University of Cape Town.
There are 17 references cited in this article, which can be found at the bottom of the page.
wikiHow marks an article as reader-approved once it receives enough positive feedback. In this case, 100% of readers who voted found the article helpful, earning it our reader-approved status.
This article has been viewed 87,758 times.
Gold leaf adds a glittery effect to canvas that can elevate your art projects. By preparing the canvas and applying the gold leaf, you can adhere your gold leaf to your canvas securely. Then, with a few special supplies, you can seal your gold leaf to preserve its beautiful finish.
Steps
Selecting a Canvas and Applying Adhesive
-
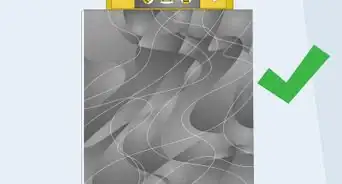
1Choose a dark canvas. Opt for a deeper colored canvas to prevent small imperfections in your gold application from looking like mistakes. Due to the fragile nature of gold leaf, tiny bits of your background will likely show through your application.[1]
- A darker background peeking through your gold typically looks more intentional than a light background, which may look more like an incomplete gold application. It’s totally up to you though.
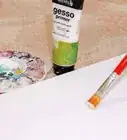
- If desired, you can use a small, flat soft-bristled brush to paint a white canvas another color with acrylic paints. What color you’d like peeking through your gold leaf is up to you.
-
2Let any background painting dry completely. If you paint your canvas, check that it has dried fully before moving on to other steps. Look at your canvas to gauge dryness. If it is cool to the touch, it is still curing. How long the canvas takes to dry will depend upon the thickness of your paint application.[2]Advertisement
-
3Lay your canvas on your work surface. Place your canvas flat on your work surface, a table is best, rather than on an easel. It’s easiest to work with gold leaf while standing over the canvas.[3]
-
4Wet a flat soft-bristled brush. Fill a container with plain tap water. Dip your brush into the container to thoroughly coat the bristles. Remove excess water by wiping each side of the brush against a clean paper towel until your brush is merely damp.[4]
-
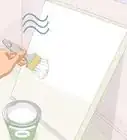
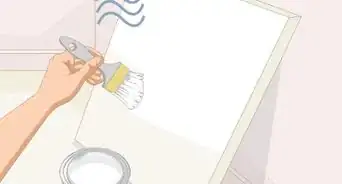
5Apply a thin layer of water-based gilding adhesive to your canvas. Unscrew the top from a container of gilding adhesive, and dip your dampened brush into it. Paint the adhesive in short strokes, spreading it over as large an area as you’d like to guild. Extend as much of the adhesive as you can before re-dipping for more adhesive if necessary.[5]
- The adhesive should be spread thin enough to be translucent rather than milky on the canvas.
- Try not to go back over areas where you’ve already applied adhesive. This will help avoid undesirable rippling underneath your gold.
- PVA glue is the best adhesive for gold leaf.[6]
-
6Feel for tackiness after 2-3 minutes. Touch an inconspicuous area of your canvas with your knuckle. If it feels like the sticky side of a piece of scotch tape, it is ready for gold leaf application.[7]
- No adhesive should come off on your knuckle if the canvas has reached the appropriate stage of tackiness.
- If the adhesive is still wet, let it cure for another minute and then check it again. Keep doing this until it reaches the desired stage of tackiness.


Applying the Gold Leaf
-
1Wash your hands and clean any adhesive drips off your work surface. Remove any adhesive residue from your hands by washing them with soap and warm water. Dry them thoroughly. Wipe up any errant drops of adhesive off your work surface with a dry paper towel.[8]
- Gold leaf is very fragile and may stick to any available adhesive unintentionally. Cleaning up prevents gold leaf from getting all over yourself and your workspace.
-
2Close any windows and turn off any fans. Minimize airflow in the room where you’re working to prevent your gold leaf from floating up into the air. The leaf is very light, and a small draft can cause it to get away from you while you’re handling it.[9]
-
3Smooth a square of wax paper against a piece of gold leaf. Open your gold leaf booklet, and peel back the protective tissue covering the leaf. Use your palm to smooth a piece of wax paper over an exposed piece of leaf. Press gently with a flat palm to remove any wrinkles in the leaf.[10]
- Smoothing the leaf will also create more static and help it “stick” to your wax paper.
-
4Bring the gold leaf over to your canvas. Gently lift the edge of the wax paper. The gold leaf will be “adhered” to the wax paper with static electricity. Hold the piece of wax paper taut about 4 inches (10 cm) above your canvas and center the gold leaf over your tacky adhesive.
- If you prefer, you can handle the gold leaf directly with your hands. It’s not dangerous or toxic, but it may break apart.
-
5Place the gold leaf on your adhesive. Gently lower your wax paper against your canvas to deposit the gold leaf onto your tacky adhesive. Lay the gold leaf so it overlaps the edge of your adhesive by about .25 inches (0.64 cm). Smooth the leaf onto the canvas by using your palm to apply pressure through the wax paper.[11]
- Repeat this wax paper process to cover your adhesive area fully in gold leaf, slightly overlapping the gold leaves each time to cover the area fully.
-
6Gently remove any overhang or excess leaf with your hands. Use your fingers to gently tear free any excess overlapping pieces of gold leaf from your canvas. These can be saved for another project or discarded.[12]
- There may still be some small hanging bits of gold leaf when you’re done. That’s okay; they will be neatened up in a later step.
-
7Use a clean soft rag or cheesecloth to burnish the gold leaf. Lay a piece of wax paper over the entire gold leafed area of the canvas. Apply firm pressure with your cloth, rubbing the gold leaf against the canvas through the wax paper. This will help secure the gold leaf in place.[13]
-
8Touch up any areas the gold leaf did not adhere to your canvas. Use more gilding adhesive to fill in any areas where your gold leaf did not stick to the canvas successfully the first time. Wait for tackiness, and apply gold leaf as normal.[14]
- This issue may occur if you waited too long to apply your gold leaf in the first place and rather than becoming tacky, the original adhesive dried out.
- Be sure to burnish any touched-up areas for the most lasting application.
-
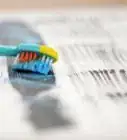
9Clean up your canvas with a small stiff-bristled brush. Use short strokes to flick any hanging gold leaf gently off your canvas using a stiff-bristled brush. It’s best to do this outside or indoors over a large trashcan, as small pieces of gold leaf will be released in the air. Keep doing this until your canvas is neat with any excess gold leaf removed.[15]
- When finished, gently glide a clean rag or cheesecloth over the canvas to sweep away any loosened pieces of leaf that have settled on the canvas.


Sealing the Gold Leaf
-
1Wait at least 3 days before sealing your gold leaf. Let your adhesive cure completely before attempting to apply sealant. For the best finish, it’s best to wait 3 days at a minimum.[16]
-
2Plan to use an acrylic varnish to seal your gold leaf. Purchase a varnish sealant and read the manufacturer’s directions to familiarize yourself with it. Many sealants require you to mix them with solvents, which can be toxic. Ensure children and pets are in another part of your home being looked after when you work with varnishes that give off fumes.[17]
- Look for a varnish with a UV protectant, such as Golden Varnishes MSA Varnish with UV protection, to keep light from damaging your gold finish.
- If mixing varnish and solvents is intimidating for you, opt for a spray varnish. These typically still require protective gear, but do not require any further mixing.
-
3Apply two coats of varnish per the manufacturer’s instructions. Follow the manufacturer’s directions to brush apply or spray your canvas with varnish and seal your gold leaf. This will keep your gold leaf from tarnishing.[18]
- Take all protective precautions your varnish recommends, such as a mask, protective gloves, or eyewear. These products are usually toxic, and most require masks that are specifically rated with a certain level of particle protection. A bandana over your face won’t cut it.
- If you need help, call the manufacturer, and they can make specific safety gear suggestions to ensure you’re protected.
-
4Let the varnish dry fully before handling your canvas. Let your canvas dry in a well-ventilated area away from pets and children. When it is completely dry, hang your work of art or paint more on the canvas as desired. Now that your gold is sealed, it will not be degraded by adding other art materials.


Community Q&A
-
QuestionIs it better to use acrylic or oil paint to paint over the gold leaf?
 Community AnswerEither is fine, but if you use oil paint it will give your picture more texture than if you use acrylic.
 -
QuestionIs it safe to do lines or designs on a detailed background? Will it damage the painting at all?
 Community AnswerAs long as the paint is dry and you are applying it gently, it most likely won't come off, but it depends on what kind of paint you are using.
 -
QuestionHow do I do this without gold leaf? Can I use gold paint?Community AnswerTo do this without gold leaf, you can use gold paint, luster dust, glitter, and much more.
Things You'll Need
- Imitation or real gold leaf
- Water container
- Tap water
- Paper towels
- A water-based gilding adhesive
- A soft clean rag or piece of cheesecloth
- Wax paper
- A flat soft-bristled brush
- A small stiff-bristled brush
- A varnish sealant
- Protective gear


References
- ↑ https://www.youtube.com/watch?v=Scd3KBPsOKs&feature=youtu.be&t=937
- ↑ https://www.youtube.com/watch?v=Scd3KBPsOKs&feature=youtu.be&t=1582
- ↑ https://www.youtube.com/watch?v=Scd3KBPsOKs&feature=youtu.be&t=1432
- ↑ https://www.youtube.com/watch?v=Scd3KBPsOKs&feature=youtu.be&t=1432
- ↑ https://www.youtube.com/watch?v=Scd3KBPsOKs&feature=youtu.be&t=1460
- ↑ Kathy Leader. Artist. Expert Interview. 13 February 2022.
- ↑ https://www.youtube.com/watch?v=Scd3KBPsOKs&feature=youtu.be&t=1644
- ↑ https://www.youtube.com/watch?v=Scd3KBPsOKs&feature=youtu.be&t=1715
- ↑ https://www.youtube.com/watch?v=Scd3KBPsOKs&feature=youtu.be&t=1752
- ↑ https://www.youtube.com/watch?v=Scd3KBPsOKs&feature=youtu.be&t=1787
- ↑ https://www.youtube.com/watch?v=Scd3KBPsOKs&feature=youtu.be&t=1829
- ↑ https://www.youtube.com/watch?v=Scd3KBPsOKs&feature=youtu.be&t=1942
- ↑ https://www.youtube.com/watch?v=Scd3KBPsOKs&feature=youtu.be&t=1961
- ↑ https://www.youtube.com/watch?v=Scd3KBPsOKs&feature=youtu.be&t=2222
- ↑ https://www.youtube.com/watch?v=Scd3KBPsOKs&feature=youtu.be&t=2272
- ↑ https://www.youtube.com/watch?v=Scd3KBPsOKs&feature=youtu.be&t=2551
- ↑ https://www.youtube.com/watch?v=Scd3KBPsOKs&feature=youtu.be&t=2578
- ↑ https://www.youtube.com/watch?v=Scd3KBPsOKs&feature=youtu.be&t=2578
- ↑ https://www.youtube.com/watch?v=Scd3KBPsOKs&feature=youtu.be&t=2493
About This Article

Applying gold leaf to your canvas will give it a glittery effect to take your art to a new level. In addition to gold leaf, you’ll need wax paper, gilding adhesive, acrylic varnish, and a clean cloth. First, you’ll need to apply the gliding adhesive to your canvas with a damp brush, then use a piece of wax paper to pick up gold leaf with static electricity. Lower the wax paper onto your canvas to transfer it and smooth it out with your palm. Once you’ve covered your canvas with gold leaf, you’ll need to place a sheet of wax paper over it and apply firm pressure with a clean cloth to help it adhere. Wait 3 days for the adhesive to dry, then apply 2 coats of acrylic varnish to seal it. Let the varnish dry before you paint over it. For more tips, including how to choose a canvas for gold leaf, read on!