This article was co-authored by wikiHow staff writer, Jessica Gibson. Jessica Gibson is a Writer and Editor who's been with wikiHow since 2014. After completing a year of art studies at the Emily Carr University in Vancouver, she graduated from Columbia College with a BA in History. Jessica also completed an MA in History from The University of Oregon in 2013.
This article has been viewed 27,903 times.
Learn more...
Wood floors and cabinets are beautiful when they're properly finished and maintained. To protect the wood and give it a little shine, seal it with osmo polyx oil. This oil is easy to apply and it will harden as it cures. Smooth and clean the wood before you scrub the oil into it. Then dry the first coat completely before you apply another coat of oil. Give the oil a chance to cure before you install the wood or put down rugs.
Steps
Sanding the Floor
-
1Prepare your work space. Set up your work space in a well-ventilated area and ensure that there's no smoking or open flames around. Consider wearing a half-face respirator with an organic-vapor cartridge if the ventilation is poor.
-
2Clean and dry the wood floor. Wash the floor with your usual wood floor cleanser. Once it's completely clean, use a microfiber cloth to dry the floor. If you have a dehumidifier, run it until the humidity in the room is below 50%.[1]
- The temperature in the room should be between 60 °F (16 °C) and 75 °F (24 °C).
Advertisement -
3Sand away old varnishes or lacquers. If you're only finishing a small area such as a door or board, use a sanding block or sand paper. If you're finishing an entire floor, use a drum or band sander. Either way, sand away old varnishes or lacquers using a very rough or medium grit (40 to 60). Then, move to a medium or fine grit (100 to 120) for light sanding.
- If the wood doesn't have old finishes to remove, you can use a medium grit (around 80).
-
4Fill any cracks, dents, or holes with wood filler. Wipe away any dust from sanding and check the entire surface of the wood for small cracks, dents, or holes that need to be filled. Spread a wood filler or putty in over the spaces and let it dry for a few hours or according to the manufacturer's instructions.
-
5Sand the filled surface. Once the wood filler has hardened completely, take medium or fine grit (100 to 120) sandpaper and rub it over the surface of the wood. This will ensure that there aren't any bumps on the prepared wood.
-
6Vacuum up all dust from the wood. Use the soft-brush attachment of a vacuum cleaner to suck up the dust from your prepared wood. Ensure that you don't scratch the wood as you run the attachment over it.


Applying the First Coat
-
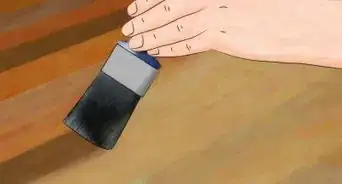
1Stir the osmo polyx oil. Open your can of hardwax oil and use a long wooden paint stick to stir the oil. Keep stirring until the oil that's separated is emulsified. You shouldn't see any clear oil floating to the top. Pour some of the oil into your paint tray.
-
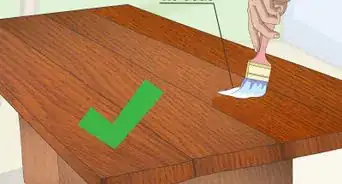
2Dip a floor brush into the osmo polyx oil and dab it over the wood. You can use an osmo floor brush or a floor brush you purchased from a hardware store. Dip the brush into the oil in your paint tray and dab it 2 to 3 times over the wood you're finishing. Leave 4 to 6 inches (10 to 15 cm) of space between each dab of oil.[2]
-
3Scrub the oil into the wood using the floor brush. Take the brush and scrub against the grain to spread the oil over a larger space. You should see a thin layer of oil coat the surface of the wood.[3]
-
4Rub the oil against the grain. Continue to use the floor brush to scrub the oil into the wood, but turn the brush so you're going with the grain. Scrub until the brush is dry.
- Avoid lifting the brush up off of the wood and back down because this will leave noticeable streaks. Instead, keep stroking and rubbing the brush across the wood.
-
5Work a small area of the wood at a time. If you're finishing a floor, you'll need to apply and scrub in the osmo polyx in small sections before moving to the rest of the floor. This will ensure that the oil doesn't harden before you've had a chance to scrub it into the wood. When sealing a floor, start in the corner so you can work your way towards the door.
-
6Store the osmo polyx oil and floor brush. Wrap the tray with the osmo polyx oil and the floor brush in an airtight plastic bag. This will prevent the oil from drying out as the wood dries.


Spreading the Second Coat
-
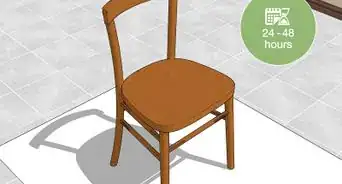
1Dry the wood for 24 hours. Although you need to apply 1 more coat of osmo polyx oil, it's important to let the first coat dry completely. If you think the wood is ready for another coat, check it by rubbing a small area with a green scrubbie pad. If you see white powder flake off, the wood is ready for another coat of oil. If not, wait several more hours and check again.[4]
-
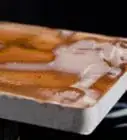
2Apply the second coat of osmo polyx oil. Remove the plastic wrap from the paint tray and brush. Dip the floor brush into the osmo polyx oil and dab it over the wood a few times. Scrub the oil across the floor as you did for the first coat. Remember to start by going against the grain before you work the oil with the grain.[5]
-
3Clean the brush and paint tray with paint thinner. Once you've finished the second coat, rub paint thinner through the bristles of the brush. This will prevent the oil from drying in the brush. Then, use the paint thinner to clean out the paint tray.[6]
-
4Dispose of any oil-soaked materials. Never throw oil-soaked rags or sanding dust into the trash. Let them dry and place them in a small airtight container such as a coffee can. Pour a water and oil-breakdown detergent over the rags and seal the container. Contact your city about hazardous waste collection.[7]
-
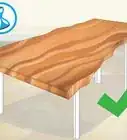
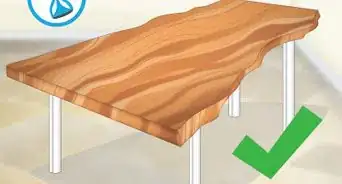
5Let the floor dry completely. Avoid walking or installing the finished wood for at least 8 to 24 hours after applying the second coat. You'll still need to be careful when you move furniture over the wood or lay rugs down. Wait a few weeks to cover the wood so the oil can cure properly.[8]


Things You'll Need
- Wood floor cleanser
- Microfiber cloth
- Sand paper or block
- Drum or band sander
- Vacuum with soft-bristle attachment
- OSMO floor brush with pole
- Osmo polyx oil
- Paint tray
- Paint stirrer
- Green scrubbie pad
- OSMO brush cleaner or paint thinner
- Knee pads, optional
- Half-face respirator with organic-vapor cartridges, optional
- Nitrile gloves, optional


References
- ↑ https://woodanchor.com/wp-content/uploads/2014/02/osmoapplyinghardwaxbyhand.pdf
- ↑ https://woodanchor.com/wp-content/uploads/2014/02/osmoapplyinghardwaxbyhand.pdf
- ↑ https://woodanchor.com/wp-content/uploads/2014/02/osmoapplyinghardwaxbyhand.pdf
- ↑ https://woodanchor.com/wp-content/uploads/2014/02/osmoapplyinghardwaxbyhand.pdf
- ↑ https://woodanchor.com/wp-content/uploads/2014/02/osmoapplyinghardwaxbyhand.pdf
- ↑ https://woodanchor.com/wp-content/uploads/2014/02/osmoapplyinghardwaxbyhand.pdf
- ↑ https://woodanchor.com/wp-content/uploads/2014/02/osmoapplyinghardwaxbyhand.pdf
- ↑ https://woodanchor.com/wp-content/uploads/2014/02/osmoapplyinghardwaxbyhand.pdf
About This Article