This article was co-authored by Art Fricke. Art Fricke is a home renovation and repair specialist and the owner of Art Tile & Renovation based in Austin, Texas. With over 10 years of experience, he specializes in bathroom and kitchen renovations. Art focuses on a single contractor approach to customized renovation work, and performs projects such as installing custom tile showers, fixing tiled shower leaks, replacing cracked tiles, and installing floor and wall tile.
There are 10 references cited in this article, which can be found at the bottom of the page.
This article has been viewed 35,906 times.
Do you want to protect your tile from scratches and cracks and make it look more vibrant? Sealing the tile will help you achieve both and applying the sealer is super easy. We'll start by explaining the different sealer options and how to choose the best one for your tile. Then, we'll walk you through how to properly prepare the tile and apply the sealer so you end up with a gorgeous, long-lasting finish. Best of all, you can get the job done in a single afternoon!
Steps
Choosing the Right Sealer
-
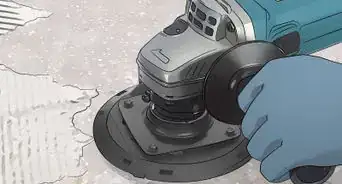
1Seal your tile if it’s porous and absorbs water. Porous tiles need to be sealed or resealed to protect them and keep them from breaking down over time. You can test to see if your tile is porous by placing a wet sponge on it for a minute and then removing the sponge. If there is a dark spot where you placed the sponge, then your tile is porous and needs to be sealed.
- If the water in the sponge stays as droplets on the surface of the tile, then the tile doesn’t need to be resealed.
Tip: Even if your tile has been previously sealed, you need to reapply tile sealer if a wet sponge leaves a mark behind.
-
2Choose a penetrating sealer if you don’t want a film on the surface.[1] A penetrating tile sealer will penetrate and impregnate the surface of the tile to seal and protect it. A penetrating sealer won’t change the appearance of the tile and will not peel or flake off over time.
- Penetrating sealers will last longer than topical tile sealers, but will not enhance the appearance of the tile.
Advertisement -
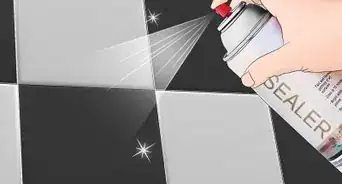
3Go with a topical tile sealer to add a high-gloss appearance. Topical sealers sit on top of the surface of the tile, forming a protective film. The film will add a glossy sheen to the surface of the tile and can enhance the color and aesthetic of the tile, but is prone to peeling and flaking after some wear and tear.
- Topical tile sealers will need to be reapplied more often than penetrating tile sealers, especially if it’s used in a high-traffic area such as a bathroom or hallway.
-
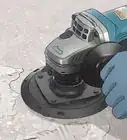
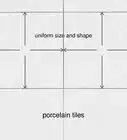
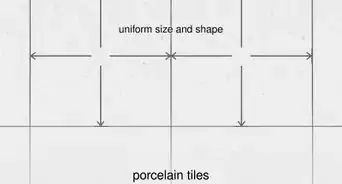
4Use a solvent-based tile sealer for ceramic and porcelain tile. Petroleum or solvent-based tile sealers work best on glassy surfaces such as ceramic and porcelain. They’ll protect the tile from scratches and breaks and will adhere to the surface better than water-based sealers.[2]
- Ceramic and porcelain tile are much less porous than natural stone, so a solvent-based tile sealer is much more effective at coating them.
- You can find solvent-based tile sealers at home improvement stores and online.
-
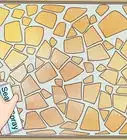
5Select a water-based tile sealer for natural stone tiles. The naturally porous stone tiles greatly benefit from being sealed by a water-based tile sealer. The larger pores absorb the sealer more easily and are better protected and enhanced by it.[3]
- The natural pores of the stone tiles more readily absorb the water-based tile sealer.
- Look for water-based tile sealers at home improvement stores and online.


Cleaning the Tile
-
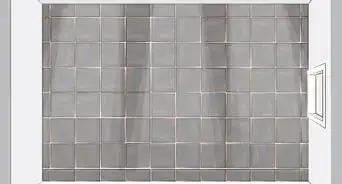
1Vacuum the tile to remove dust, dirt, and debris. Take a vacuum to the floor tile and use the hose extension on the wall or any hard to reach areas to suck up any dust or dirt from the surface of the tile. Pay extra attention to the corners and any grout between the tiles so debris doesn’t get trapped beneath the tile sealer.[4]
-
2Add a few drops of dish soap to 1 gallon (3,800 mL) of warm water. Fill a medium-sized bucket with warm water and add the dish soap to it. Stir the mixture with your mop and slosh it around to work it up into a lather.[5]
- Use warm or hot water to allow the mixture to form soapy bubbles. But don’t use water so hot that it could burn you!
-
3Mop the tile with the cleaning solution. Dip the mop into the bucket of soapy water and run it over the surface of the tile. Be sure to cover all of the tiles evenly and work the mop into the corners and grout lines to lift dirt, grime, and stains from the surface.[6]
- Apply more soapy water to the mop and let the excess water drain into the bucket to keep the mop saturated with soap.
Tip: Dip a stiff-bristled scrubbing brush into the cleaning solution and scrub off stubborn stains from the surface of the tile.
-
4Scrub the grout with a toothbrush to remove stains. Focus on cleaning the grout, or the lines between the tiles, by dipping a small brush, like a toothbrush, into the cleaning solution and rubbing the grout. Apply pressure to the brush and use a brisk, back and forth motion to scrub the grout well and lift any dirt, stains, or grime from it.[7]
- You can use a hard-bristled cleaning brush but don’t use a wire or metal brush or you could damage the grout.
-
5Rinse the tile with clean water. Wash away all of the soap from the surface of the tile so it’s clean and clear. Use a bucket of clean water to rinse the tile. Make sure you get all of the soap off so it doesn’t affect the adhesion of the sealer.[8]
- If you’re washing tile on an outdoor patio, use a garden hose to rinse it clean.
-
6Allow the tile to dry for at least 6 hours.[9] The tile must be completely dry before you apply any sealer to it or it won’t properly adhere to the surface. When you’re finished rinsing it clean, leave the tile undisturbed overnight or for at least 6 hours. Then, check to see if it’s dry by running your finger over the surface to feel for moisture.[10]
- If the tile is still wet or damp, wait another hour and then check it again.
- Use towels to soak up the water or aim a fan at the tile to help it dry faster.


Sealing the Tile
-
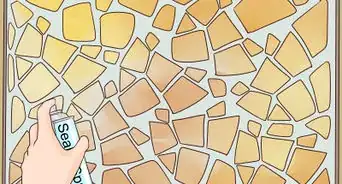
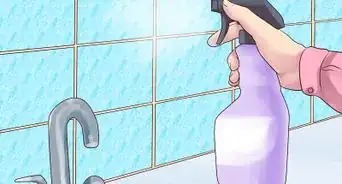
1Fill a spray bottle with the tile sealer. Carefully open the container of tile sealer and pour it into a clean spray bottle. Close the lid of the spray bottle securely so it doesn’t leak while you’re using it.[11]
Warning: Some sealers contain noxious fumes that could make you nauseated. Be careful not to breathe over the container when you open it.
-
2Hold the bottle 6 inches (15 cm) from the surface and spray the tile. Use the spray bottle to apply a thin coating of the sealer all over the surface of the tile. Make sure you cover every area as evenly as you can, including the corners and edges of the tile.[12]
- If you’re sealing floor tile, start at the far side of the room and work in sections toward the exit so you don’t walk on the tile after spraying it.
- Start at the upper corners of wall tile and work your way down to apply the sealer evenly.
-
3Let the sealer sit for 5 minutes. Allow the sealer to penetrate deep into the tile and form a protective coating.[13] Leave the tile undisturbed for at least 5 minutes so the sealer can fully set.
- Check the packaging of the sealer you’re using for specific drying times.[14]
- Set a timer on your phone or watch for 5 minutes.
-
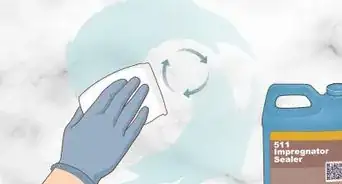
4Wipe over the tile with a damp cellulose sponge to remove the excess sealer.[15] Take a clean cellulose sponge, soak it in warm water, and wring out most of the water. Wipe down the surface of the tile with the sponge to soak up the excess sealer so it doesn’t form a sticky or uneven surface.[16]
- Don’t scrub the tile with the sponge. Simply wipe over it to soak up the excess sealer.


Expert Q&A
-
QuestionShould I apply sealer before or after I grout tiles?
 Art FrickeArt Fricke is a home renovation and repair specialist and the owner of Art Tile & Renovation based in Austin, Texas. With over 10 years of experience, he specializes in bathroom and kitchen renovations. Art focuses on a single contractor approach to customized renovation work, and performs projects such as installing custom tile showers, fixing tiled shower leaks, replacing cracked tiles, and installing floor and wall tile.
Home Renovation & Repair SpecialistYou should wait until after you grout the tiles and let them dry completely before you start.


References
- ↑ Art Fricke. Home Renovation & Repair Specialist. Expert Interview. 1 July 2020.
- ↑ https://floorelf.com/tile-and-stone-sealers-part-1
- ↑ https://floorelf.com/tile-and-stone-sealers-part-1
- ↑ https://www.bhg.com/homekeeping/house-cleaning/tips/how-to-clean-tile-floors/
- ↑ https://www.nps.gov/tps/how-to-preserve/briefs/40-ceramic-tile-floors.htm#preserve/
- ↑ https://creativehomemaking.com/cleaning/general/tile-floors/
- ↑ https://www.bobvila.com/articles/cleaning-grout/
- ↑ https://www.bhg.com/homekeeping/house-cleaning/tips/how-to-clean-tile-floors/
- ↑ Art Fricke. Home Renovation & Repair Specialist. Expert Interview. 1 July 2020.
- ↑ https://extremehowto.com/sealing-tile-and-grout/
- ↑ https://youtu.be/110y3d26PLE?t=39
- ↑ https://youtu.be/110y3d26PLE?t=74
- ↑ Art Fricke. Home Renovation & Repair Specialist. Expert Interview. 1 July 2020.
- ↑ https://youtu.be/110y3d26PLE?t=85
- ↑ Art Fricke. Home Renovation & Repair Specialist. Expert Interview. 1 July 2020.
- ↑ https://youtu.be/110y3d26PLE?t=85
About This Article