X
wikiHow is a “wiki,” similar to Wikipedia, which means that many of our articles are co-written by multiple authors. To create this article, volunteer authors worked to edit and improve it over time.
This article has been viewed 51,514 times.
Learn more...
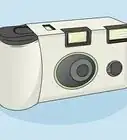
Here are some instructions on how to attach a lens to a Canon DSLR.
Steps
-
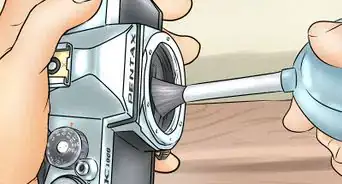
1Take a look at your lens. Most Canon lenses have a small red dot or a small white square on the attaching end of the lens. In this case, it's a white square.
-
2You will also see that the camera body has a small dot around the opening of the lens.Advertisement
-
3Bring the lens and body together at the dots. Make sure the body dot and the lens dot are matching, "connect the dots" if you will.
-
4Once you placed the lens inside the body, turn the lens to the right and it should snap in.
-
5To remove, place your finger on the large button to the right of the lens and twist left, bringing the dots back together, then pull out.
-
6Finished.


Advertisement
Community Q&A
-
QuestionHow do I operate a Canon Rebel t6 camera?
 Community Answer1. Make sure your camera is on, the battery is charged and the SD card (memory card) is inserted. 2. There is a dial at the top of your camera, this is the mode dial. Set it to the letter P, or auto mode. 3. Look through the viewfinder of your camera. 4. Half-press the shutter button to focus. 5. Press fully to take the photo.
Advertisement


About This Article
Advertisement