This article was co-authored by Steve Masley. Steve Masley has been designing and maintaining organic vegetable gardens in the San Francisco Bay Area for over 30 years. He is an Organic Gardening Consultant and Founder of Grow-It-Organically, a website that teaches clients and students the ins and outs of organic vegetable gardening. In 2007 and 2008, Steve taught the Local Sustainable Agriculture Field Practicum at Stanford University.
There are 7 references cited in this article, which can be found at the bottom of the page.
wikiHow marks an article as reader-approved once it receives enough positive feedback. In this case, 93% of readers who voted found the article helpful, earning it our reader-approved status.
This article has been viewed 677,233 times.
Building a raised garden box to grow food for your family is a fun project and a healthy way to provide produce. It will save you money, time, and involves lesser effort than digging an in-ground garden plot. This is great for all ages. The kids can learn how food is grown starting with seeds. Get started after the jump.
Steps
Standard Wood Boxes
-
1Find the location where you plan to put the box. When you have decided the place, position the box, and dig out holes for the corner post. These posts can simply be placed on top of the soil or they can be rooted in the ground several inches or more. This is up to your preference. Just plan ahead.[1]Expert AnswerQ
When asked, "When is a raised bed a good idea?"
Steve Masley has been designing and maintaining organic vegetable gardens in the San Francisco Bay Area for over 30 years. He is an Organic Gardening Consultant and Founder of Grow-It-Organically, a website that teaches clients and students the ins and outs of organic vegetable gardening. In 2007 and 2008, Steve taught the Local Sustainable Agriculture Field Practicum at Stanford University.Home & Garden Specialist EXPERT ADVICEAnswer from Steve Masley:
The team at Grow it Organically answered: "When you're working on an in-ground garden, it's harder on your back because of the angle. If you have any physical issues, a raised bed is just much easier to work, and you can do a lot more in a day."
-
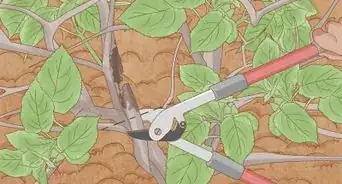
2Prepare your wood posts. Use 4x4 pieces of lumber. These will be used for the corners of the boxes. Cut them to be at least the same height or several inches deeper than the box. If your boxes are going to be longer than 8', you will want add to center posts on the long sides.[2]Advertisement
-
3Cut the side walls. Using 2x4s, cut boards for the two long sides, equal to the distance from the far edge of one corner post to the far edge of the other. Cut the short end boards to be equal to the distance between the far edges of the posts, plus the ends of the long side boards.[3]
-
4Drill the boards into place. Use outdoor appropriate screws; 1"-1 1/2" or decking screws work well. Drill through the boards directly into the posts.[4]
-
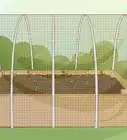
5Place a barrier cloth. Once the box is set, line the box with 1/2" hardware cloth to keep out pests and varmint. Staple or screw the hardware cloth to the sides.[5]
-
6Place weed cloth. Next, place some weed cloth on top of the hardware cloth. Staple that to the sides of the box. This is to keep the weeds from growing from below.[6]
-
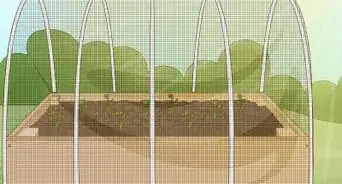
7Add in your soil. Bring in some planting mix for soil. It is usually measured in cubic feet. Use a wheelbarrow or park close to the box and start filling it up. Stand on it to pack it down. Leave about 2 inches (5.1 cm) from the top.[7]
-
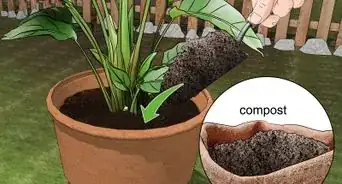
8Have fun watching your garden grow! Make sure to fertilize the soil or rotate types of plants in the boxes to keep the soil fresh. Plan to grow plants that suit the season of the year as well.


Recycled Metal Boxes
-
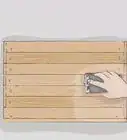
1Find an old filing cabinet. You want to find an older filing cabinet with a solid bottom. You don't want one that's rusty or in bad shape though.[8]
-
2Prepare the filing cabinet. Remove the drawers and also the tracks if you can. Sand out the inside and remove as much paint (if there is any inside) as you can. Tip the filing cabinet so that the back is now the base and place the cabinet where you want your new veggie bed to be.[9]
-
3Repaint the outside. Using outdoor safe spray paint, repaint the outside a fun new color to start bringing the cabinet back to life. Look for spray paints that are graded to stick well to smooth metal or enamel.[10]
-
4Line the cabinet. Get a lining material and line the inside of your cabinet. Weed liner is good for this. It will help keep the metal from becoming damaged too quickly.
-
5Add your drainage material. Unless you drill holes in the new bottom of the cabinet, you'll need to place several inches of filler material at the bottom of the cabinet to allow drainage. Start with a base, single layer of river rock, add a 3" layer of gravel, and then add a 3" layer of sand.[11]
-
6Fill with planting soil. Now, fill your filing cabinet with planting soil. Leave about 2" at the top. More soil can be filled in if needed once your plants are put in.[12]
-
7Grow your veg! Grow or transplant your vegetable plants. Enjoy your colorful, modern garden box!


Garden Brick Boxes
-
1Purchase the necessary bricks. Think about the size and height that you want the garden bed to be and then buy the amount of garden brick that you find appropriate for that size. You can buy more later if you need it, so don't overbuy.[13]
-
2Level the ground. Level the ground where you plan to put the bed.[14]
-
3Lay out the bricks layer by layer. Lay out the first layer of the garden bricks, adjusting for size and making sure that the bricks fit snugly. Then, move to the next layer and the next until the wall is at the height you desire. Stagger the bricks in a way that looks good to you.[15]
-
4Line the garden bed. Add a thick liner or a heavy duty weed liner to the inside of the box. Leave extra material coming up over the edge. The extra will be trimmed away later.[16]
-
5Fill the garden bed. Fill the box with high quality soil and fertilizers if you want them. Leave extra space at the top (roughly 2").[17]
-
6Plant your vegetables! Enjoy your new garden beds!


Community Q&A
-
QuestionHow deep should the soil be in the boxes?
 Community AnswerA minimum of 6 inches, depending on what you are growing. Tomatoes and carrots, need more. Cilantro and lettuce will probably be okay with just 6.
 -
QuestionMy lawn is at a 20 degree angle. Should I dig the box in so the bottom is level?
 alistair mcintoshCommunity AnswerPerhaps, or maybe consider filling the bottom to a level surface with river boulders or similar.
 -
QuestionWhy compact the soil by stepping on it?
 Community AnswerGeneral compaction rate for most garden mixes is between 25-35% depending on how loose it is when you add it and organic matter composition. If you compact it with your feet you'll achieve close to this right away. Unless you're the weight of a small car, this one off compaction isn't enough to stop root development or water holding capabilities. What you don't want is to plant your veggies and find the roots exposed two months later when it compacts and settles on its own.
Warnings
- Be sure it gets water regularly.⧼thumbs_response⧽
- Keep it organic and natural, as possible.⧼thumbs_response⧽
- Avoid chemicals in your garden.⧼thumbs_response⧽
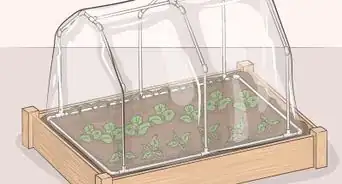
- You can garden year round. If you have snow, build cold frames.⧼thumbs_response⧽


-Oven-Step-15.webp)

References
- ↑ https://www.sunset.com/garden/backyard-projects/ultimate-raised-bed-how-to#raised-bed-project-drill
- ↑ https://www.almanac.com/content/how-build-raised-garden-bed
- ↑ https://www.lowes.com/projects/gardening-and-outdoor/how-to-build-a-raised-garden-bed/project
- ↑ https://www.lowes.com/projects/gardening-and-outdoor/how-to-build-a-raised-garden-bed/project
- ↑ https://www.homedepot.com/c/ah/how-to-build-a-raised-garden-bed/9ba683603be9fa5395fab90a354f998
- ↑ https://www.homedepot.com/c/ah/how-to-build-a-raised-garden-bed/9ba683603be9fa5395fab90a354f998
- ↑ https://www.homedepot.com/c/ah/how-to-build-a-raised-garden-bed/9ba683603be9fa5395fab90a354f998
- ↑ https://www.hobbyfarms.com/uf-hack-turn-a-filing-cabinet-into-a-planter/
- ↑ https://www.hobbyfarms.com/uf-hack-turn-a-filing-cabinet-into-a-planter/
- ↑ https://www.hobbyfarms.com/uf-hack-turn-a-filing-cabinet-into-a-planter/
- ↑ https://www.hobbyfarms.com/uf-hack-turn-a-filing-cabinet-into-a-planter/
- ↑ https://www.hobbyfarms.com/uf-hack-turn-a-filing-cabinet-into-a-planter/
- ↑ https://www.bhg.com/gardening/yard/garden-care/brick-raised-bed/
- ↑ https://www.bhg.com/gardening/yard/garden-care/brick-raised-bed/
- ↑ https://www.bunnings.com.au/diy-advice/garden/planters/diy-brick-planter-box
- ↑ https://www.bunnings.com.au/diy-advice/garden/planters/diy-brick-planter-box
- ↑ https://www.bunnings.com.au/diy-advice/garden/planters/diy-brick-planter-box
About This Article
To build a raised vegetable garden box, first cut 4 pieces of 4x4 lumber for posts. Then, dig holes for the posts where you want your box to go, or simply place them on top of the soil if you want your box raised higher. Next, cut 2x4 lumber into 2 long sides and 2 short sides for your box. Attach the sides by drilling through the boards directly into the posts with outdoor screws. Finally, before you put planting soil in your box, line it with ½-inch hardware cloth to deter pests and weed cloth to minimize weeds. For more on building raised vegetable garden boxes, including making them from recycled metal boxes or garden bricks, read on!