wikiHow is a “wiki,” similar to Wikipedia, which means that many of our articles are co-written by multiple authors. To create this article, volunteer authors worked to edit and improve it over time.
This article has been viewed 43,478 times.
Learn more...
For those of you who are interested in building your own outdoor furniture, this is a must to try. Having a bench will allow for greater seating in your yard, and you can tell everyone that you made it. Here is a quick way build a wood bench. As long as you have basic knowledge of how to use tools (power or hand tools) you will be fine. These five parts, with simple steps, will guide from getting the tools and materials you will need to building the wood bench. Always be aware of where your hands are around a saw to prevent injury.
Steps
Getting Started
-
1Pick the type of wood to use (e.g. oak, birch, cedar, poplar, pine). Oak is a nice looking hardwood, and cedar withstands the weather well.
-
2Gather the tools for the job:
- Impact Wrench or Power Drill or hand drill
- Miter Saw or hand saw
- Tape Measure
- Pencil
- Drill Bits
- Screw bits or screwdrivers that fit the heads of the screws you have
- Ruler or other straight edge
Advertisement -
3Collect hardware you will need:[1]
- 40 pieces of 4 inch long metal straps (they can be found next the L-brackets at a hardware store), and screws to fit them if they don't already come with screws.
- Make sure the screws are no longer than an inch.
- 34 screws that are 2 inches long (a box of 2" drywall screws will work fine that way you have some extra screws).
- 40 pieces of 4 inch long metal straps (they can be found next the L-brackets at a hardware store), and screws to fit them if they don't already come with screws.
-
4Start cutting the wood to size:[2]
- A) 3 - 2x6 @ 48 inches
- B) 2 - 2x4 @ 19 inches
- C) 4 - 2x4 @ 25 inches
- D) 2 - 2x4 @ 18 inches
- E) 9 - 1x4 @ 10 inches
- F) 2 - 1x4 @ 17-1/4 inches (the 1/4 inch is for a future step)
- G) 2 - 1x4 @ 48 inches


Assembling the Legs
-
1You will need:
- B) 2 - 2x4 @ 19 inches
- C) 4 - 2x4 @ 25 inches
- D) 2 - 2x4 @ 18 inches
-
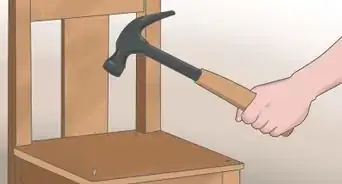
2Connect the end of (B) 19" 2x4 to the butt of a (C) 25" 2x4 with two 2" screws.
-
3Attach the other (C) 25" 2x4 an inch in from the other end of the (B) 19" 2x4.
-
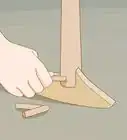
4Attach a (D) 18" 2x4 so that the top of this piece is 16.5" inches from the bottom of the legs, and so the ends are flush with the outside of the legs.
-
5Repeat steps above to make the second set of legs.


Assembling the Seat
-
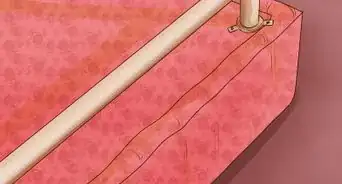
1Attach the end of a (A)2x6 piece on top of the cross piece (D) on one leg, making sure that it is flush with the outside of the leg.
-
2Do the same with another (A) 2x6 piece, but on the opposite end of the cross piece (D).
-
3Put the third (A) 2x6 piece in the middle of the two other 2x6 pieces (there will be about ¾ inch space between each board).
-
4Attach the other end of each board in the same manner to the other leg, on part (D).


Assembling the Backrest
-
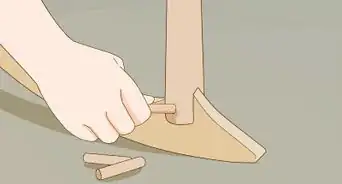
1To create a more comfortable backrest, cut an angle at the end of both (F) 17" 1x4 pieces.
- Measure 9-11/16" on one side and 17" on the other side (This is for the skinny side of the board).
- Connect the two spots.
- Cut the line.
-
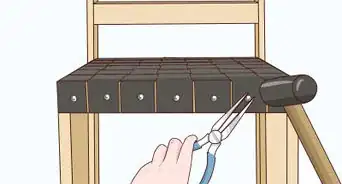
2Attach one (G) 48" 1x4 in between the two (F) 17" 1x4 pieces at the square end.
-
3Put the center of one of the (E) 10" 1x4 pieces in the middle of what you just built.
- If you desire only put one strap per board.
-
4Install another (E) 10" 1x4 piece 1-5/8" from the edge of the center piece.
-
5Follow this same spacing for the remainder of the (E) 10" 1x4 pieces.
-
6Attach the other (G) 48" 1x4 to the ends of the (E) 10" pieces.
- If you desire, only put one strap per board on the bottom.


Community Q&A
-
QuestionWhat are the 40 4-inch long metal straps used for?
 ZackTop AnswererStep 3 says, "Put the center of one of the (E) 10" 1x4 pieces in the middle of what you just built. If you desire only put one strap per board." Step 6 says, "Attach the other (G) 48" 1x4 to the ends of the (E) 10" pieces. If you desire, only put one strap per board on the bottom."
 -
QuestionWhat are the 40 4-inch long metal straps used for?ZackTop AnswererStep 3 says, "Put the center of one of the (E) 10" 1x4 pieces in the middle of what you just built. If you desire only put one strap per board." Step 6 says, "Attach the other (G) 48" 1x4 to the ends of the (E) 10" pieces. If you desire, only put one strap per board on the bottom."
Warnings
- Wear proper hearing and eye protection.⧼thumbs_response⧽
Things You'll Need
- Impact Wrench or Power Drill or hand drill
- Miter Saw or hand saw
- Tape Measure
- Pencil
- Drill Bits
- Screw bits or screwdrivers to fit the heads of the screws you have
- Ruler or other straight edge
-
40 pieces of 4 inch long metal straps (they can be found next the L-brackets at a hardware store), and screws to fit them if they don't already come with screws.
- Make sure the screws are no longer than an inch.
- 34 screws that are 2 inches long (a box of 2" drywall screws will work fine that way you have some extra screws).
- 19 feet of 1x4
- 16 feet of 2x4
- 12 feet of 2x6