wikiHow is a “wiki,” similar to Wikipedia, which means that many of our articles are co-written by multiple authors. To create this article, volunteer authors worked to edit and improve it over time.
There are 8 references cited in this article, which can be found at the bottom of the page.
This article has been viewed 93,956 times.
Learn more...
Creating a customized upholstered bench is easier than it looks. Because of the rectangular shape and versatility, it is ideal for interior rooms, porches or outdoor seating. Always use caution when working on upholstery projects with a powerful staple gun.
Steps
Making the Bench Base
-
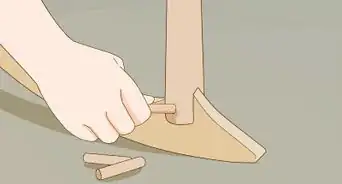
1Choose to either reupholster an existing bench or make a new one. If you are reupholstering an existing bench, you will need to unscrew the legs and reattach them later.
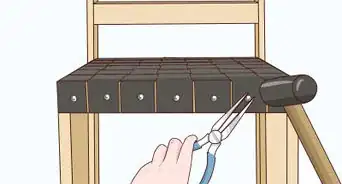
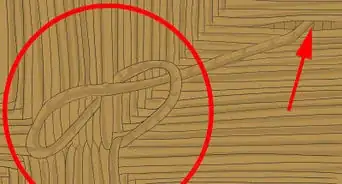
- If you are reupholstering a bench, you will also need to remove staples at the back of the base with needle nosed pliers. Then, remove the fabric, batting, and foam so that you can replace them. It is a good idea to replace them unless they are relatively new.
- Keep your piece of fabric to use as a template for your fabric bench cover.
-
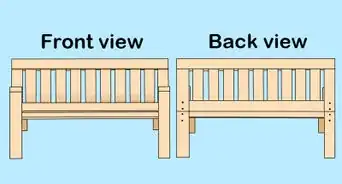
2Measure an existing frame or decide how large you want your bench to be. If you are creating a bench from scratch, you can customize it to the space you want to fill. Measure the area in inches.[1]Advertisement
-
3Purchase a piece of 1/2 inch to 3/4 inch plywood from a home improvement or lumber store. Ask the store to cut it to the exact size that you measured.
-
4Buy thick foam core and in a size that is greater than or equal to the size of your piece of wood. Your foam core should be at least three inches (7.5cm) thick to assure comfort. Purchase one and a half times the size in upholstery or outdoor fabric.
- Just as home improvement stores will cut plywood for little to no cost, large fabric stores can cut foam core to size.
- Use an electric knife to cut foam core at home.[2]
-
5Clear a large workspace or table. It is easiest to upholster a bench if you are able to slide the fabric and batting along a smooth surface.
-
6Drill holes into the corners for the legs. Practice attaching them before you start upholstering to ensure they work for your piece of furniture. You will need a drill and screws for this process.


Attaching Foam and Batting
-
1Buy a large roll of batting from a craft store. You will need two and a half times the amount of batting as you need foam core.
-
2Cut a piece of batting in the exact size of the foam core and plywood base.
-
3Set your wood base on top of the worktable. Then, get ready to layer your foam and batting.
-
4Glue the foam to the wood base using foam glue. Make sure to apply an even, thin layer atop the wood base. Let it sit according to package directions.[3]
-
5Glue the batting to the top of the foam with a layer of foam glue. Apply an even layer, and then wait for it to dry.[4]
-
6Pick your wood base, foam and batting off the table. Lay and center a large piece of batting on the table. It will need to wrap around the base and foam to create the upholstered look.
-
7Lay the wood base facing down on top of the sheet of batting. Center it on the table so that you will have more than enough batting on every side to wrap around the back of the base.
-
8Choose a mechanical staple gun, an air compressor staple gun or an electric staple gun to affix the batting and fabric. Plug in the staple gun, as needed, and refill it with staples.[5]
-
9Starting at the center of one side, fold the batting around the bench and onto the back of the base, pulling fairly hard to create tension. Affix the batting to the base with staples within the first inch and a half of the edge of the base.
-
10Staple every inch. Work from the center of each side out toward the corner. Use a hammer to knock loose staples into the wood.[6]
-
11Create round corners by pulling the batting around the center of the corner and affixing it right at the corner. Create square corners by folding one side of the batting in toward the other side of the corner. Then, pull the batting up on the second side and affix it with several staples to the base.
-
12Continue stapling until the entire edge of the batting is wrapped around the foam core and secured.
-
13Cut the excess batting from the bottom of the base. Make sure not to cut below the staple line.


Covering the Bench
-
1Lift the bench up again. Place your material upside down on the table. Center it.[7]
-
2Replace the bench base face down on top of the upholstery material. Center it as well.
-
3Wrap the fabric around one end of the bench and secure it with the staple gun. Pull it taught before you staple it.
-
4Continue around the perimeter of the bench. Fold the corners in either by creating two darts on each side or by doing a square fold. Staple at least every inch, with more staples in the corners.
-
5Cut excess fabric outside of the staple line. Use fabric scissors to ensure a straight, even cut.[8]
-
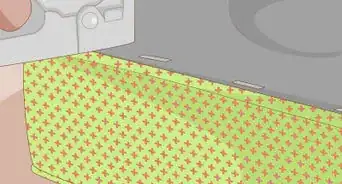
6Consider placing a bottom cover on the bottom of the bench to protect the upholstery. Cut a piece of fabric that is one inch smaller than your wood base on all sides. Choose interfacing, cotton or synthetic fabric.[9]
-
7Staple the bottom cover over the raw upholstery edges every inch or two.
-
8Reattach the legs or base.[10]


Community Q&A
-
QuestionWhy have a layer of batting between the foam and the fabric? Why not just cover the foam with fabric?
 Community AnswerYou don't really need to have it. And you don't even really need the foam. They are both there for comfort. The batting is softer than the foam, but the foam is more supportive.
 -
QuestionWhy do I use batting and not just foam?
 Community AnswerIt softens the corners of the foam and gives it a rounder, more polished look.
Things You'll Need
- Cut wood/plywood
- Thick foam
- Electric knife
- Batting
- Foam glue
- Scissors
- Staple gun
- Hammer
- Upholstery/outdoor fabric
- Fabric scissors


References
- ↑ https://www.youtube.com/watch?v=qxW_pOXGpq4
- ↑ http://www.thechroniclesofhome.com/2012/10/tutorial-how-to-upholster-bench.html
- ↑ https://cyberseams.com/sewing/home-decor/how-to-upholster-a-bench-part-1/
- ↑ https://cyberseams.com/sewing/home-decor/how-to-upholster-a-bench-part-1/
- ↑ http://www.allthingsthrifty.com/2012/05/diy-how-to-upholster-bench.html
- ↑ https://www.thechroniclesofhome.com/2012/10/tutorial-how-to-upholster-bench.html
- ↑ https://cyberseams.com/sewing/home-decor/how-to-upholster-a-bench-part-2/
- ↑ https://lovecreatecelebrate.com/how-to-upholster-a-bench-seat/
- ↑ https://www.youtube.com/watch?v=u9qF0G2Jrd8
About This Article
If you want to make a soft seat for your bench, you can upholster it with some simple tools. You’ll need foam a little larger than your bench’s surface, and batting and fabric twice the size. First, remove your bench’s legs so you can wrap the bench fully. Then, cut the foam to the size of your bench’s surface and glue it down using foam glue. Once the glue is dry, wrap the batting around your bench, staple it to the back, and cut away any excess. Then, wrap it again with your final fabric and staple this to the back too. Finally, reattach the legs and enjoy your new upholstered bench. For more tips, including how to remove old upholstering from a bench, read on!