wikiHow is a “wiki,” similar to Wikipedia, which means that many of our articles are co-written by multiple authors. To create this article, volunteer authors worked to edit and improve it over time.
wikiHow marks an article as reader-approved once it receives enough positive feedback. In this case, 91% of readers who voted found the article helpful, earning it our reader-approved status.
This article has been viewed 70,987 times.
Learn more...
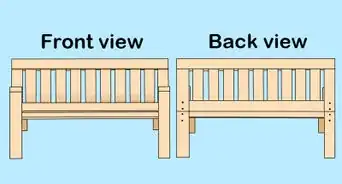
Rushing a chair is one of the traditional methods of creating a seat for a chair with rails around the perimeter. Materials for rushing include twisted cattail leaves or even twisted strands of paper. The strands of rush are stretched across the seat and looped around the rails, moving in a counterclockwise direction, to fill in the seat. Pieces of corrugated cardboard are used for additional padding. Below, you will find information on how to rush a chair in this manner.
Steps
-
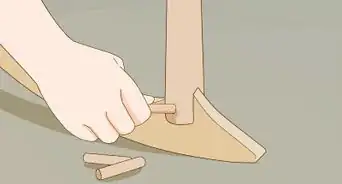
1Use a utility knife to remove the old rush seat. Do not to mar the frame of the chair.[1]
- Remove any tacks with pliers.
-
2Cut the rush into lengths of 30 feet (9.144 meters). The rush comes in a coil of 100 feet (30.48 meters) or more.Advertisement
-
3Dip each rush in a bucket of warm water for 12 seconds, and then shake off any excess water.
-
4Tack it to the inside left rail near the front leg (or slightly behind the last tack if you followed the tip for filling in a gap on a trapezoid-shaped seat).[2]
-
5Wrap it around the front rail and then the left rail so it is tight against the left front chair leg.[3]
-
6Pull it across the front of the seat.[4]
-
7Loop it around the right rail and then the front rail so it is tight against the right front chair leg.
-
8Take the strand to the back rail. Loop it around the back rail and then around the right rail so it is tight against the back right leg.
-
9Cross along the back rail and loop it around the left rail and then the back rail so it is tight against the back left leg.
-
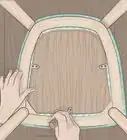
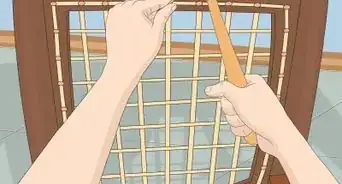
10Bring it to the front rail and continue the sequence, moving counterclockwise around the seat, until you reach the end of the piece of rush.[5]
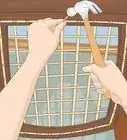
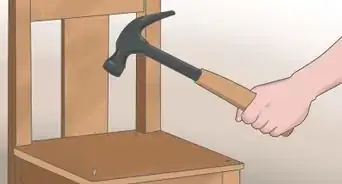
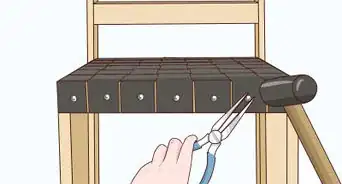
- Knock the rushes tight against each other with a wooden block and hammer.
- Install temporary tacks through the last rush on all sides to help prevent them from slipping.
-
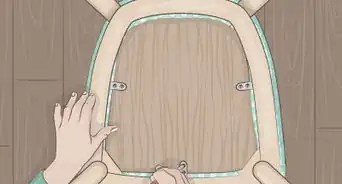
11Tie another piece of rush to the end with a square knot and trim off the excess. The knot should be positioned under the seat so it is not visible.
-
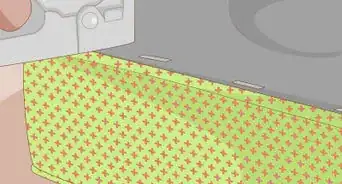
12Insert corrugated cardboard as padding after weaving approximately 10 times around the perimeter of the seat.
- Place a temporary tack holding the end of the last piece of rush.
- Cut pieces of cardboard into 4 triangles that are nearly as long as the side rails.
- Cut off the top corner of each triangle.
- Slip the side corners of each triangle into the woven rush near each leg.
-
13Remove the temporary tack, tie on another piece of rush and continue in the same counterclockwise fashion over the cardboard until you completely cover the side rails with rush.
-
14Change the weaving pattern to a “figure 8” to fill in the rest of the front and back rails.
- Place a temporary tack on the side rail and then thread the end of the rush up through the center opening of the seat. The temporary tack holds the woven part in place while you finish the seat.
- Pass the rush over the front rail, up through the center opening, over the back rail and up through the opening again. Repeat this figure-8 pattern until the front and back rails are filled in.
-
15Hide the end of the rush by tacking it to the bottom of the front or back rail, and remove all temporary tacks.


Community Q&A
-
QuestionWhat can I do with rush that is broken?
 Community AnswerThrow it away.
 -
QuestionMy chair has armrests. I took out the screws, but the arms are loose. Should I thread the rush through the small opening, then put the screw back in the armrest?
 Community AnswerYes, but make sure you screw the arm back on properly.
 -
QuestionWhere can I buy a rush chair?
 Community AnswerYou can buy a one time chair at Costco!
Warnings
- If the seat of the chair does not have right angles at the front 2 corners, you will have to fill in the gap with short, individual strands. Do this by tacking it on the inside of the left rail, wrapping each one around the front and the left rails, crossing along the front rail and then wrapping it around the right and front rail. Tack it on the inside of the right rail.⧼thumbs_response⧽
Things You'll Need
- Utility knife
- Pliers
- Measuring tape
- Rush
- Pail of warm water
- Hammer
- Furniture tacks (Number 2 or 3)
- Block of wood
- Cardboard


References
- ↑ https://books.google.com.ph/books?id=YmYEAAAAMBAJ&pg=PP103&lpg=PP103&dq=removing+old+rush+seat+with+a+knife&source=bl&ots=710CvvuISj&sig=ACfU3U0qDC4PTmz-9UuYEnVnB3F1BHxktg&hl=en&sa=X&ved=2ahUKEwijz8rfm5bnAhVReXAKHUaYCVUQ6AEwFnoECAcQAQ#v=onepage&q=removing%20old%20rush%20seat%20with%20a%20knife&f=false
- ↑ https://www.youtube.com/watch?v=NQkE05DD9_Y&t=86s
- ↑ https://www.youtube.com/watch?v=AHu7lc5680w
- ↑ https://www.youtube.com/watch?v=ViClfS2tBAk
- ↑ https://www.youtube.com/watch?v=TuE1ujMQZpI