This article was co-authored by wikiHow Staff. Our trained team of editors and researchers validate articles for accuracy and comprehensiveness. wikiHow's Content Management Team carefully monitors the work from our editorial staff to ensure that each article is backed by trusted research and meets our high quality standards.
This article has been viewed 43,207 times.
Learn more...
Building a paper bridge is a great way to explore physics and engineering principles in a fun and creative way. You will need sheets of copy paper, textbooks to be the supports of the bridge, and some small objects to test how much weight each paper bridge can hold. Make a flat bridge first, before moving on to creating a pleated bridge. This will let you see how the design differences have an impact on how much weight each bridge is able to hold
Steps
Making a Flat Bridge
-
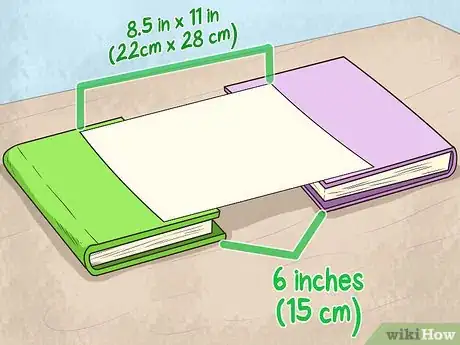
1Lay 1 sheet of paper between 2 textbooks that are 6 in (15 cm) apart. Place 2 textbooks that are equal in size on a flat surface. Arrange the paper so that an even length of paper rests on each textbook.
- Start building your paper bridge on the ground on or a table.
- Use a sheet of 8.5 in × 11 in (22 cm × 28 cm) copy paper, which may be labeled as "A4" size, or a piece of regular notebook paper will work just as well.
- You can also use wooden building blocks that are the same size instead of textbooks if you like.[1]
-
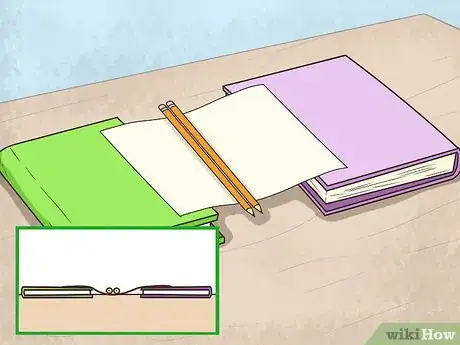
2Test the strength of the paper bridge using a pencil. Rest a pencil down the center of the paper bridge, parallel to the textbooks. If the bridge holds the weight of the pencil, try adding more pencils 1 at a time to see how many the bridge can hold.
- Try adjusting the distance between the textbooks if the bridge cannot hold a pencil. Making the distance smaller may give the bridge the support it needs to hold more weight.[2]
Advertisement -
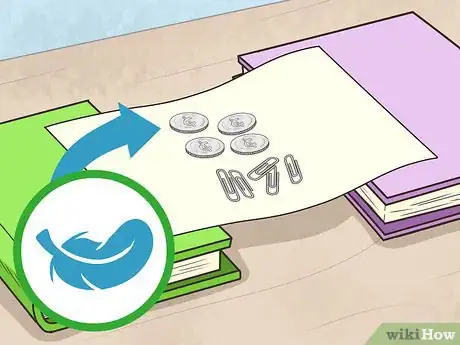
3Use lighter objects to test the strength of the bridge if it collapses. Remove the pencil, and rearrange the paper back to the right position. Add wooden toothpicks or small coins 1 at a time to test how much weight your bridge can hold.
- Small coins such as pennies or dimes are ideal.
- Paper clips are also another option.
- Try looking around you to find other small objects that you can use to test your bridge!
Folding a Pleated Bridge
-
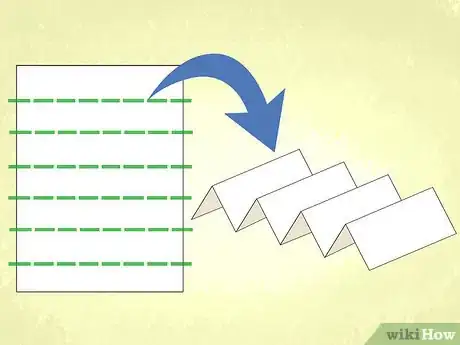
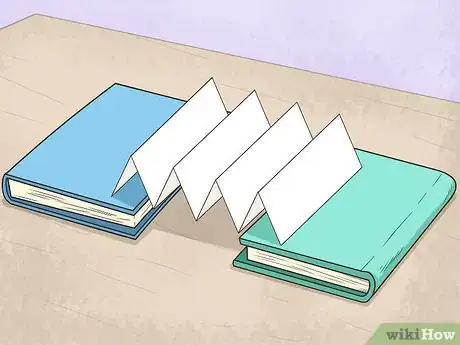
1Fold the sheet of copy paper in half 3 times. Bring the short ends together. Press each half of the paper down firmly to create a fold. Keep the paper folded, and then fold it in the same direction twice more.
- When the paper is unfolded, you will see 2 “M” shapes when you look at it from the side.
-
2Unfold the sheet of paper and place it over the textbooks. Keep the paper slightly bent like an accordion, so that it looks like 2 “M” shapes from the side. Make sure that equal parts of the paper are on each text book.
- You may have to bring the textbooks slightly closer together so that the paper can reach both supports.
- Pleated paper bridges can support more weight than flat paper bridges. This is because the weight of the objects is spread out over the pleats, and each pleat spreads the weight down to the foundation.
-
3Test the strength of the new design of the paper bridge. Place pencils, wooden toothpicks, or small coins within the pleats to see how much weight it can hold. Compare how much more weight this pleated design can hold compared to the flat bridge.
- For an extra challenge, work out how the placement of the objects affects how much weight the bridge can hold. The paper bridge will be able to support evenly distributed weight more effectively, rather than if all the weight is in 1 spot.[3]
Community Q&A
-
QuestionHow to make a paper bridge with one sheet of paper and a paper clip and rubber band?
 davidCommunity AnswerFold the paper into halves, then open it. Use the paper clip to clip it in the middle, then tie the rubber band on the paper clip and put it on a line. Then you have a paper bridge.
Things You’ll Need
- Textbooks or blocks
- Ruler
- Copy paper
- Pencils
- Wooden toothpicks, coins, or paper clips
