This article was co-authored by Ben Barkan and by wikiHow staff writer, Madeleine Criglow. Ben Barkan is a Garden and Landscape Designer and the Owner and Founder of HomeHarvest LLC, an edible landscapes and construction business based in Boston, Massachusetts. Ben has over 12 years of experience working with organic gardening and specializes in designing and building beautiful landscapes with custom construction and creative plant integration. He is a Certified Permaculture Designer, is licensed Construction Supervisor in Massachusetts, and is a Licensed Home Improvement Contractor. He holds an associates degree in Sustainable Agriculture from the University of Massachusetts Amherst.
There are 9 references cited in this article, which can be found at the bottom of the page.
This article has been viewed 17,603 times.
Building a raised garden bed with legs allows you to protect your garden from animals and weeds, and it can even make gardening a little easier since you don't have to stoop down to reach the plants. Making a raised garden bed with legs is a simple DIY project you can do on your own. Keep reading to learn everything you need to know about building a raised garden bed with legs, including how to prepare the bed for a thriving garden.
Steps
Constructing a Raised Garden Bed with Legs
-
1Purchase cedar wood planks. To construct a durable raised bed that is resistant to rot, use cedar wood planks.[1] For this guide, purchase ten 8 ft. 1 in. by 4 in. cedar wood planks and four 8 ft. 2 in. by 4 in. cedar wood planks.[2]
- If you'd rather purchase cedar wood planks in person, visit a home improvement store like Lowe's or Home Depot.
-
2Cut your cedar wood planks using a saw or other wood cutting tool. First, cut the 8 ft. 1 in. by 4 in. cedar planks so that you have ten 4 ft. long side planks and ten 2 ft. short side planks. Then, cut four 30 in. legs from the four 8 ft. 2 in. by 4 in. planks.[3]
- If you don't have a saw or other cutting tool, ask for your cedar planks to be cut by a professional at a home improvement store.[4]
- After making these cuts, save the remaining cedar wood to use as your support pieces and bottom slats.
Advertisement -
3Secure the short sides to the legs. First, drill 2 holes into each end of one of your 2 ft. planks (4 holes in total). Repeat the process so that all ten of your 2 ft. planks have 2 holes on each end. Then, attach five planks in an even row to one of the 30 in. legs with screws. After, attach the other side of these five planks to the opposite leg with screws. Repeat this step for the other five planks so that you have the two short sides of your garden box completed.[5]
-
4Fasten the long sides to the legs. Drill 2 holes on each end of one of your ten 4 ft. long side planks (4 holes in total). Repeat the process for all ten of your 4 ft. long side planks. Then, attach five long side planks to the short side by screwing them in place on each end. Repeat the process for the opposite five planks so that your garden box officially has all of its sides securely in place.[6]
- To make sure the box is straight before securing the long side planks in place, use a speed square.
-
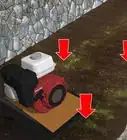
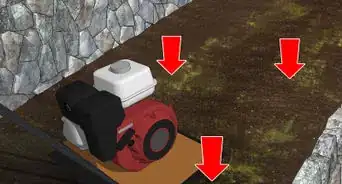
5Attach support pieces along the bottom of the garden bed. These will hold up the bottom slats of your garden bed. To construct the bottom support pieces, use your remaining 2 in. by 4 in. planks. Using wood glue, place these supports in an even line along the long and short sides of the garden box. Since your bottom slats will rest on the support pieces, place them right below where you would like the bottom of your garden bed to be.[7]
-
6Cut identical wooden slats to line the bottom of the box. To construct the bottom of your garden box, measure the length between the two long sides of your garden box. Then, cut your remaining cedar plank scraps to that size.[8]
-
7Attach each slat to the supports along the bottom with a nail gun. First, place the slats over the supports on the bottom of the box. Leave a slight gap between each slat so that the soil in your garden bed can drain. Then, attach either side of each slat to the supports underneath with a nail gun.[9]
-
8Stain or paint the planter if you would like. Staining or painting can add more personality to your garden bed. To paint or stain your garden bed, first sand down the surface with 120-grit sandpaper. Then, wipe down the surface with a clean cloth. If you're staining the wood, apply the stain and let it sit for 5-10 minutes (the longer you wait, the darker your stain will be).[10] Then, wipe off the stain. If you're painting, apply a layer of paint, then wait for it to dry.[11]
- If you plan on eating the veggies in your garden, go for a non-toxic, water-based polyurethane stain.[12] For paint, choose exterior acrylic paint to be extra safe.[13]
- After the stain or paint dries, consider adding a second coat.


Prepping the Garden Bed for Planting
-
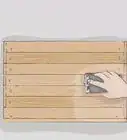
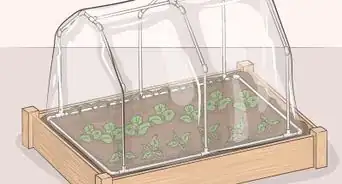
1Lay out landscape fabric over the bottom. Landscape fabric is a perforated fabric that protects the wooden slats of your garden bed while also allowing the soil to drain. To make your raised garden bed last as long as possible, line the bottom of the box with the landscape fabric before adding your soil.[14]
-
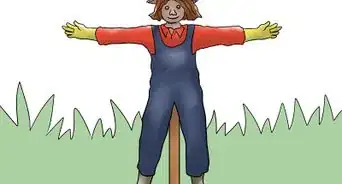
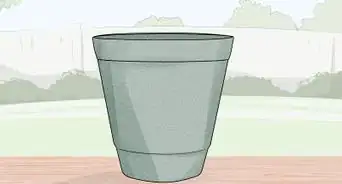
2Place your garden bed in an even location with lots of sunlight. Many vegetables and flowers need at least 6 to 8 hours of sunlight a day (A.K.A. full sunlight). To ensure that your plants get all the sunlight they need, place your raised garden bed in an area with access to direct sunlight. To ensure that your garden bed is secure, place it on an even, level surface in your yard or on your porch.[15]
-
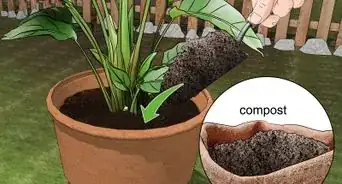
3Add 12–22 inches (30–56 cm) of good-quality soil. In general, plants need about 12–22 inches (30–56 cm) of soil to thrive. If you're planting vegetables in your raised garden bed, fill your raised garden bed with 18–22 inches (46–56 cm) of soil. This will be plenty of soil to allow the roots to grow strong.[16]
- To give your plants all the nutrients they need, consider adding a layer of compost over the soil.
-
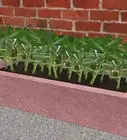
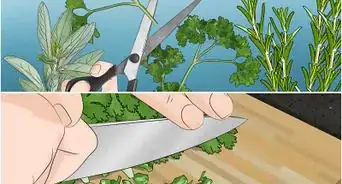
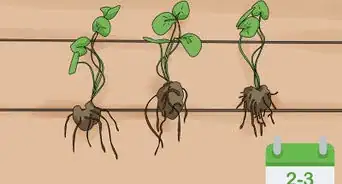
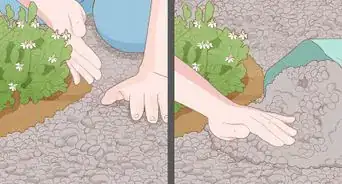
4Plant the flowers, vegetables, and herbs of your choice. Grow plants and vegetables like radishes, tomatoes, and leafy greens. If you're interested in planting flowers, try poppies, nasturtium, or marigolds. Though you can fit many varieties of vegetables, flowers, and herbs in your garden bed, leave some space in between each seed so that each has enough room to grow.


Things You’ll Need
- Ten 8 ft. 1 in. by 4 in. cedar wood planks
- Four 8 ft. 2 in. by 4 in. cedar wood planks
- Drill
- Screws
- Tape measure
- Woodcutting tool (Miter saw, circular saw, jigsaw, etc.)
- Nail gun
- Wood glue
- Exterior acrylic paint (optional)
- Non-toxic, water-based polyurethane stain (optional)
- Landscape fabric
- Flower, vegetable, and herb seeds of your choice


-Oven-Step-15.webp)

References
- ↑ https://extension.uga.edu/publications/detail.html?number=C1027-4&title=Raised%20Garden%20Bed%20Dimensions
- ↑ https://www.loveandrenovations.com/diy-elevated-garden-bed/
- ↑ https://www.loveandrenovations.com/diy-elevated-garden-bed/
- ↑ https://www.almanac.com/content/how-build-raised-garden-bed
- ↑ https://www.loveandrenovations.com/diy-elevated-garden-bed/
- ↑ https://www.loveandrenovations.com/diy-elevated-garden-bed/
- ↑ https://www.loveandrenovations.com/diy-elevated-garden-bed/
- ↑ https://www.addicted2decorating.com/how-to-build-an-elevated-garden.html
- ↑ https://www.loveandrenovations.com/diy-elevated-garden-bed/
- ↑ https://www.homedit.com/how-to-stain-wood/
- ↑ https://www.gfloutdoors.com/paint-for-raised-garden-beds-which-type-of-paint-to-use/
- ↑ https://www.finewoodworking.com/2004/11/01/selecting-a-finish
- ↑ https://www.gfloutdoors.com/paint-for-raised-garden-beds-which-type-of-paint-to-use/
- ↑ https://www.sunset.com/home-garden/garden-basics/how-to-build-raised-bed-gardening-diy
- ↑ https://www.almanac.com/content/how-build-raised-garden-bed
- ↑ https://www.sunset.com/home-garden/garden-basics/how-to-build-raised-bed-gardening-diy
- ↑ https://ipm.missouri.edu/MEG/2019/12/christmasRose/
About This Article