This article was co-authored by wikiHow Staff. Our trained team of editors and researchers validate articles for accuracy and comprehensiveness. wikiHow's Content Management Team carefully monitors the work from our editorial staff to ensure that each article is backed by trusted research and meets our high quality standards.
There are 9 references cited in this article, which can be found at the bottom of the page.
This article has been viewed 58,303 times.
Learn more...
Caning a chair is a fun and easy project. Just get a cane-ready chair and measure the holes to determine what sort of gauge you need. Thread the cane through the chair from the center to the right side, then from the center to the left. Finish up by weaving the cane from the back edge to the front. If you’re looking for a unique and attractive chair for your home, office, or front porch, caning a chair is a great option.
Steps
Readying Your Materials
-
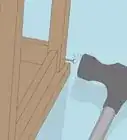
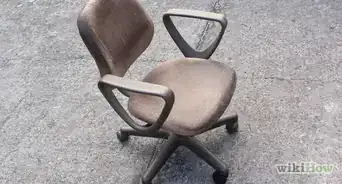
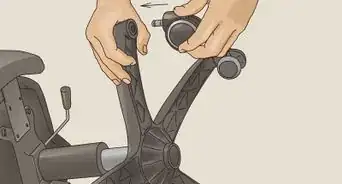
1Choose a chair that can be caned. To cane a chair, you’ll need one with a large, empty space in the middle of the back or seat. The seat should also have holes drilled around the edge of the seat or back frame.[1]
- The holes should be drilled in intervals of about 1⁄2 inch (1.3 cm) around the perimeter of the area of the frame you want to cane.
- The holes should also be about 1⁄2 inch (1.3 cm) from the inner area of the seat.
- It is not possible to cane a chair without a large, empty space in the middle of the back or seat.
- Do not attempt to add holes to a regular chair in order to cane it. Only chairs with pre-drilled holes are acceptable for caning.
-
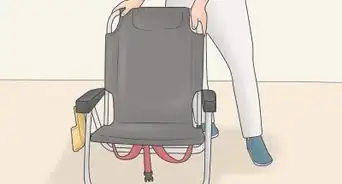
2Choose your caning material. A variety of materials can be used to cane chairs. For sturdy or rustic chairs, rush, Hong Kong grass, and splint are all suitable. You might also wish to use wicker. The material you choose should match the chair’s texture and color, and suit your personal preferences.[2]Advertisement
-
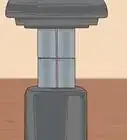
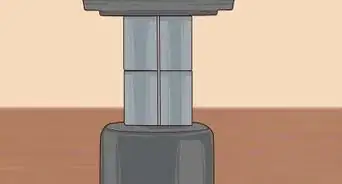
3Determine the gauge of caning material you need. To determine the gauge of caning material you need, use a ruler to measure the distance between the holes (center to center) and the diameter of each hole. The larger the hole, the larger the gauge of cane you’ll need to order.[3]
- If the holes are 3⁄8 inch (0.95 cm) with 3⁄8 inch (0.95 cm) between them, use superfine caning material of .08 inches (0.20 cm) in diameter.
- If the holes are 3⁄16 inch (0.48 cm) with 1⁄2 inch (1.3 cm) between them, use “fine fine” caning material of .09 inches (0.23 cm) in diameter.
- If the holes are 3⁄16 inch (0.48 cm) with 5⁄8 inch (1.6 cm) between them, use fine caning material of .1 inches (0.25 cm) in diameter.
- If the holes are 1⁄4 inch (0.64 cm) with 3⁄4 inch (1.9 cm) between them, use narrow medium or medium caning material of .11 inches (0.28 cm) or .12 inches (0.30 cm) in diameter, respectively.
- If the holes are 5⁄16 inch (0.79 cm) with 7⁄8 inch (2.2 cm) between them, use common caning material of .14 inches (0.36 cm) in diameter.
-
4Cut the caning material with a sharp knife if necessary. Depending on the kind of cane you buy, it will either come in a package as a bunch of strands (typically about 6 to 7 yards long), or as a single long spool. If it comes as a single spool, cut it into pieces of about 6 to 7 yards (6 to 7 meters) long.[4]
- The amount of total caning material you need to buy depends on the circumference of your chair. The larger the circumference of your chair, the more material you will need.
- When cutting the caning material, place it on a flat surface and use a steady back-and-forth sawing motion to cut through it.
- You could use a box cutter for thicker caning material and sharp shears for thinner caning material.
-
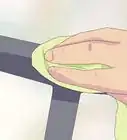
5Soak the caning material. Before you can begin using the caning material, it needs to be soaked to make it more pliable. After about 10 minutes, most caning materials are ready for use.[5]
- Except for reed, plastic, and splint, don’t soak your caning material for more than 15 minutes or it might start to discolor and become weak.
- Reed and splint need to be soaked for 30 to 45 minutes before use.[6]
- Only keep a few strands in the water at a time. When you begin using the caning material, add new strands as you take out those that have already been soaked.
- Don’t soak plastic cane.[7]


Weaving the Verticals
-
1Keep the glossy side up. When the chair is in its normal position, the glossy side of the caning material should face up and away from the seat. If you’re caning the back of the chair, the glossy side should face the front.[8]
- Some caning materials might not have a glossy side. In these cases, either side of the caning material can face up.
-
2Check the soaked caning material for breaks and weak spots before using it. If a piece of caning material is frayed or thin in a certain area, discard it. The strips should all appear relatively identical.[9] The “eye” of the cane (the lump where the stem grew out of the leaf) should be smooth and unbroken.[10]
- If the “eye” of the cane is not smooth or has a break in it, the caning material will be weaker and might snap under pressure.
-
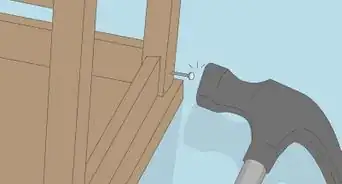
3Arrange the central caning strip. Slip a piece of caning material into the center rear hole. Allow about 2 inches (5.1 cm) of the caning material to dangle through the bottom of the hole. Jam a peg into the back rear hole to secure it using your fingers. Pull it taut and push the other end through the front-center hole, then secure it with a peg.[11]
- Caning pegs are available at your local arts and crafts store. Since they taper towards a point, they only come in one size.
-
4Bring the loose end up through the hole to the right. Place a peg in the hole to keep the caning material taut. Pull the loose end across the opening to the hole on the opposite end.[12]
- Remember to secure the caning material with a peg every time you pull it through a hole. If you run out of pegs, pull some from previous holes, with the exception of the rear-center hole (the first hole you passed the caning material through).
-
5Repeat for the rest of the holes on the right. Continue moving along the series of holes on the right side of the chair’s opening, alternately bringing the caning material up through a hole (from the opening next to it), pulling it taut, securing it with a peg, then bringing it down through the hole on the opposite side.[13]
- Don’t draw any caning material through corner holes.
-
6Tie the caning material off when you reach the end of the side or the end of a strand. Once you’ve pulled the caning material through all the holes on the right side, loop it through the final hole several times. Tie it into a knot. Do the same when your current strand is not long enough to span the chair.[14]
- All the caning material should be in a single layer along the upper edge of the chair or the forward-facing portion of the chair’s back.
-
7Add a new strand by sliding it through a hole and securing it with a peg. Adding new strands requires the same basic technique you used when inserting the initial strand. Leave a bit of the caning material loose and dangling through the hole.[15]
-
8Weave the other half of the seat. After you’ve woven the cane across the right side of the seat, weave the cane across the left side. Start from the hole just to the left of the rear center hole you started from initially. Use the same method you used to weave the strands from the center to the right.[16]
- Remember to keep the strands on the same level. In other words, every strand of caning material should go down through holes on the top side of the chair’s seat or the forward-facing side of the chair’s back.


Adding More Layers
-
1Make the horizontal layer. Start a second layer of cane from the center-right hole. Pass a bit of caning material through the center of the hole, then secure it with a peg. Pull the other end across the chair and pass it through the hole directly opposite.[17]
- Work your way down the chair in this way, weaving and pegging the caning material as you go.
- Finish the horizontal layer by starting again from the hole directly above the one you started from. In other words, pass a bit of caning material through the center of the hole, secure it with a peg, then pull the other end across the chair toward the corresponding hole on left side.
- Bring it up through the bottom of the hole above it, and continue moving back and forth toward the top edge of the new layer.
-
2Add the second vertical layer. After completing the horizontal layer, add another vertical layer to the caning. Start this third layer in the hole just to the right of the rear left corner.[18]
-
3Add the second horizontal layer. Starting from the hole just below the top-left corner hole, thread your caning material across the chair frame by pulling the strand between the two vertical layers. The caning material should be above the third vertical layer and under the first vertical layer.[19]
-
4Weave the first diagonal layer. Thread a strand from the rear right corner hole across to the hole just to the bottom left corner hole. As you pull the strand across, pass it over the vertical pairs and under the horizontal pairs. Pull the strand up through the hole to the right of the one you passed it through, then weave it back toward the hole just below the corner hole in the rear right.[20]
- Continue in this way until the area from the front right corner to the center of the frame has been woven with diagonals.
- Finish the diagonal by running a strand from the front left corner hole (or, if you’re working on the back of the chair, the bottom left corner hole) up to the hole just to the left of the one in the top right corner. From there, work your way toward the left.
-
5Weave diagonals going the opposite way. The final layer will begin from the hole in the back left corner to the one just above the hole in the front right corner. Pull the strand back up through the hole just above it, then weave it back across to the hole just to the right of the hole in the back left.[21]
- As you work your way across, pull the strand beneath the vertical pairs and over the horizontal pairs.
- Continue to work your way toward the rear right corner, then start a fresh strand in the front right corner hole. Pull it to the hole directly below the one in the back left corner. Work your way down and toward the front left corner in this way.
-
6Tie off any loose strands. When you’re done, look beneath the chair and tie any loose strands you see to the nearest vertical strand. Loop the loose strands around the nearest vertical strands once or twice, then pull the rest of the loose strand through the loop. This will prevent the cane weave from coming loose.[22]
- After securing all loose strands, remove the pegs that kept them in place. Use your fingers to pull the pegs out.
- All pegs should be removed once all loose strands are secure.


Things You’ll Need
- caning material
- a knife, box cutter, or shears
- wooden pegs
- small bowl or pot of water
- a chair with pre-drilled caning holes
References
- ↑ http://www.aces.uiuc.edu/vista/html_pubs/weave/weave.html
- ↑ http://www.aces.uiuc.edu/vista/html_pubs/weave/weave.html
- ↑ https://www.wickerwoman.com/articles/chair-caning-instructions
- ↑ https://books.google.com/books?id=5A9jr0x8KtYC&lpg=PP1&pg=PA2#v=onepage&q&f=false
- ↑ https://www.wickerwoman.com/articles/chair-caning-instructions
- ↑ http://www.aces.uiuc.edu/vista/html_pubs/weave/weave.html
- ↑ https://books.google.com/books?id=5A9jr0x8KtYC&lpg=PP1&pg=PA2#v=onepage&q&f=false
- ↑ http://www.aces.uiuc.edu/vista/html_pubs/weave/weave.html
- ↑ https://www.wickerwoman.com/articles/chair-caning-instructions
- ↑ https://books.google.com/books?id=5A9jr0x8KtYC&lpg=PP1&pg=PA1#v=onepage&q&f=false
- ↑ https://www.wickerwoman.com/articles/chair-caning-instructions
- ↑ http://www.aces.uiuc.edu/vista/html_pubs/weave/weave.html
- ↑ http://www.aces.uiuc.edu/vista/html_pubs/weave/weave.html
- ↑ http://www.aces.uiuc.edu/vista/html_pubs/weave/weave.html
- ↑ http://www.aces.uiuc.edu/vista/html_pubs/weave/weave.html
- ↑ https://books.google.com/books?id=5A9jr0x8KtYC&lpg=PP1&pg=PA3#v=onepage&q&f=false
- ↑ http://www.aces.uiuc.edu/vista/html_pubs/weave/weave.html
- ↑ http://www.aces.uiuc.edu/vista/html_pubs/weave/weave.html
- ↑ http://www.aces.uiuc.edu/vista/html_pubs/weave/weave.html
- ↑ http://www.aces.uiuc.edu/vista/html_pubs/weave/weave.html
- ↑ http://www.aces.uiuc.edu/vista/html_pubs/weave/weave.html
- ↑ http://www.aces.uiuc.edu/vista/html_pubs/weave/weave.html
About This Article

Before caning a chair, soak your caning material in water for 10-45 minutes, depending on the type, to make it more pliable. To start weaving, slip a piece of material through a hole near the center of your chair back or bottom and keep the glossy side up. Next, bring the material all the way down to the opposite hole. Then, slip the loose end through the hole to the right. Go back up toward the first hole and continue going back and forth until the surface is covered before adding more layers. For more tips on how to cane a chair, like how to determine the right gauge, read on!