This article was co-authored by wikiHow Staff. Our trained team of editors and researchers validate articles for accuracy and comprehensiveness. wikiHow's Content Management Team carefully monitors the work from our editorial staff to ensure that each article is backed by trusted research and meets our high quality standards.
This article has been viewed 108,027 times.
Learn more...
Glass casting is a process where you place glass in a mold to create a specific glass sculpture or design. The mold must be placed in a kiln to fuse the glass together and form your desired item. Casting glass is difficult and requires some specialist machinery. Make sure you take the proper safety precautions when you're working with a kiln. Wear kiln gloves and dark, protective glasses.
Steps
Preparing the Mold
-
1Gather your materials. The most important item in the whole glass casting process is the mold. The mold is what makes your glass into the shape it is. You can buy glass casting molds online or check at the local glass refinery if they sell them.
- You will also need glass primer and a hake brush to apply the primer. You can find a hake brush at the local hardware store. It's a small brush with a long flat handle and compact bristles.
- You need a kiln to put your glass into. The kiln will fuse the glass and turn it into your desired shape. Get a kiln that's big enough to fit your mold into. Generally any type of kiln will do for casting glass.
- A diamond pad or a grinding stone will let you clean and perfect the glass after you take it out of the kiln.
-
2Purchase enough frit, nugget, billet, or cullet glass to fill the mold. You can use frit glass, nugget glass, billet glass, or cullet glass to make your glass item. Frit glass is a fine type of glass that water or gas can pass through. Nugget glass is small pebble-like pieces of glass. Billet glass is small ingots of glass. Cullet glass is recycled glass that has been rejected elsewhere in the glass making process. It's up to you which type of glass you use for your project.[1]
- You can buy any of these types of glass online or at the local glass store if there's 1 in your area.
Advertisement -
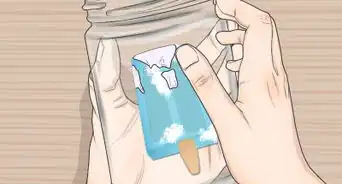
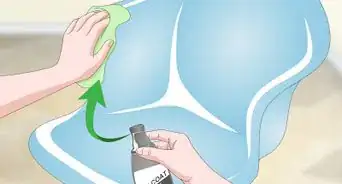
3Clean your mold with a toothbrush. Before you use the mold to cast glass, you need to clean it out to remove dust or leftover debris from other times it has been used. Buy a specialized kiln washing product online. Kiln washing products are very effective at cleaning molds. Apply the product to your toothbrush and gently scrub your mold to clean it.
- Kiln washing products are designed to rigorously clean kiln and ceramic items. You can buy this product at the local tiles or ceramics store.
- You can use a bristle brush instead of a toothbrush to clean your mold.
-
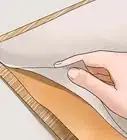
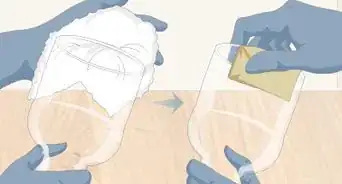
4Apply the first coat of primer to the mold. The primer will act as a glass separator on the mold, preventing the glass from binding to the mold. You can get a glass primer at the local hardware store. Use a hake brush to apply the primer to the mold.[2]
- Read the instructions on the glass primer before you use it.
- The primer layer doesn't need to be thick. A thin layer will do.
-
5Let the first coat of primer dry to the mold for 2 to 3 hours. After you've applied the first coat of primer to the mold, you can let it air dry at room temperature. If you're in a hurry, you can use a blow dryer to help the primer dry into the mold faster.
- If you don't have 2 to 3 hours to let the primer dry, you can blow dry it. Take the proper safety precautions by wearing safety goggles and a dust mask when blowing primer with hot air. When blow drying, turn the blow dryer onto a high setting and hold it near the mold for 1 minute or so. Use a tissue to dab the primer to see if it's dry. If it's not, blow dry it for another minute and check again with a tissue.
-
6Apply 2 more coats of primer and let each coat dry for 2 to 3 hours. You should never paint the next coat of primer without letting the previous coat completely dry into the mold. When each coat has fully dried, apply the next coat of primer using the hake brush.
- Only blow dry the primer if you're in a hurry. It's safer to let it dry at room temperature.


Filling the Mold
-
1Put on protective gear. When you're working with a kiln, you should wear the right protective gear to make sure you don't get burned. Kilns can get extremely hot on the outside when they're on. Wear kiln gloves at all times when you're working near a kiln.[3]
- Wear dark protective glasses if you're looking into a kiln through 1 of its spy holes. Regular sunglasses should not be used as a substitute for these protective glasses.
- Put on a shirt or jumper with long sleeves to prevent burns to your forearms while you're working with the kiln.
-
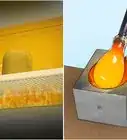
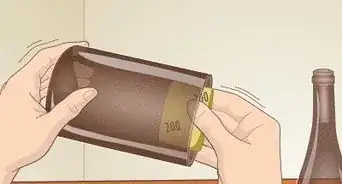
2Fill the mold with your glass. You should add enough glass to the mold so it slightly overflows above the top of the mold. You can use the cap on top of your glass' container to gently pour the glass into the mold.[4]
- If you don't want to use the bottle cap, pour some of the glass onto your palm. Then pinch the glass with your other hand and slowly pour it onto the mold. Wear gloves if you decide to use this method.
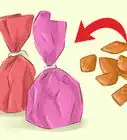
- If your glass is too big, place it in the center of a paper towel on a flat work surface. Gently smash the glass with a hammer. Use gloves to open the paper towel to protect yourself from glass shards.
- If you lay large pieces of glass flat, they will trap air. Identify the larger pieces of glass and place them vertically. The air won't get trapped and the glass will melt from the bottom.
-
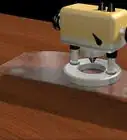
3Put your mold in your kiln. Make sure your kiln is placed in a well-ventilated area. When placing your mold in the kiln, place it on the kiln posts. This will ensure that an even flow of heat passes around your mold.[5]
- Kiln posts are placed on top of the kiln's shelves. They provide support to the kiln's shelves.
- Kilns release gasses which can cause damage to the body if they are not placed in a safe area with plenty of ventilation. Place the kiln in a large warehouse or a garage with the garage door wide open. Don't place the kiln in a small, enclosed place.


Firing the Glass
-
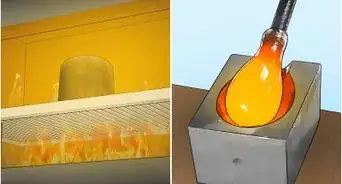
1Fire your kiln to fuse the glass. When the kiln is firing, it will be extremely hot, so avoid touching it directly. Use the following casting schedule on your kiln to fuse the glass:
- Turn the temperature to 250 °F (121 °C) for 10 minutes.
- Raise the temperature to around 1,465 °F (796 °C) and leave it on that temperature for 10 minutes.
- Turn the heat down to 950 °F (510 °C) and leave the kiln at that temperature for 1 hour.
- Decrease the temperature to 850 °F (454 °C) and wait for 15 minutes.
- Turn the heat to 100 °F (38 °C). Leave the kiln closed and wait a day before you open it.
-
2Let the kiln fully cool down. Don't touch the mold or reach into the kiln until the outside is cool to the touch. The time it takes the kiln to cool will vary. Measure the temperature of the kiln an hour after it fired. This difference between the temperature it fired at and the temperature an hour later is the cooling rate per hour for the kiln.
- For example, if your kiln fired at 1,500 °F (820 °C) and an hour later the temperature is 1,250 °F (677 °C), the cooling rate is 250 °F (121 °C) per hour.
-
3Take your mold out of the kiln and refine it. Put gloves on when removing the glass from the kiln as it still might be quite warm. Place the glass on a steady work surface. Use a diamond pad or a grinding stone to make it smooth and get rid of any blemishes. Rub uneven or imperfect areas of the glass with the diamond pad or grinding stone to smooth out the imperfections.
- Hold the mold gently as you rub it with the diamond pad or grinding stone.
-
4Unplug the kiln when you're finished using it. Kilns are programmed to turn off after they're finished firing. If you want to, you can force the kiln to turn off by using the on/off switch on the kiln. When you're finished with the kiln, plug it out to cut off the electrical supply reaching it.[6]


Community Q&A
-
QuestionHow many uses can you usually get out of one mold? What is the best kind for multiple uses?
 Jason CreganCommunity AnswerMolds can be used a lot of times before wear and tear leads to them wearing away and needing to be replaced.
 -
QuestionIs the mold just made of sand?
 Community AnswerYou also need a binding agent of some sort to hold the mold together and allow it to keep its shape.
 -
QuestionHow do I remove the glass without breaking the mold?
 Community AnswerReally you can't, unless you have a pre-made dividing line in the mold to allow it to come apart. This can be done easily by making the mold in two parts. If the mold is already made, it's too late and you'll have to break the mold.
Things You'll Need
- Mold
- Frit, billet, nugget, or cullet glass
- Glass primer
- Hake brush
- Kiln gloves
- Dark, protective glasses
- Hairdryer
- Toothbrush or wire brush
- Kiln washing product
- Kiln
- Diamond pad or grinding stone


References
- ↑ https://www.glasscampus.com/tutorials/pdf/Glass%20Casting%20in%20a%20Kiln.pdf
- ↑ https://www.glasscampus.com/tutorials/pdf/Glass%20Casting%20in%20a%20Kiln.pdf
- ↑ http://www.hse.gov.uk/non-metallic-minerals/kilns-in-schools.htm
- ↑ https://youtu.be/4BTGso8hweA?t=1m59s
- ↑ https://www.glasscampus.com/tutorials/pdf/Glass%20Casting%20in%20a%20Kiln.pdf
- ↑ https://hotkilns.com/it-seems-i-should-turn-kiln-end-test-firing-typically-how-soon-after-would-i-turn-it-back-check-temp
About This Article