This article was co-authored by Mobile Kangaroo and by wikiHow staff writer, Ellie Salyers. Mobile Kangaroo is a full service repair shop and Apple Authorized Service Provider headquartered in Mountain View, CA. Mobile Kangaroo has been repairing electronic devices such as computers, phones, and tablets, for over 19 years, with locations in over 20 cities.
The wikiHow Tech Team also followed the article's instructions and verified that they work.
This article has been viewed 2,396 times.
Do you want to switch things up in Word by changing the default Times New Roman or Calibri font to something else? There’s an easy way to adjust settings so you can set a new default font. This wikiHow article will show you how to set the default font in Word Office 365 (for all versions since Word 2013) on Windows and macOS.
Steps
Changing Font on Windows
-
1Open Word. On your Windows PC, open up the Microsoft Word application.
-
2Open up a document. You can use any document you want, but if you want to start a new document, click on File > New > Blank Document in the top left corner of the window.[1]Advertisement
-
3Click on Home. This is located in the left corner of the top Windows menu bar.
-
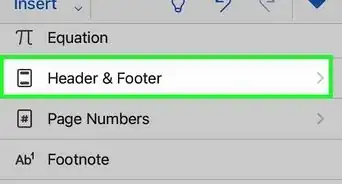
4Click on the Font Dialogue Box Launcher. This is the small square icon with an arrow inside. It is located in the bottom right corner of the “Font” section above the document.[2]
-
5Select your font. In the pop-up window, you’ll see a drop down menu labeled “Font” in the top left corner. Simply scroll until you find the font that you want to set as the default. Click on it.
- You can see a preview of your font in the “Preview” section near the bottom of this pop-up window. This will show you exactly what your font looks like as you make changes.
-
6Set your Font style and Size. There are two drop down menus to the left of “Font.” Scroll through each to set your desired default font style and size.
-
7Set other font preferences (optional). If you also want to change features such as "Font color," "Underline style," or "Effects," simply adjust these settings within the same pop-up window.
- You can also click on Advanced near the top of this pop-up window to change more settings such as “Character Spacing” and “Advanced Typography.”
-
8Click on Default…. This is located in the bottom left corner of the pop-up window.
-
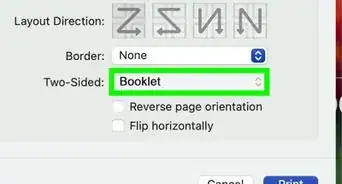
9Click on This document only or All documents based on the Normal template. The former will only change the default font for this particular document, while the latter will change the default font for all future Word documents.
-
10Click on OK. This is located in the bottom right corner of the pop-up window. You have now successfully changed the default font in Word.
- If you’ve tried this method and the font you chose still does not appear as the default font, look towards the next method for troubleshooting.


Checking Permissions on Windows
-
1Open the Start menu. This is located on the left or center of your PC’s taskbar. This button is the Windows logo, which looks like four squares.[3]
-
2Type Normal.dotm into the search bar. The search bar is located in the bottom left corner of the Search menu. If your office template directory is not indexed and you are unable to find "Normal.dotm" through search, Right click start menu and select "Run" option. Then type "%Appdata%/Microsoft/Templates" in run dialogue box and click "OK". This will open office's templates directory and you will find Normal.dotm in this directory.
-
3Right-click the Normal.dotm. Now click on Properties at the bottom of this drop down menu.
-
4Navigate to General. If it isn’t already displayed, click on this button near the top of the pop-up window to view the general information.
-
5Uncheck Read-only (if necessary). If you see that the checkbox next to “Read-only” is selected, simply click on it to uncheck it. You should now be able to change default settings on Word.
- If you are unable to uncheck this box, look towards the last step of this method.
-
6Click on the Security tab. This is located at the top of the pop-up window.
-
7Click on your name. You should see your name located underneath “Group or user names.” Now look and see if there’s a checkmark in the “Allow” section of the “Write” permission.
- If there isn’t, look to the last step.
-
8Click on OK. This is located at the bottom of the Normal Properties pop-up window.
-
9Contact your company (if necessary). If you weren’t able to uncheck the “Read-only” box, or did not see the “Write” permission allowed, this means that your company will not allow you to change the default font. We recommend that you contact your company’s technology or computer services to try and resolve this issue.


Changing Font on macOS
-
1Open Word. On your Mac, open up the Microsoft Word application.
-
2Open up a document. You can use any document you want, but if you want to start a new document, click on File > New Document in the top left Apple menu bar.
-
3
-
4Click on the “Font” drop down menu. This is located in the top left corner of the “Font” pop-up window. Simply click on the arrow.
-
5Select your font. In the drop down menu that appears below “Font,” you’ll see all of the fonts available to you. Simply scroll until you find the font that you want to set as the default. Click on it.
- You can see a preview of your font in the “Preview” section near the bottom of this pop-up window. This will show you exactly what your font looks like as you make changes.
-
6Set your Font style and Size. There are two drop down menus to the left of “Font.” Click on each to set your desired default font style and size.
-
7Set other font preferences (optional). If you also want to change features such as "Font color," "Underline style," or "Effects," simply adjust these settings within the same pop-up window.
- You can also click on Advanced near the top of this pop-up window to change more settings such as “Character Spacing” and “Advanced Typography.”
-
8Click on Default…. This is located in the bottom left corner of the pop-up window.
-
9Click on This document only or All documents. The former will only change the default font for this particular document, while the latter will change the default font for all future Word documents.
-
10Click on OK. This is located in the bottom right corner of the pop-up window. You have now successfully changed the default font in Word.
- If you’ve tried this method and the font you chose still does not appear as the default font, look towards the next method for troubleshooting.


Checking Permissions on macOS
-
1Open Finder. If the default font you chose isn’t remaining as the default, use these steps to check your permissions. The Finder application is blue and white with a smiley face inside.
- Some companies have permission settings that don’t allow default font changes, which is why you may want to check and see if this is the case for you.
-
2Type Normal.dotm into the search bar. Click on the magnifying glass in the top left corner to open the search bar. Press Enter on your keyboard after typing it in.
-
3Click on the Normal.dotm file. If you don’t see this file in your search results, you may need to click on This Mac near the top left corner of the window.
-
4Click on File > Get Info. These are located in the top Apple menu bar.
-
5Navigate to General. If it isn’t already displayed, click on this button near the top of the pop-up window to view the general information.
-
6Uncheck Locked (if necessary). If you see that the checkbox next to “Locked” is selected, simply click on it to uncheck it. You should now be able to change default settings on Word.
- If you are unable to uncheck this box, look towards the last step of this method.
-
7Click on Sharing & Permissions. This is located at the bottom of the pop-up window. Now look and see if the “Read & Write” privilege appears next to your name. If it doesn’t, look to the next step.
-
8Contact your company (if necessary). If you weren’t able to uncheck the “Locked” box, or did not see “Read & Write” next to your name, this means that your company does not allow you to change the default font. We recommend that you contact your company’s technology or computer services to try and resolve this issue.


References
- ↑ https://support.microsoft.com/en-us/office/create-a-document-28508ada-9a3c-4333-a17b-cb29723eb64c
- ↑ https://support.microsoft.com/en-us/office/change-the-default-font-in-word-2f50603b-9886-47e4-a483-48ac5ab80163#ID0EBDF=Windows
- ↑ https://support.microsoft.com/en-us/windows/open-the-start-menu-4ed57ad7-ed1f-3cc9-c9e4-f329822f5aeb#WindowsVersion=Windows_10
- ↑ https://support.microsoft.com/en-us/office/change-the-default-font-in-word-2f50603b-9886-47e4-a483-48ac5ab80163#ID0EBDF=macOS
About This Article

1. Open a document in Word.
2. Click on Home > Font Dialogue Box Launcher.
3. Select your font.
4. Change font style.
5. Click on Default.
6. Click on This document only or All documents.
7. Click on OK.