This article was co-authored by wikiHow staff writer, Ali Garbacz. Our trained team of editors and researchers validate articles for accuracy and comprehensiveness.
wikiHow’s Content Management Team carefully monitors the work from our editorial staff to ensure that each article meets our high quality standards.
There are 13 references cited in this article, which can be found at the bottom of the page.
Learn more...
Ironically, the only thing your Shark vacuum can’t clean is itself. This is where you come in to save the day! These vacuums are some of the easiest to take apart to clean, and it won’t take much on your part to keep yours in pristine condition. From rinsing the filters to getting stubborn blockages out of the hoses, read on for a step-by-step guide on how to clean your Shark vacuum to leave it squeaky clean and looking brand new.
Things You Should Know
- Detach the dust cup from the vacuum and empty its contents over a trash bin before rinsing it out with water.
- Remove the foam, felt, and HEPA filters and wash them under warm water. Let them air-dry for at least 24 hours before putting them back in the vacuum.
- Cut any hair and other debris from the brushroll, then clean out dirt from the bristles.
- Check the various hoses and tubes on the vacuum for any blockages and use a long, thin tool to dislodge the debris.
Steps
Emptying the Dust Cup
-
1Pull up on the dust cup release latch to detach it from the vacuum. The dust cup is where the debris goes after it’s been vacuumed up. Each vacuum model’s dust cup release latch will be in a slightly different place, but they all essentially work in the same fashion. Consult your specific user manual to see where this latch can be found.[1]
- Completely unplug your vacuum from any power source and make sure it’s powered off before starting to clean.
-
2Open the dust cup over a trash can and empty its contents. Press down on the latch that opens the dust cup’s lid. This latch might also be called the “Release” or “Empty” button on certain models. Hold the dust cup upside down over a trash can so that its contents fall directly into the trash.[2]
- If there’s any stubborn dirt or debris that doesn’t immediately fall out of the canister, give it a couple of gentle taps against the side of your trash can.[3]
- Some models have a dust cup that has both a top lid and a bottom lid that can be opened separately.
- Open the bottom lid first and let the dirt and debris fall into your trash can. If it needs to be emptied more, turn the dust cup upside down over the trash bin and open the top lid.
Advertisement -
3Rinse the dust cup with water and let it dry. If there’s a lot of stubborn dust buildup, take the detached dust cup and rinse it in the sink under warm water. Use a gentle soap to get rid of any tough spots or stains. When you’re done, set the canister on its side with the lid open and let it dry completely before reattaching it.[4]
- Make sure the dust cup is completely dry before reattaching it to the vacuum to avoid getting water into any electrical ports.


Rinsing the Filters
-
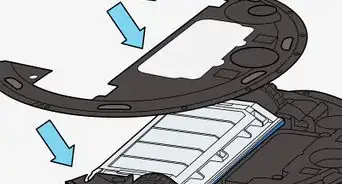
1Remove the foam and felt filters from the detached dust cup. Pull out the foam and felt filters, also called the “pre-motor” filters, from the bottom of the dust cup. The filter on the Shark robot vacuum is a tray that can be pulled out from the dust bin by two tabs.[5] This filter is just one piece and doesn’t have separate foam and felt filters that need to be removed.[6]
- Clean the pre-motor filters at least once a month.
-
2Wash the filters under warm water until the water runs clear. It’s normal for these filters to become a bit discolored over time. Keep running the filters under warm water until the water runs clear. If you’ve been using your filters for a while, it’s normal for them to remain a bit discolored and not be as pristinely white as they were when you first bought them.[7]
- Do not use soap or any other cleaning chemicals when rinsing the filters.
- For the Shark robot vacuum filter, just tap the filter over a trash can to dislodge any dust and debris. Then, go in with a soft-bristled brush (such as a soft-bristled toothbrush) to sweep away any other remaining dirt before putting the filter back.[8]
-
3Wring the filters out and let them air-dry for at least 24 hours. Give each filter a good squeeze to get rid of any excess water and set them aside to dry. Make sure they’re completely dry before putting them back in the dust cup to prevent any water from getting into electrical ports. When putting them back in the dust cup, put the felt filter in first then the foam filter.[9]
- Do not use a hairdryer or any other heating method to dry the filters. Just let them air-dry.
-
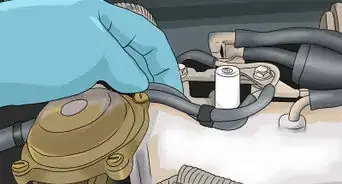
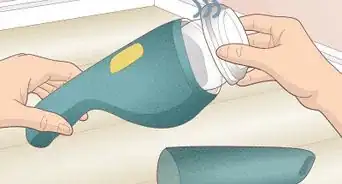
4Remove the HEPA filter and rinse it with water. The HEPA, or “post-motor,” filter can be found under the dust cup in some models or at the front or back of the vacuum in others. It is usually circular or rectangular in shape and has grills that cover a white filter. Consult your manual to find out where it is in your specific vacuum. Pull the HEPA filter straight out, then rinse it thoroughly with water.[10]
- Do not use soap or any other chemicals when rinsing the HEPA filter.
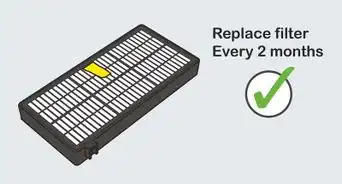
- Clean the HEPA filter at least once a year.
-
5Set the filter aside to dry completely before putting it back. Make sure there’s no water left on the filter before you place it back in the vacuum. Let it sit to air-dry for at least 24 hours.[11]


Cleaning the Brushroll
-
1Pull the brushroll out of the floor nozzle. How you access the brushroll will be different for each vacuum model, but it’s generally stored in a compartment at the bottom of the vacuum. Press down on the compartment door’s tabs, then lift the brushroll out to start cleaning it.[12]
- The Shark robot vacuum has brushes on the side that sweep up dirt. Use a dry cloth to wipe these clean.[13]
- If the robot vacuum’s wheels need cleaning, pull the wheels from their compartments and clean both the wheel and the inside of the compartment before reassembling them.
-
2Use scissors to cut away any hair or other debris. If you’ve noticed that the brushrolls on your vacuum aren’t spinning and picking up dirt, it’s probably because there’s hair and other stringy debris tangled in the bristles. Use a pair of scissors to cut away any big tangles of hair, then go in and remove any other dust and debris from the bristles.[14]
- The brushrolls on some models are not removable from their place in the vacuum. In this case, do your best to rotate the brushroll to clear away hair and dirt.
-
3Remove the soft roller and brush off dirt with a dry cloth. Some upright models of Shark vacuums have a second roller at the very front of the vacuum. Slide the access button up to remove the soft roller, then remove any hair or string that’s wrapped around it. Use a dry cloth to wipe away any other dirt, then replace the roller back in its compartment.[15]
- Rinse the soft roller under warm water if you have some particularly stubborn dirt spots. Do not use soap or any other cleaning chemicals.
- Avoid washing the brushroll with water, especially those that can’t be completely removed from the vacuum.
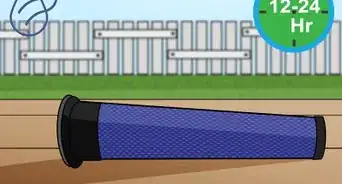
- Let the soft roller air-dry for at least 24 hours before putting it back in its compartment.


Unclogging the Hose & Nozzle
-
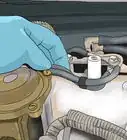
1Detach the floor nozzle and remove any blockages. Each vacuum model with have different pieces, but most upright models will have a floor nozzle (the wide piece that runs along the floor) that’s connected to the rest of the vacuum by a canister or long tube. Detach the floor nozzle by pressing down on the release tabs and look inside the opening for anything blocking it.[16]
- To remove these blockages, insert something long like a wooden spoon or skewer to loosen them, then turn the floor nozzle upside down and shake the debris free.
-
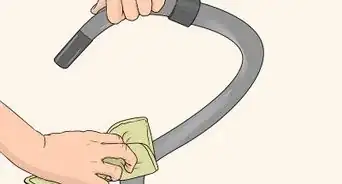
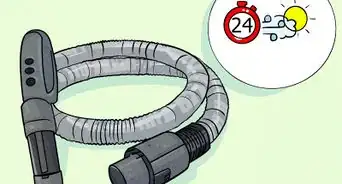
2Check the hose connected to the floor nozzle. Press the release latches to detach the hose from the floor nozzle and the canister. Straighten out the hose and look inside to see if there’s anything stuck inside. Use something long and sturdy to try unclogging the hose before reattaching it.[17]
- Wash the detached hose piece with water and gentle soap if there’s a buildup of dirt. Dry it with a towel or cloth and make sure it’s completely dry before reattaching it to the vacuum.
-
3Remove the vacuum wand and clean it out. The wand is a long, hollow tube that runs between the handle and the floor nozzle on the cordless models. Press down on the release tabs near the handle and the floor nozzle to detach the wand. Look inside the openings on both ends to see if anything’s getting in the way. Use something thin and long—like a wooden skewer—to loosen up any big clumps of dirt and dust, then shake the hose to get them out.[18]
- Wet some paper towels in a vinegar solution that’s 1 part vinegar and 2 parts water. Use this solution to disinfect the inside of the vacuum’s hoses and wand as well as reduce odor.[19]
- Let all the parts dry completely before reattaching them to the vacuum.


Warnings
- Unplug your vacuum from any power source before doing any cleaning to reduce the risk of shock.[24]⧼thumbs_response⧽
- Hand wash with water only to prevent damage from other cleaning chemicals.[25]⧼thumbs_response⧽
- Allow all filters to dry completely before putting them back in your vacuum to prevent liquid from getting into the electrical ports.[26]⧼thumbs_response⧽


References
- ↑ https://m.sharkclean.com/include/pdf/manual-ix140-iz140.pdf
- ↑ https://www.sharkclean.com/include/pdf/manual-rv1001ae.pdf
- ↑ https://m.sharkclean.com/include/pdf/manual-wv201.pdf
- ↑ https://youtu.be/Fva1_ujxH28?t=50
- ↑ https://www.sharkclean.com/include/pdf/manual-rv1001ae.pdf
- ↑ https://www.sharkclean.com/include/pdf/manual-nv350.pdf
- ↑ https://www.sharkclean.com/include/pdf/manual-nv350.pdf
- ↑ https://youtu.be/YgH7zwZzqoU?t=28
- ↑ https://www.sharkclean.com/include/pdf/manual-nv350.pdf
- ↑ https://www.sharkclean.com/include/pdf/manual-nv800.pdf
- ↑ https://youtu.be/Fva1_ujxH28?t=58
- ↑ https://www.sharkclean.com/include/pdf/manual-nv800.pdf
- ↑ https://www.sharkclean.com/include/pdf/manual-rv1001ae.pdf
- ↑ https://youtu.be/mrQNxk3AlY0?t=14
- ↑ https://www.sharkclean.com/include/pdf/manual-nv800.pdf
- ↑ https://www.sharkclean.com/include/pdf/manual-nv800.pdf
- ↑ https://youtu.be/iPEdLEOvs2I?t=262
- ↑ https://m.sharkclean.com/include/pdf/manual-ix140-iz140.pdf
- ↑ https://www.howtocleanstuff.net/how-to-clean-a-vacuum/
- ↑ https://dustmadness.com/how-to-clean-vacuum-cleaner/
- ↑ https://www.howtocleanstuff.net/how-to-clean-a-vacuum/
- ↑ https://www.industryairsales.com/vacuum-tips-how-often-to-change-your-hepa-filter/
- ↑ https://www.industryairsales.com/vacuum-tips-how-often-to-change-your-hepa-filter/
- ↑ https://www.sharkclean.com/include/pdf/manual-nv800.pdf
- ↑ https://www.sharkclean.com/include/pdf/manual-nv800.pdf
- ↑ https://www.sharkclean.com/include/pdf/manual-nv800.pdf


wikiHow’s Content Management Team carefully monitors the work from our editorial staff to ensure that each article meets our high quality standards.