This article was co-authored by Ricardo Mitchell. Ricardo Mitchell is the CEO of CN Coterie, a fully licensed and insured Lead EPA (Environmental Protection Agency) Certified construction company located in Manhattan, New York. CN Coterie specializes in full home renovation, electrical, plumbing, carpentry, cabinetry, furniture restoration, OATH/ECB (Office of Administrative Trials and Hearings/Environmental Control Board) violations removal, and DOB (Department of Buildings) violations removal. Ricardo has over 10 years of electrical and construction experience and his partners have over 30 years of relevant experience.
This article has been viewed 67,249 times.
Vacuum tubes are an older technology not often used today, but they still show up in some amplifiers and other devices. For a quick test, inspect the tube for signs of damage and listen to the sound it makes. If you're familiar with tubes, you can also get a tube tester with a testing chart. Replace these tubes with new ones to get your electronics back into working condition.
Steps
Visually Inspecting the Tubes
-
1Inspect the tube’s colored coating. The coating, or getter, is on the top part of the tube. Normally it’s gray, black, or silver. A white coating means the tube has a crack. In this case, it’s time to get a new tube.[1]
-
2Plug the tube into an electrical device to check its glow. Put the tube into your guitar amplifier, tester, or other tube-using machine. Turn on the machine to activate the tubes, and look for an orange, red, or purple glow.[2] If the heated filament inside the tube glows orange like a setting sun, it's usually a sign that the tube is healthy.[3]
- The filament may be hard to see. If you don’t see the glow, that doesn’t necessarily mean the tube is bad. Keep in mind that some tubes glow more than others.
- If the tube doesn’t seem to glow at all, try touching it. Be very careful, since tubes get hot when they’re active. A cold tube is one that no longer works.
- If the device doesn’t turn on at all, this may be a problem with the device’s fuse. Replace the fuse or have an expert inspect it.
Advertisement -
3Look for a purple glow around the internal wires. The wires are inside the tube, easily visible behind the glass. When electrified, they may give off a purple glow. Purple concentrated around the wires is a sign that the tube is defective.[4]
- You may notice a blue glow concentrated around the glass. This is normal. Purple around the glass is also normal.
-
4Replace the tube if it glows red. Sometimes the plating inside the tube turns red. This can be a sign that the tube isn’t installed properly in your electrical device. If the tube stays red, it can’t control the electrical current, which will eventually damage your device.[5]


Testing the Tubes’ Sound
-
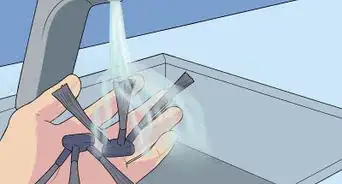
1Shake the tube for signs of rattling. Be gentle to avoid damaging the components. A little rattling is normal. If it sounds very loud, or you notice a loose piece moving around inside the tube, then your tube is broken and needs to be replaced.[6]
-
2Tap the tubes with a pencil to listen to their ringing. Plug the tube into your amplifier or other machine. Bring along a pencil, chopsticks, or another wooden or plastic implement. Use it to gently tap each tube. All tubes ring, but the bad ones sound louder and may cause the device to squeal.[7]
-
3Swap the tubes to make sure you found the broken one. Turn off the machine, then swap the tubes. Turn the knobs on your amplifier or other device to activate each tube. Tap the tubes again as you go and listen for the ringing. A bad tube will sound loud no matter what channel it’s on.[8]
- Swapping the old tube with a new one is also a good test. If the old tube is broken, the new one won’t ring as much.
-
4Hold the tube still while using the device to test it. Slip an oven mitt over your hand. Hold onto the suspect tube as you use your device, such as by playing a note on the guitar hooked up to the vacuum tube amplifier. You will notice much less rattling if the tube is broken.[9]


Using a Tube Tester
-
1Purchase a tube tester. You can find tube testers by searching for them online. Check online tube stores and auction sites to find a variety of testers. Select 1 that fits your budget. Used ones start at about $35 USD. Because the technology is rarely used these days, expect quality store-bought testers to cost a couple hundred of dollars.[10]
- Emission testers only show whether or not a tube is working. Mutual conductance testers show how well a tube is working.
-
2Look at the print on the vacuum tube to identify it. A series of numbers and letters is printed on the side of every tube. This code is what you use to figure out where to place the tube in the tester.[11]
- For example, the lettering on the tube reads something like “12AX7.”
-
3Insert the tube into the tester’s socket. To find out which socket the tube goes in, use the chart that came with the tester. Look up the number and letter code in the chart to select the correct socket. If you don’t have a chart, try searching for the tester brand online to find a manual.[12]
-
4Look for visible signs of damage on the tube. Before turning on the electricity, give the vacuum tube a quick inspection. Notice any evidence of broken glass or bent pins inside the tube. Loose parts or discolorations are signs that the tube needs to be replaced.
- If you see that the tube is broken, don’t test it. It could damage the tester.
-
5Turn the tester on according to the chart. Using the code on the vacuum tube, look at the testing chart again. Set the tester’s switches according to the chart’s instructions. This turns on the electrical connection, causing the tube to function.[13]
-
6Check the test results to see if the tube works. The testing results depend on what kind of tester you have. First, look for a red and green gauge with a needle. If the needle moves into the green zone, the tube still works. If the tester doesn’t have this gauge, it will give you a number look up in the chart.[14]
- Look up a vacuum tube reading table for more information on how to read the Gm number and what it means.


Expert Q&A
Did you know you can get expert answers for this article?
Unlock expert answers by supporting wikiHow
-
QuestionWhat colors should the wires glow in a vacuum tube?
 Ricardo MitchellRicardo Mitchell is the CEO of CN Coterie, a fully licensed and insured Lead EPA (Environmental Protection Agency) Certified construction company located in Manhattan, New York. CN Coterie specializes in full home renovation, electrical, plumbing, carpentry, cabinetry, furniture restoration, OATH/ECB (Office of Administrative Trials and Hearings/Environmental Control Board) violations removal, and DOB (Department of Buildings) violations removal. Ricardo has over 10 years of electrical and construction experience and his partners have over 30 years of relevant experience.
Electrician & Construction Professional, CN CoterieIf you're checking a gas-filled vacuum tube, it should be orange, red, or purple.
Support wikiHow by unlocking this expert answer.
Warnings
- Vacuum tubes can burn your hands! Cover up when handling an active tube.⧼thumbs_response⧽


References
- ↑ http://www.vacuumtubes.net/How_Vacuum_Tubes_Work.htm
- ↑ Ricardo Mitchell. Electrician & Construction Professional, CN Coterie. Expert Interview. 6 May 2020.
- ↑ http://www.vacuumtubes.net/How_Vacuum_Tubes_Work.htm
- ↑ http://blog.thetubestore.com/how-to-tell-if-your-tube-is-bad/
- ↑ http://blog.thetubestore.com/how-to-tell-if-your-tube-is-bad/
- ↑ http://blog.thetubestore.com/how-to-tell-if-your-tube-is-bad/
- ↑ http://blog.thetubestore.com/how-to-tell-if-your-tube-is-bad/
- ↑ http://blog.thetubestore.com/how-to-tell-if-your-tube-is-bad/
- ↑ http://blog.thetubestore.com/how-to-tell-if-your-tube-is-bad/
- ↑ https://www.electronicproducts.com/Electromechanical_Components/Electromechanical_Switches/What_s_It_Worth_Simple_vacuum_tube_testers.aspx
- ↑ https://itstillworks.com/test-vacuum-tubes-6400721.html
- ↑ https://itstillworks.com/test-vacuum-tubes-6400721.html
- ↑ https://itstillworks.com/test-vacuum-tubes-6400721.html
- ↑ https://itstillworks.com/test-vacuum-tubes-6400721.html
About This Article